
Lizard Pose is one of those yoga poses that looks simple at first, but once you try it, you quickly feel how deep it goes. It stretches the hips, opens the groin, lengthens the legs, and helps release tension from areas that often become tight from sitting, running, or daily stress.
The key is not to force it. Lizard Pose works best when you move slowly, breathe deeply, and listen to your body.
What Is Lizard Pose?
This pose is a deep hip opener used in yoga to stretch the hips, legs, and lower body. It is commonly practiced after lunges, sun salutations, or standing poses because the body is already warm.
Meaning and Purpose of Utthan Pristhasana
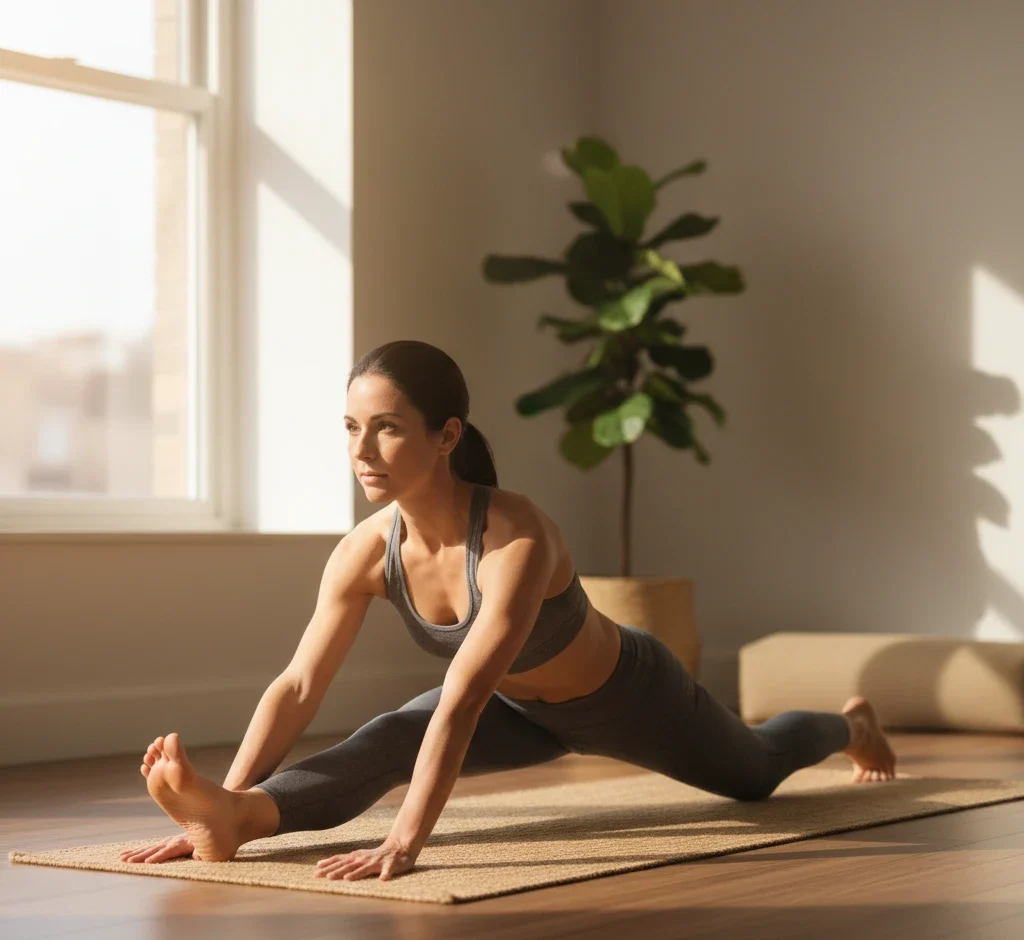
Lizard Pose is also called Lizard Pose Utthan Pristhasana in Sanskrit. The pose places one foot outside the hand while the back leg extends behind the body. This shape creates a strong stretch through the hips, thighs, and groin.
The purpose of this pose is to improve flexibility, mobility, and body awareness.
 alt=”Lizard Pose low lunge with hands supported” title=”Lizard Pose low lunge with hands supported”
Why Lizard Pose Is a Deep Hip Opener
hip-opening pose is a deep hip opener because it targets the front, inner, and outer areas of the hips at the same time. When you step your right foot outside your hand, your front hip opens while the back leg stretches the hip flexors.
This makes it helpful for people who feel tight from sitting, walking, cycling, or running.
Muscles Worked in hip-opening pose
hip-opening pose may look like a hip stretch, but it works several areas of the body.
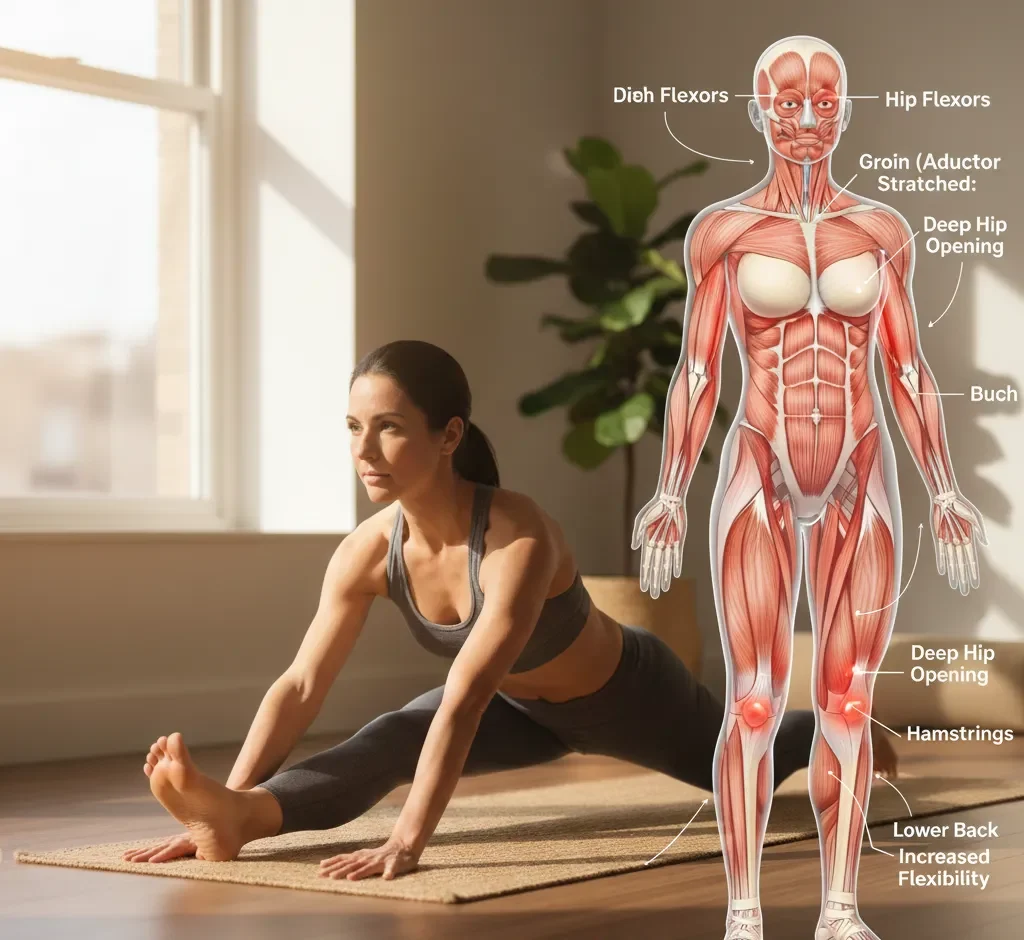
Hip Flexors
The hip flexors of the back leg get a strong stretch in this pose. These muscles often become tight from long sitting hours, which can affect posture and lower back comfort.
Hamstrings, Quadriceps, and Groin
The front leg stretches the groin and inner thigh, while the back leg works through the quadriceps and hip flexors. Depending on your flexibility, you may also feel the hamstrings working to support the pose.
Glutes, Core, and Shoulders
Your glutes help stabilize the hips. The core supports balance, and the shoulders stay active when your hands or forearms press into the floor or blocks.
 alt=”Front knee alignment in Lizard Pose” title=”Front knee alignment in Lizard Pose”
Who Should Practice hip-opening pose?
hip-opening pose can be useful for many people, but it should always be practiced with care.
Beginners
Beginners can practice a modified version using yoga blocks. There is no need to bring the forearms to the floor right away.
Office Workers
Office workers often have tight hips and lower backs from sitting for long periods. hip-opening pose helps stretch those areas gently when practiced with proper support.
Athletes and Runners
Runners, football players, cyclists, and gym-goers may benefit from this pose because it stretches the hip flexors, groin, and legs.
People With Tight Lower Backs
Tight hips can sometimes add pressure to the lower back. hip-opening pose may help by improving hip mobility, but anyone with back pain should move slowly and avoid forcing the stretch.
 alt=”Lizard Pose hip stretch with back knee down” title=”Lizard Pose hip stretch with back knee down”
Learn More : Reclining Bound Angle Pose Benefits
Benefits of hip-opening pose
The benefits go beyond flexibility. It can support strength, balance, breathing, and mental calm.
Deep Stretch for Hip Flexors and Hamstrings
One of the main benefits of hip-opening pose is the deep stretch it gives to the hip flexors, hamstrings, thighs, and groin. This can help improve lower-body mobility over time.
Improves Balance, Strength, and Core Stability
Even though it feels like a stretch, hip-opening pose also builds control. Your core, glutes, arms, and shoulders work together to keep the body steady.
Supports Mental and Emotional Release
Deep hip openers can feel intense. Holding the pose with slow breathing may help release stress and create a sense of calm. The goal is not to push harder, but to stay present.
 alt=”Modified Lizard Pose using yoga blocks” title=”Modified Lizard Pose using yoga blocks”
How to Do hip-opening pose Step by Step
Practice this pose on a yoga mat and move slowly.
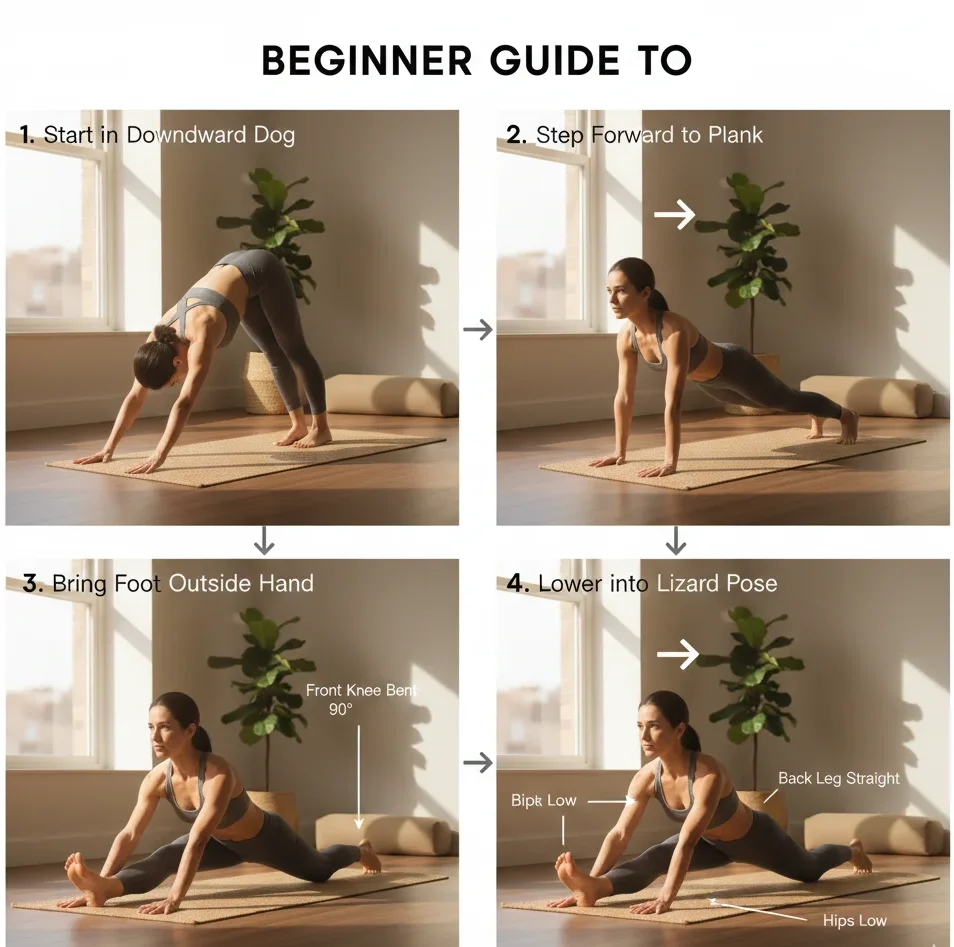
Step 1: Start in High Plank or Low Lunge
Begin in high plank or low lunge. Keep your hands under your shoulders and your body steady.
Step 2: Step Your Foot Outside Your Hand
Step your right foot outside your right hand. Your right knee should stay close to the right shoulder. Keep your left leg extended behind you.
Step 3: Lower Your Hips Gradually
Slowly lower your hips toward the mat. Do not drop suddenly. Let the hips open with control.
Step 4: Keep the Back Leg Active
Press back through the left heel if the left leg is lifted. If needed, lower the left knee to the mat for support.
Step 5: Use Hands, Forearms, or Blocks
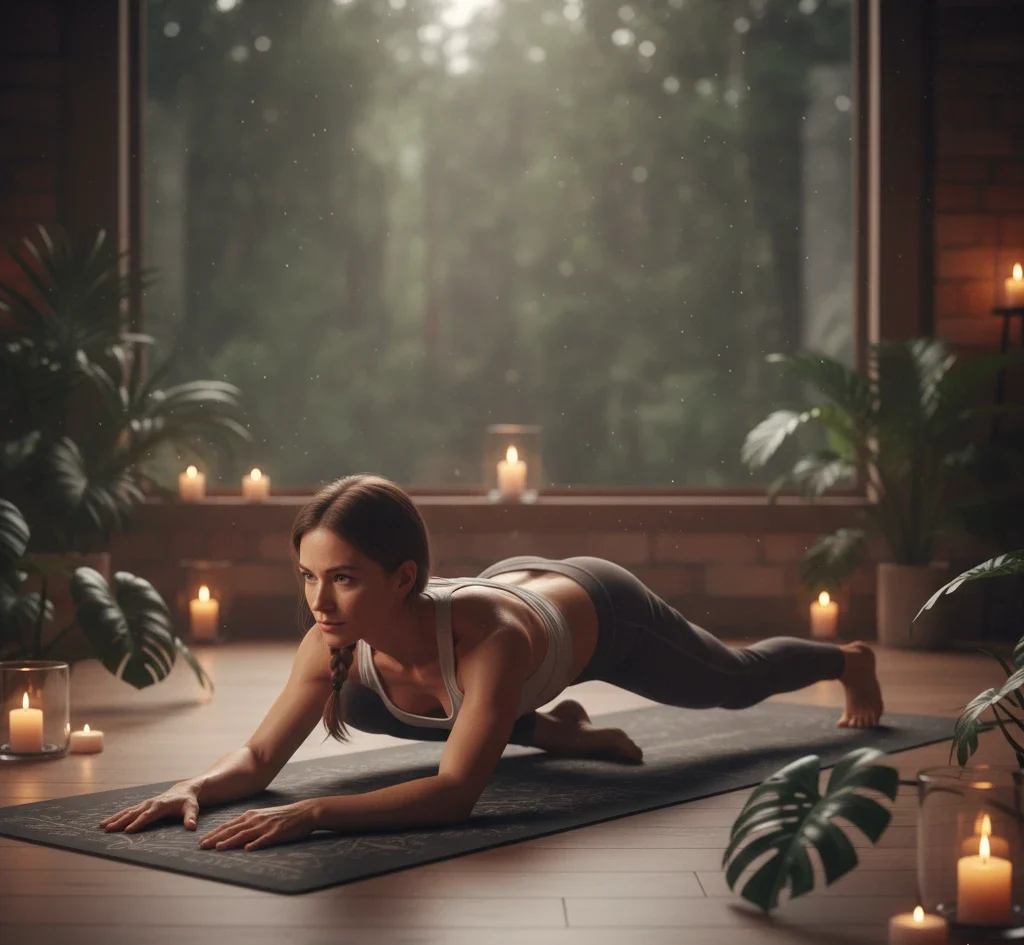
Stay on your hands if the stretch is already strong. For a deeper version, lower onto your forearms or use blocks under the arms.
Step 6: Lengthen the Spine and Breathe Deeply
Keep your spine long and chest open. Breathe slowly. Stay relaxed in the face, jaw, and shoulders.
Repeat on the other side.
 alt=”Lizard Pose variation with forearms supported” title=”Lizard Pose variation with forearms supported”
Correct Alignment Tips for Beginners
Good alignment makes hip-opening pose safer and more effective.
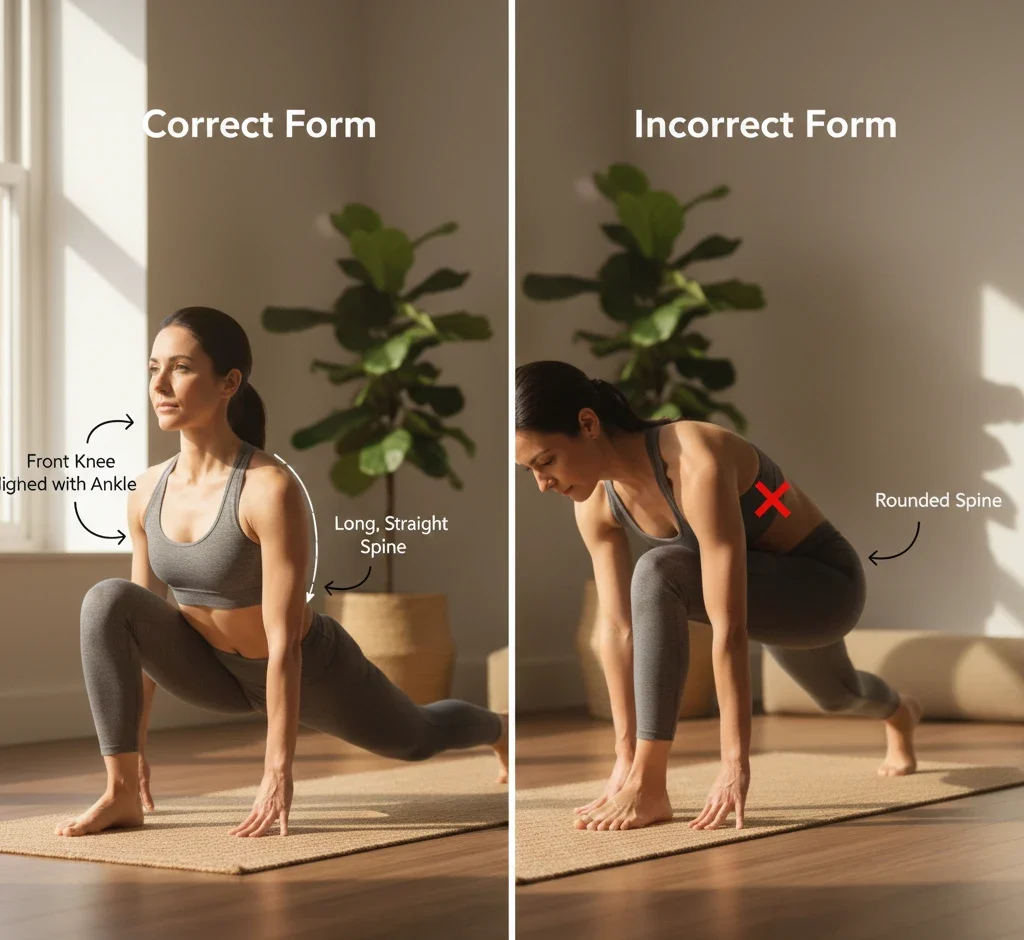
Keep the Knee Over the Ankle
Your front knee should stay over or near the ankle. Avoid letting it fall too far inward or outward.
Engage the Back Leg
Keep the back leg active instead of letting it collapse. This protects the hips and supports balance.
Keep the Chest Open
Avoid sinking into the shoulders. Lift the chest slightly and keep the neck long.
Square the Hips
Try to keep both hips facing forward. They do not need to be perfectly square, but avoid twisting the pelvis too much.
How Long Should You Hold hip-opening pose?
Beginners can hold hip-opening pose for 20 to 30 seconds on each side. With more practice, you can hold it for 45 seconds to 1 minute.
Do not stay longer just to prove flexibility. If you feel sharp pain, numbness, or pressure in the knee, come out of the pose.
 alt=”Back-leg setup for a stable low lunge” title=”Back-leg setup for a stable low lunge”
Learn More : Reclined Pigeon Pose for Hip Pain
hip-opening pose Variations
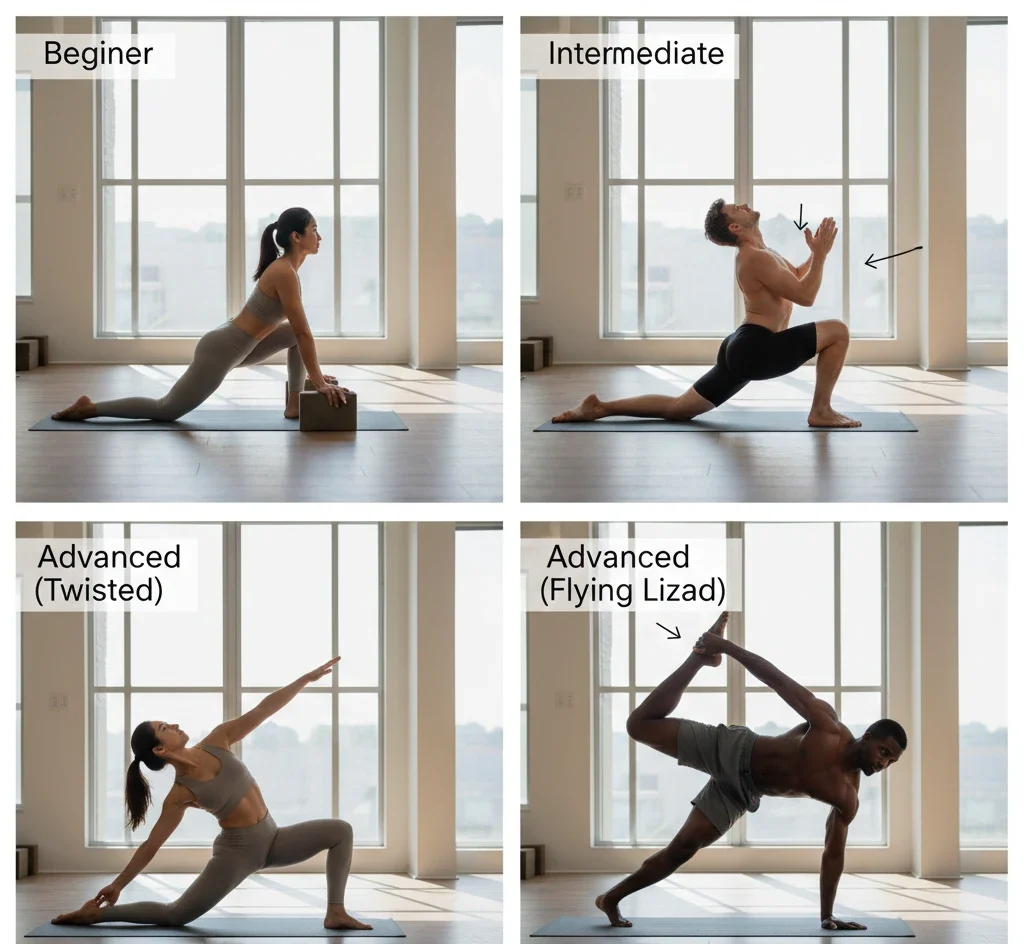
Modified hip-opening pose for Beginners
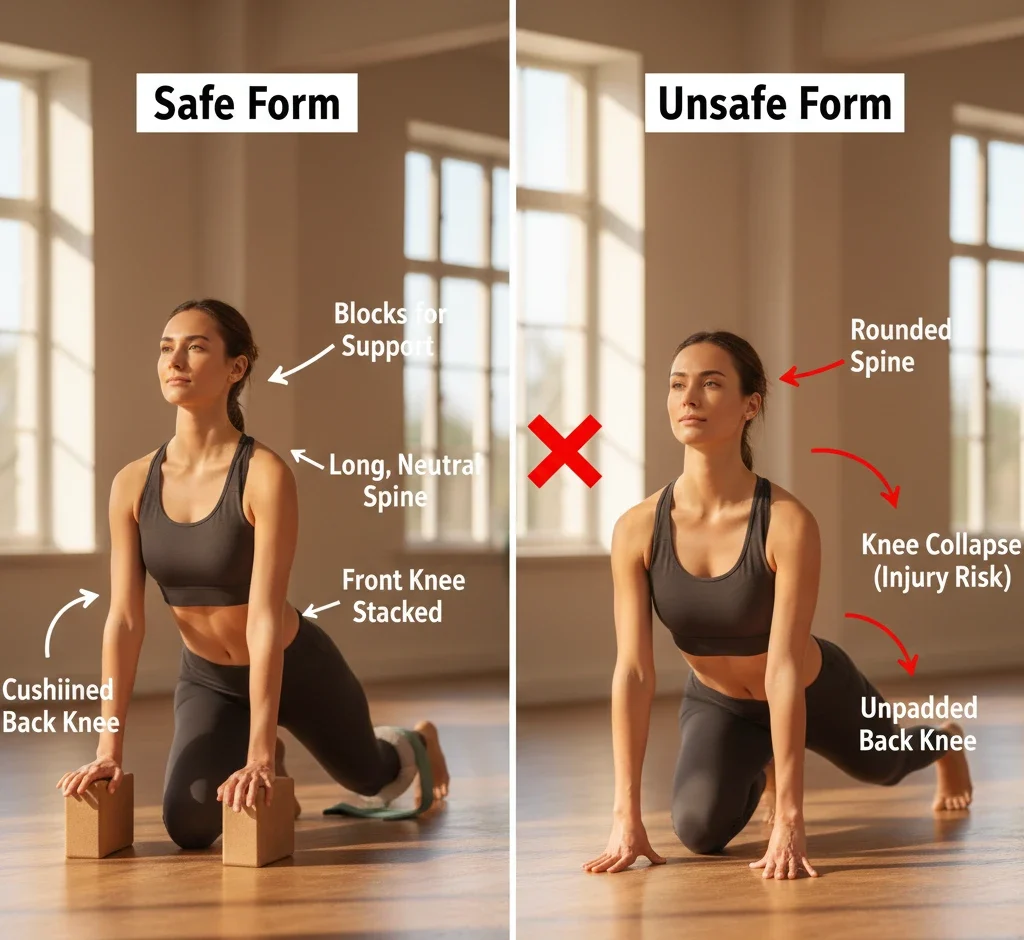
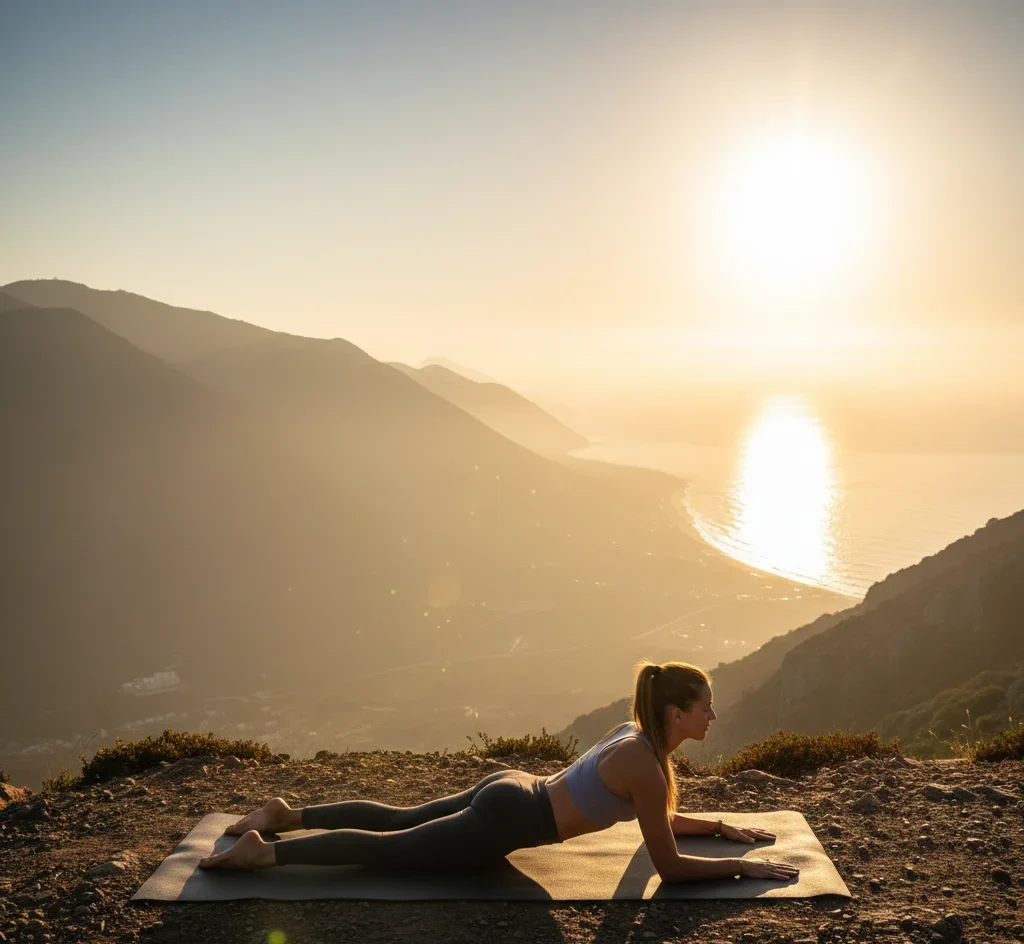
Lower the back knee to the mat and place blocks under your hands. This reduces pressure and makes the pose easier to hold.
Twisted hip-opening pose
From this Pose, place one hand on the floor and gently rotate the chest open. This adds a twist and stretches the upper body.
Advanced hip-opening pose
Advanced students may lower the forearms to the mat, lift the back knee, or add a deeper bind. Only try this when your hips are warm and your body feels ready.
 alt=”Lizard Pose breathing and posture practice” title=”Lizard Pose breathing and posture practice”
Common Mistakes in hip-opening pose
Forcing the Hips Too Low
Pushing the hips down can strain the groin or hip flexors. Let the body open gradually.
Rounding the Spine
A rounded back reduces space in the pose. Keep the spine long and use blocks if needed.
Holding the Breath
If you cannot breathe smoothly, the pose is too deep. Come back to a gentler version.
Poor Knee Alignment
Letting the front knee collapse inward can create discomfort. Keep the knee tracking in the same direction as the toes.
Precautions and Safety Tips
Avoid or modify hip-opening pose if you have:
- Knee injury
- Hip injury
- Groin strain
- Severe lower back pain
- Recent surgery
- Sharp pain during the pose
Always warm up first. Use blocks, lower the back knee, and listen to your body. Yoga should feel challenging, not painful.
 alt=”Gentle Lizard Pose modification for beginners” title=”Gentle Lizard Pose modification for beginners”
Learn More : Wide Legged Forward Fold Benefits
Final Thoughts on hip-opening pose
hip-opening pose is a powerful hip opener that can improve flexibility, balance, and lower-body comfort when practiced with patience. It is especially helpful for tight hips, stiff legs, and tension caused by sitting or intense physical activity.
Start with the basic version, use support when needed, and let the pose develop over time. The best progress in hip-opening pose comes from steady breathing, safe alignment, and respecting your body’s limits.
Quick answer: hip-opening pose, or Utthan Pristhasana, is a deep hip-opening lunge that can improve lower-body mobility when practised gradually. Use blocks, keep the front knee comfortable, and choose a gentler version rather than forcing the stretch.
Safety and Balance
Warm up first and keep the front knee tracking in line with the toes. Support the hands with blocks or lower the back knee if needed. Stop for sharp hip, groin, knee, or back pain, numbness, or tingling, and seek qualified guidance after an injury or surgery.
Frequently Asked Questions
Is hip-opening pose suitable for beginners?
Yes, in a modified form. Beginners can keep the back knee down and use blocks under the hands.
How long should I hold hip-opening pose?
Start with about 20 to 30 seconds on each side while breathing comfortably. Longer holds are not necessary if the stretch becomes painful.
Should my forearms touch the floor?
No. Stay on your hands or use blocks if that gives you better alignment and control.
What can I do instead of hip-opening pose?
Try a low lunge, supported half split, or another gentle hip-flexor stretch.
Further reading: For general yoga safety information, see NCCIH: Yoga—What You Need To Know.
