
Introduction to Padmasana (Lotus Pose)
Padmasana lotus, commonly called the lotus pose, is one of the most recognized seated yoga postures in traditional yoga practice. You have probably seen it in meditation images, spiritual artwork, or hatha yoga classes. But beyond its calm appearance, this pose carries deep physical and mental benefits.
Padmasana is more than simply sitting cross-legged. It encourages stillness, balance, focus, and body awareness. Many people use it during breathing exercises, meditation, and mindfulness routines because the posture naturally supports a stable spine and relaxed breathing.
For some people, full lotus takes time. Tight hips, stiff knees, or limited mobility can make the pose challenging at first. That is completely normal. Even practicing ardha padmasana, or half lotus, can provide many of the same calming benefits.
Meaning of Padmasana
The word “Padmasana” comes from Sanskrit:
- “Padma” means lotus flower
- “Asana” means posture or seat
The lotus flower has long symbolized purity, balance, and spiritual growth. In the lotus position, the body appears steady and grounded while the mind becomes calm and attentive.
Importance in Yoga
Padmasana has been practiced for centuries in hatha yoga and meditation traditions. Unlike fast-moving yoga poses, this posture focuses on stability and stillness.
Yoga teachers often recommend it for:
- Meditation sessions
- Breathwork
- Mindfulness practice
- Mental concentration
- Energy balancing
Because the spine stays upright in this yoga pose, breathing becomes smoother and deeper. Over time, many practitioners notice improved posture and better body awareness.
Spiritual Significance
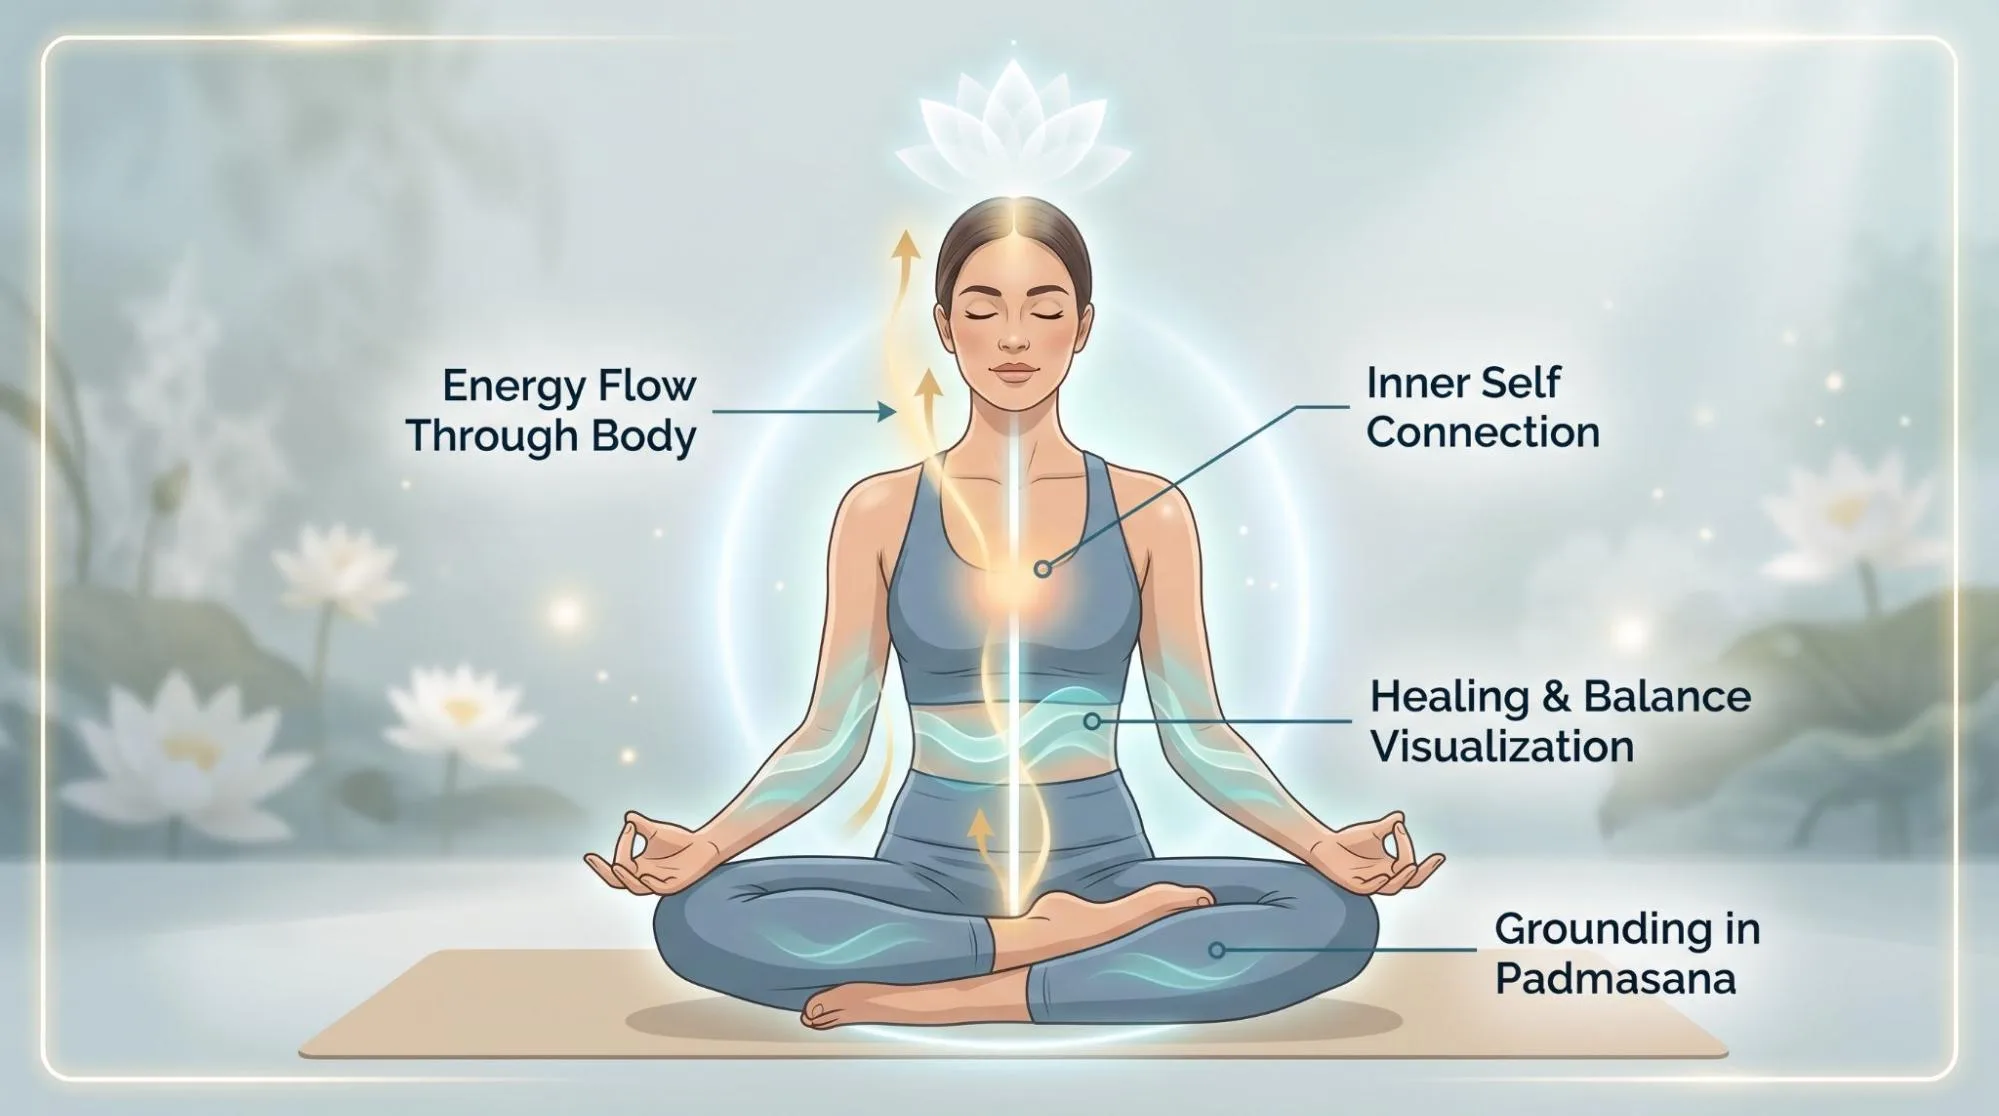
In many yoga traditions, padmasana lotus is connected with inner stillness and spiritual focus. The balanced sitting posture is believed to help energy move more freely through the body.
Some practitioners associate the pose with grounding energy, emotional calmness, and meditation awareness. Even if you approach yoga from a physical rather than spiritual perspective, the pose can still create a strong sense of peace and focus.
Learn More : Lotus Pose Benefits: Padmasana Steps, Safety, and Beginner Tips
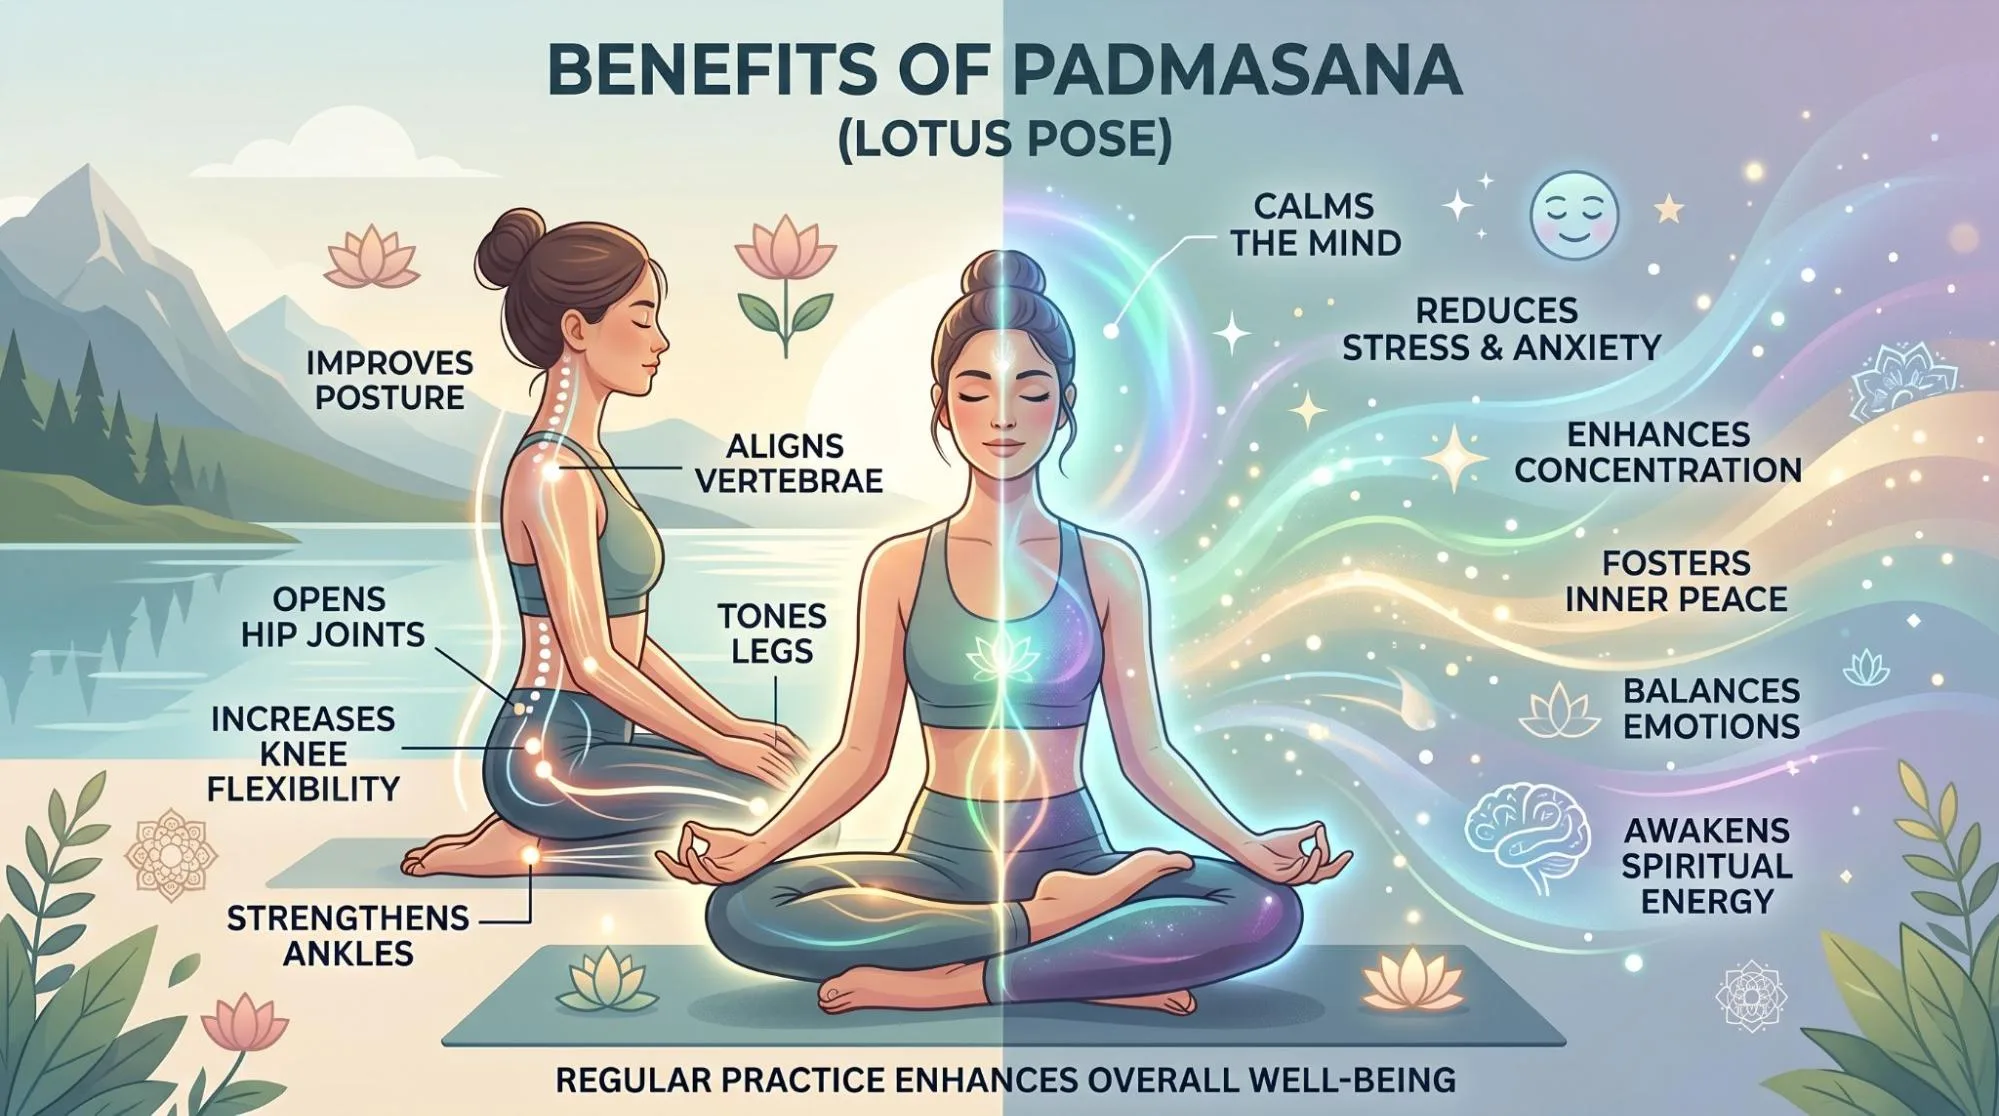
The Benefits of Padmasana (Lotus Pose)
Padmasana does not merely mean sitting in cross-legged position. It is a powerful habit, which affects the mind, body, and soul. Some of the key benefits of practising Padmasana include:
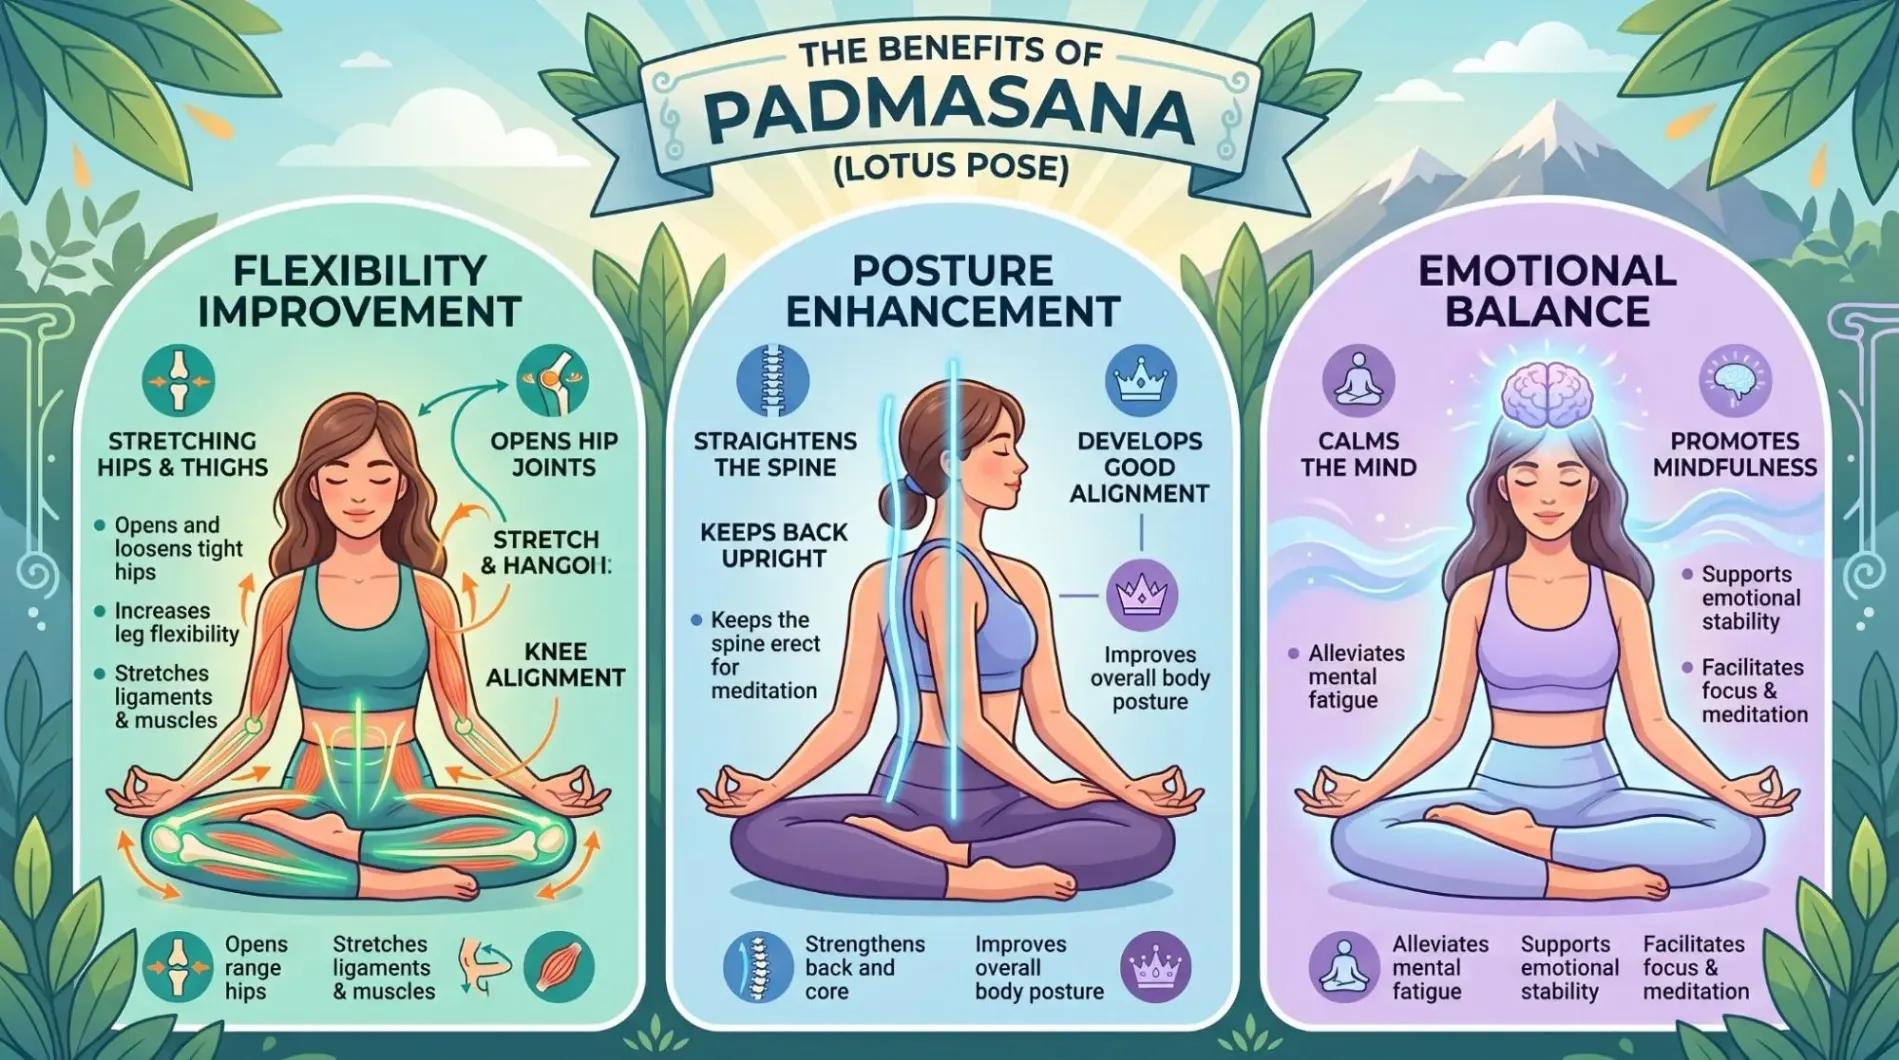
1. Improves Flexibility and Mobility
One of the biggest physical benefits of padmasana lotus is improved flexibility in the hips, ankles, and knees. Since the legs fold deeply into the lotus position, regular practice gently opens tight areas in the lower body.
Over time, the pose may help:
- Improve hip mobility
- Reduce stiffness in the legs
- Increase range of motion
- Make sitting on the floor more comfortable
People with very tight hips often begin with ardha padmasana before attempting full lotus.
Strengthens the Core and Spine
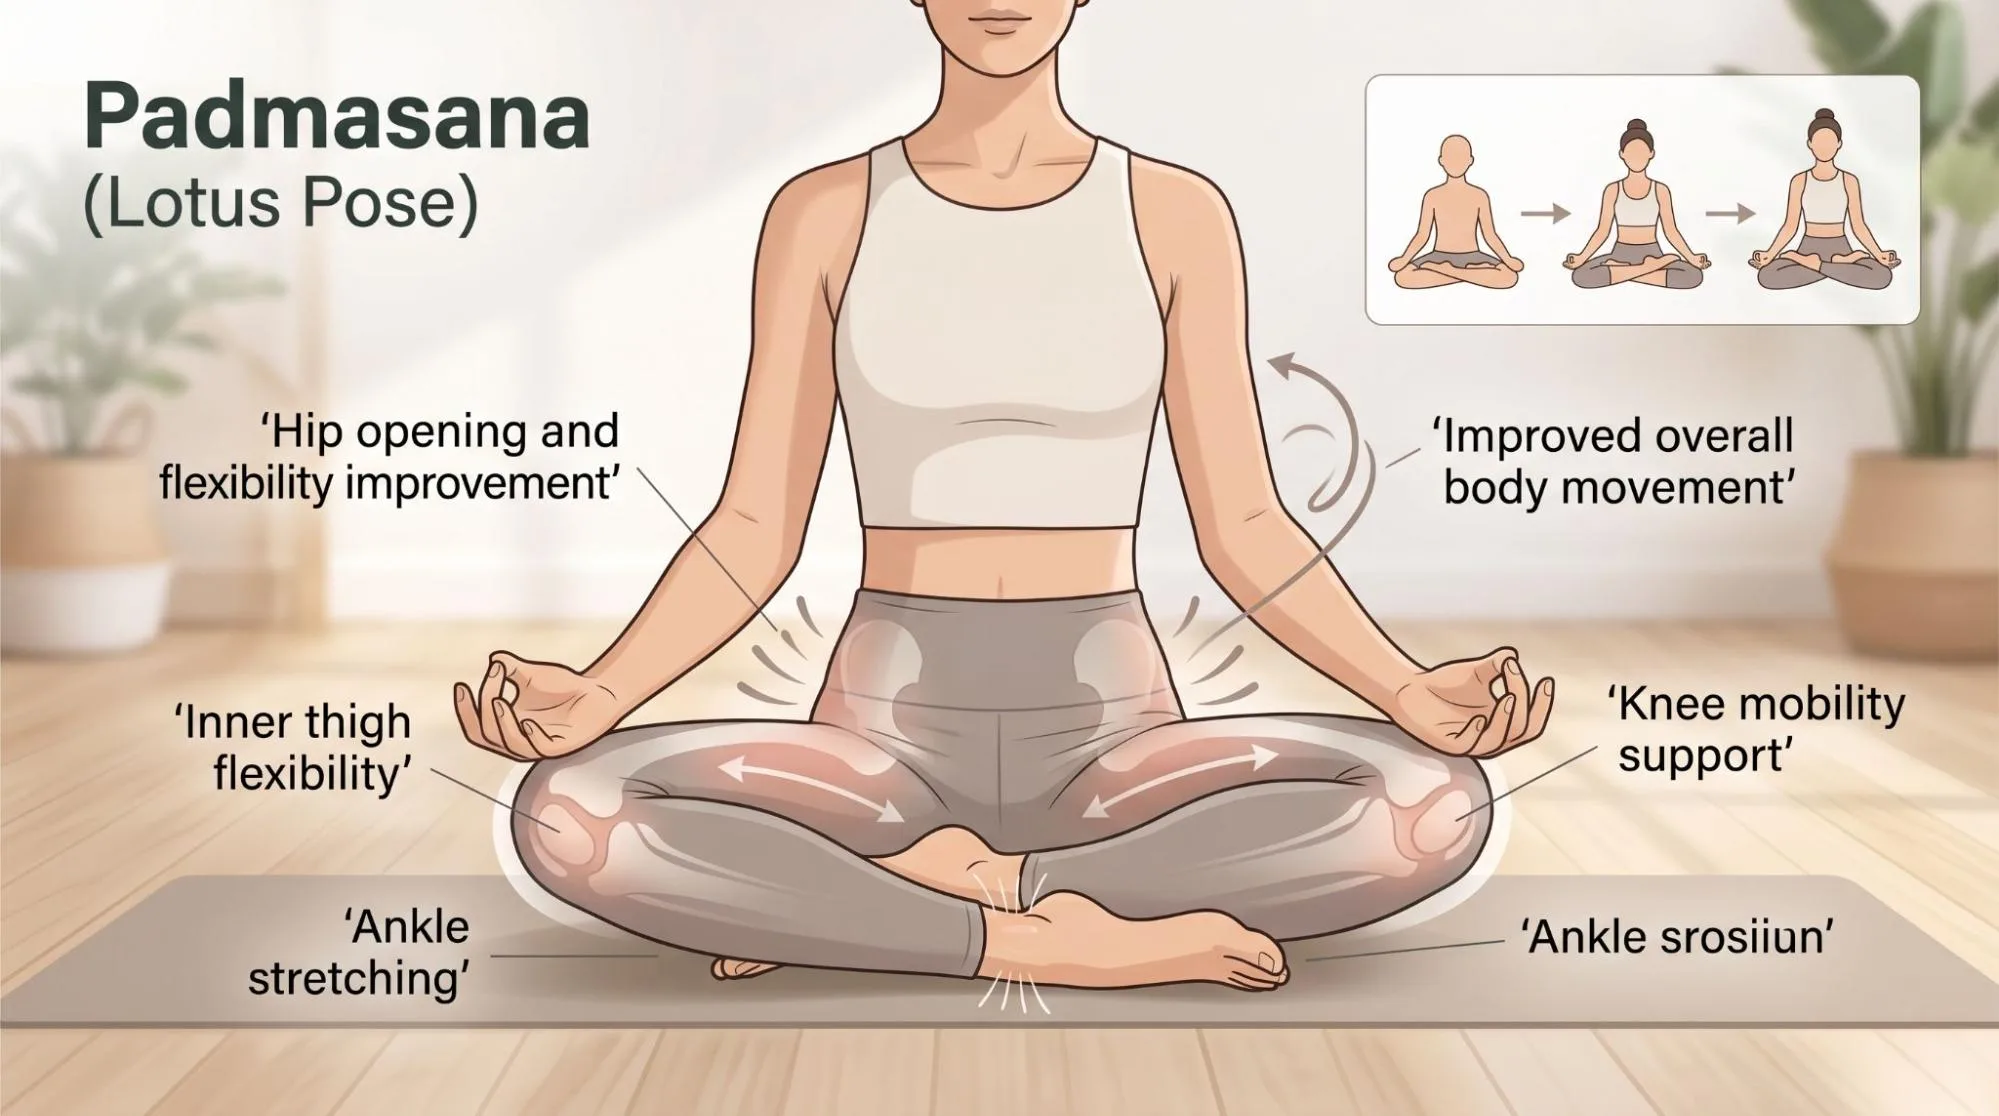
Enhances Posture
When practiced correctly, lotus pose naturally encourages an upright posture. Instead of collapsing through the chest, the spine lengthens and the shoulders relax.
This can help counter poor sitting habits developed from long hours at desks or phones.
Strengthens the Spinal Muscles
Holding the posture activates small stabilizing muscles around the spine. These muscles support better alignment and long-term spinal strength.
Tones the Abdominals
Maintaining balance in padmasana lotus requires gentle engagement of the abdominal area. It is subtle, but regular practice can improve core awareness.
Benefits Lower Back
A properly aligned seated posture may reduce unnecessary pressure on the lower back. Many people notice less discomfort during meditation when the pelvis and spine are positioned correctly.
Develops Balance
Lotus pose teaches the body to stay steady without tension. Physical balance often improves alongside mental steadiness.
Promotes Long-Term Spine Health
Consistent posture awareness can support healthier spinal habits over time. Sitting upright also improves breathing efficiency and reduces slouching.
Learn More : Seated Forward Fold Yoga Step by Step
Enhances Circulation and Reduces Stiffness
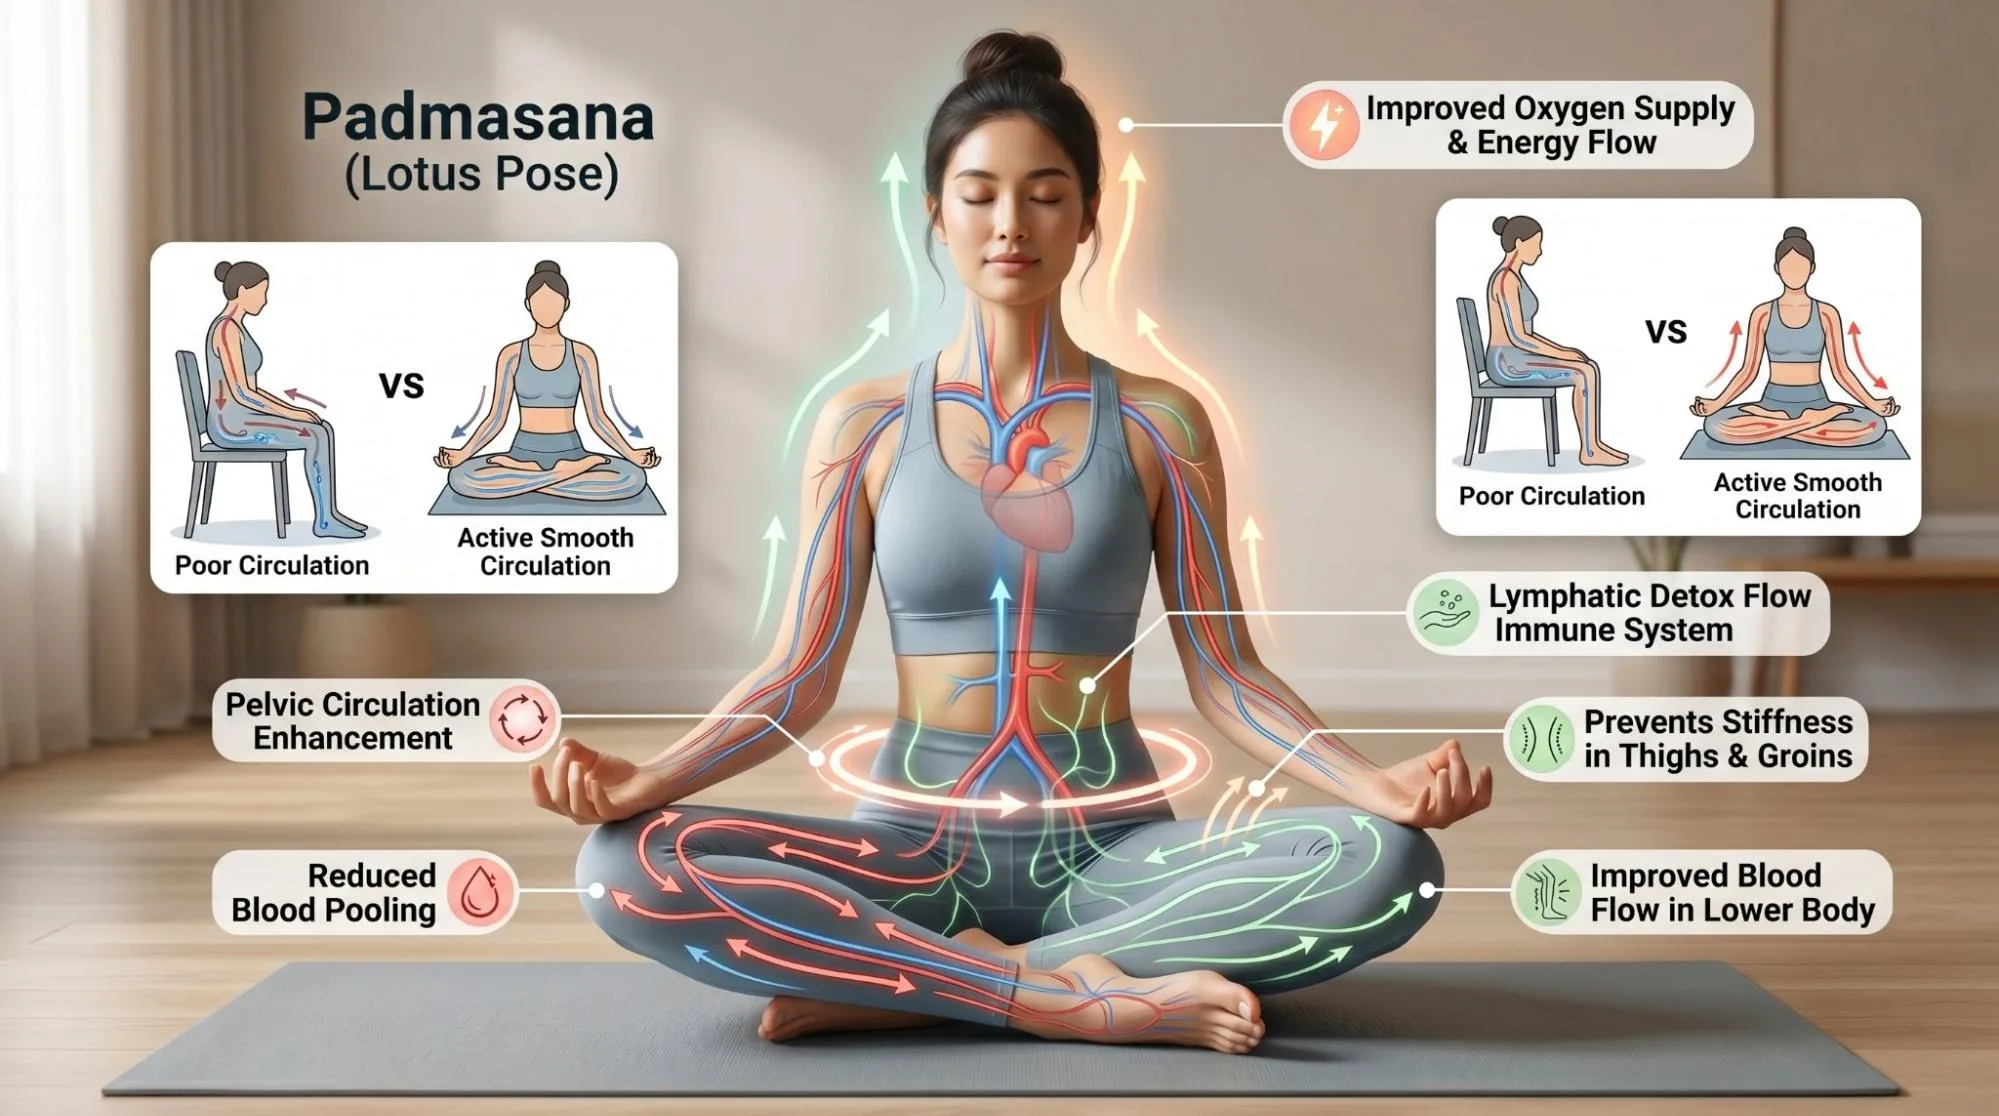
Boosts Blood Flow to the Lower Body
Gentle folding of the legs can encourage healthy circulation through the hips and lower body when practiced comfortably and safely.
Improves Circulation to the Pelvis
Padmasana lotus may support circulation around the pelvic area, especially during calm breathing exercises and meditation.
Promotes Healthy Lymphatic Flow
Slow yoga practice and mindful breathing can support healthy lymphatic movement, which plays a role in overall wellness.
Reduces Leg Discomfort
People who spend long hours standing or sitting often experience stiffness in the legs. Gentle mobility work leading into lotus pose may ease tension over time.
Prevents Stiffness
Regular stretching around the hips and thighs helps maintain joint mobility and flexibility.
Enhances Oxygen Supply
Because the chest stays open and upright, breathing becomes fuller and more efficient. Better breathing often leads to improved oxygen flow throughout the body.
Many people turn to padmasana lotus for mental calmness rather than flexibility alone.
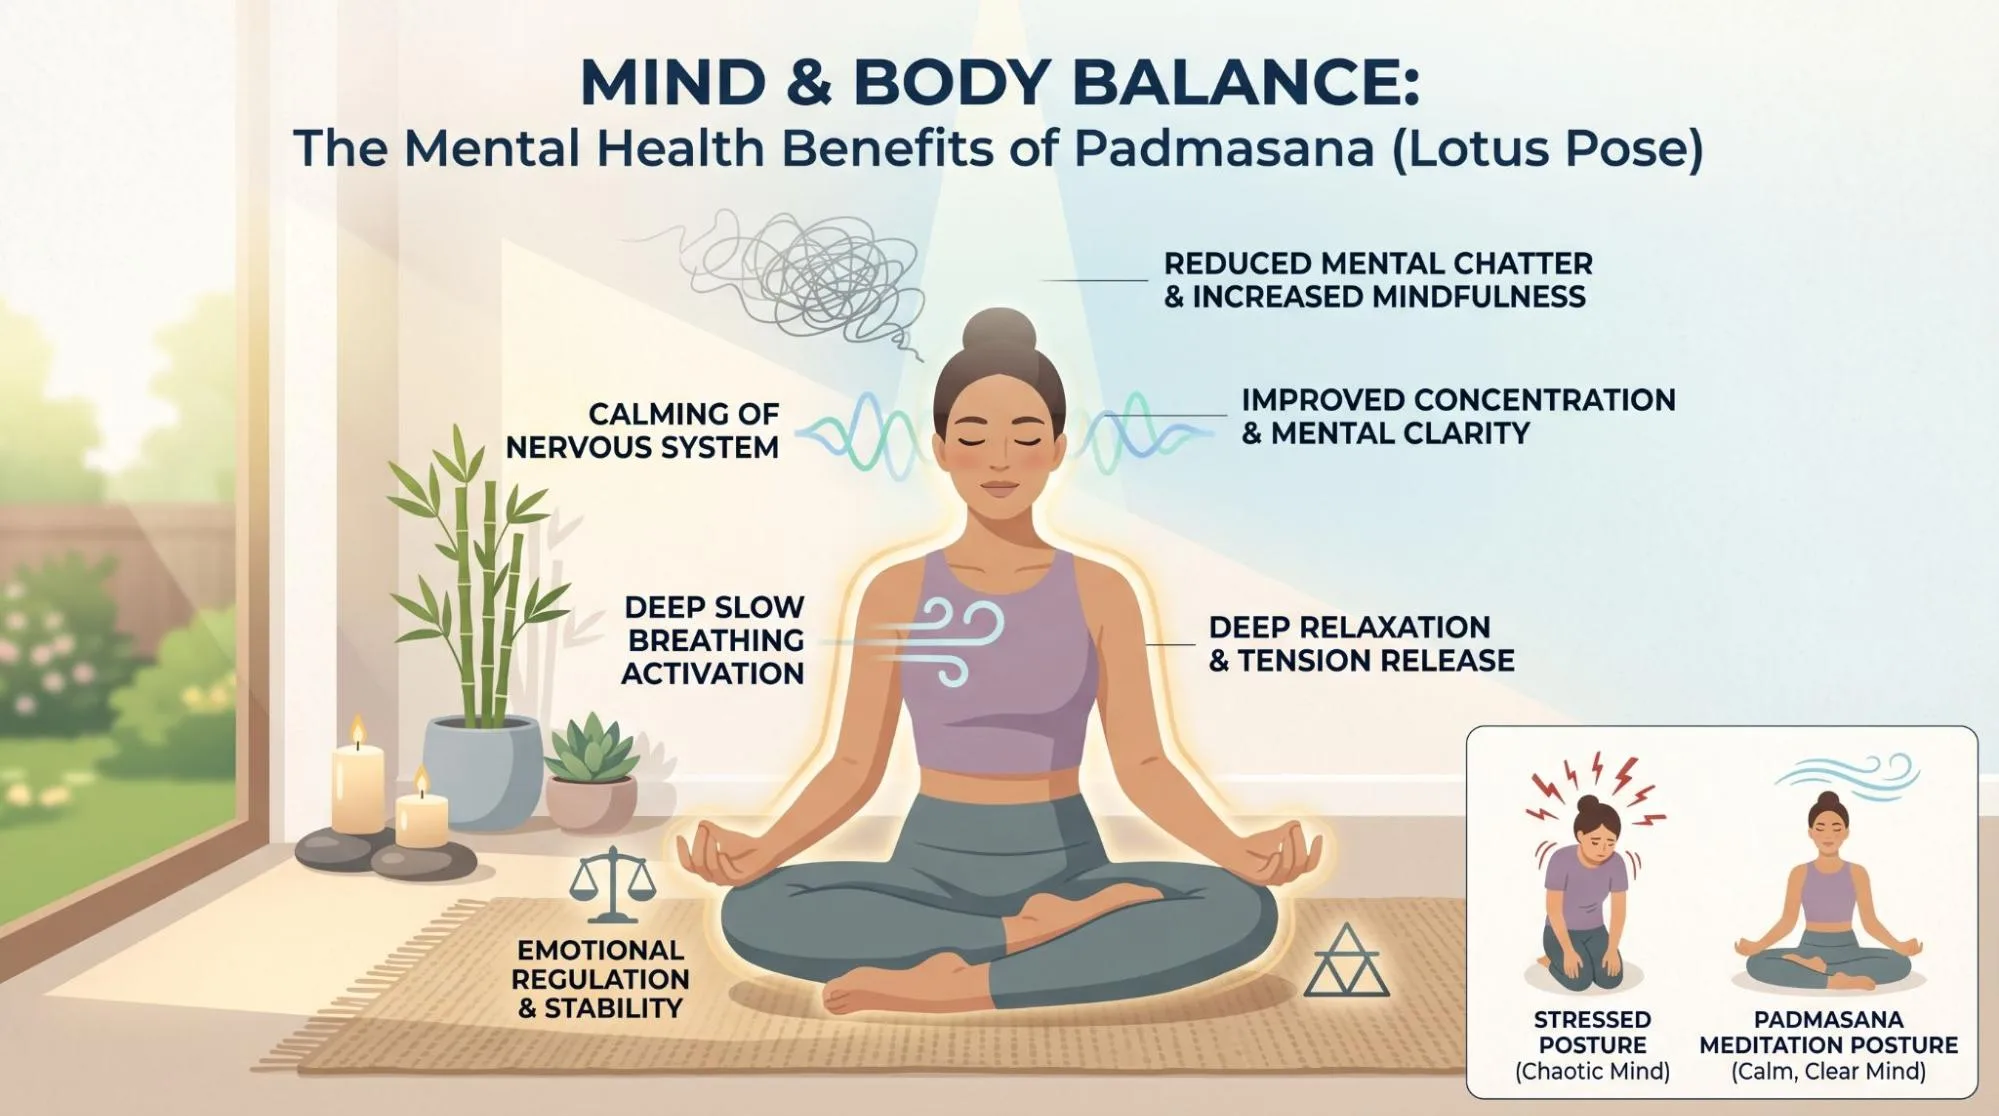
Calms the Nervous System
Slow breathing combined with a stable seated posture can help the body shift into a more relaxed state.
Induces Mindfulness
Stillness naturally encourages awareness. You become more conscious of your breathing, thoughts, and body sensations.
Increases Mental Clarity
Meditation in lotus pose often helps reduce mental clutter and improve focus.
Enhances Emotional Regulation
Mindful breathing practices may help people respond more calmly to stress and emotional tension.
Improves Concentration
The stable lotus position minimizes unnecessary movement, making it easier to focus during meditation.
Promotes Deep Relaxation
Many practitioners describe a feeling of grounded calmness after sitting in padmasana for several minutes.
Fosters Emotional Balance
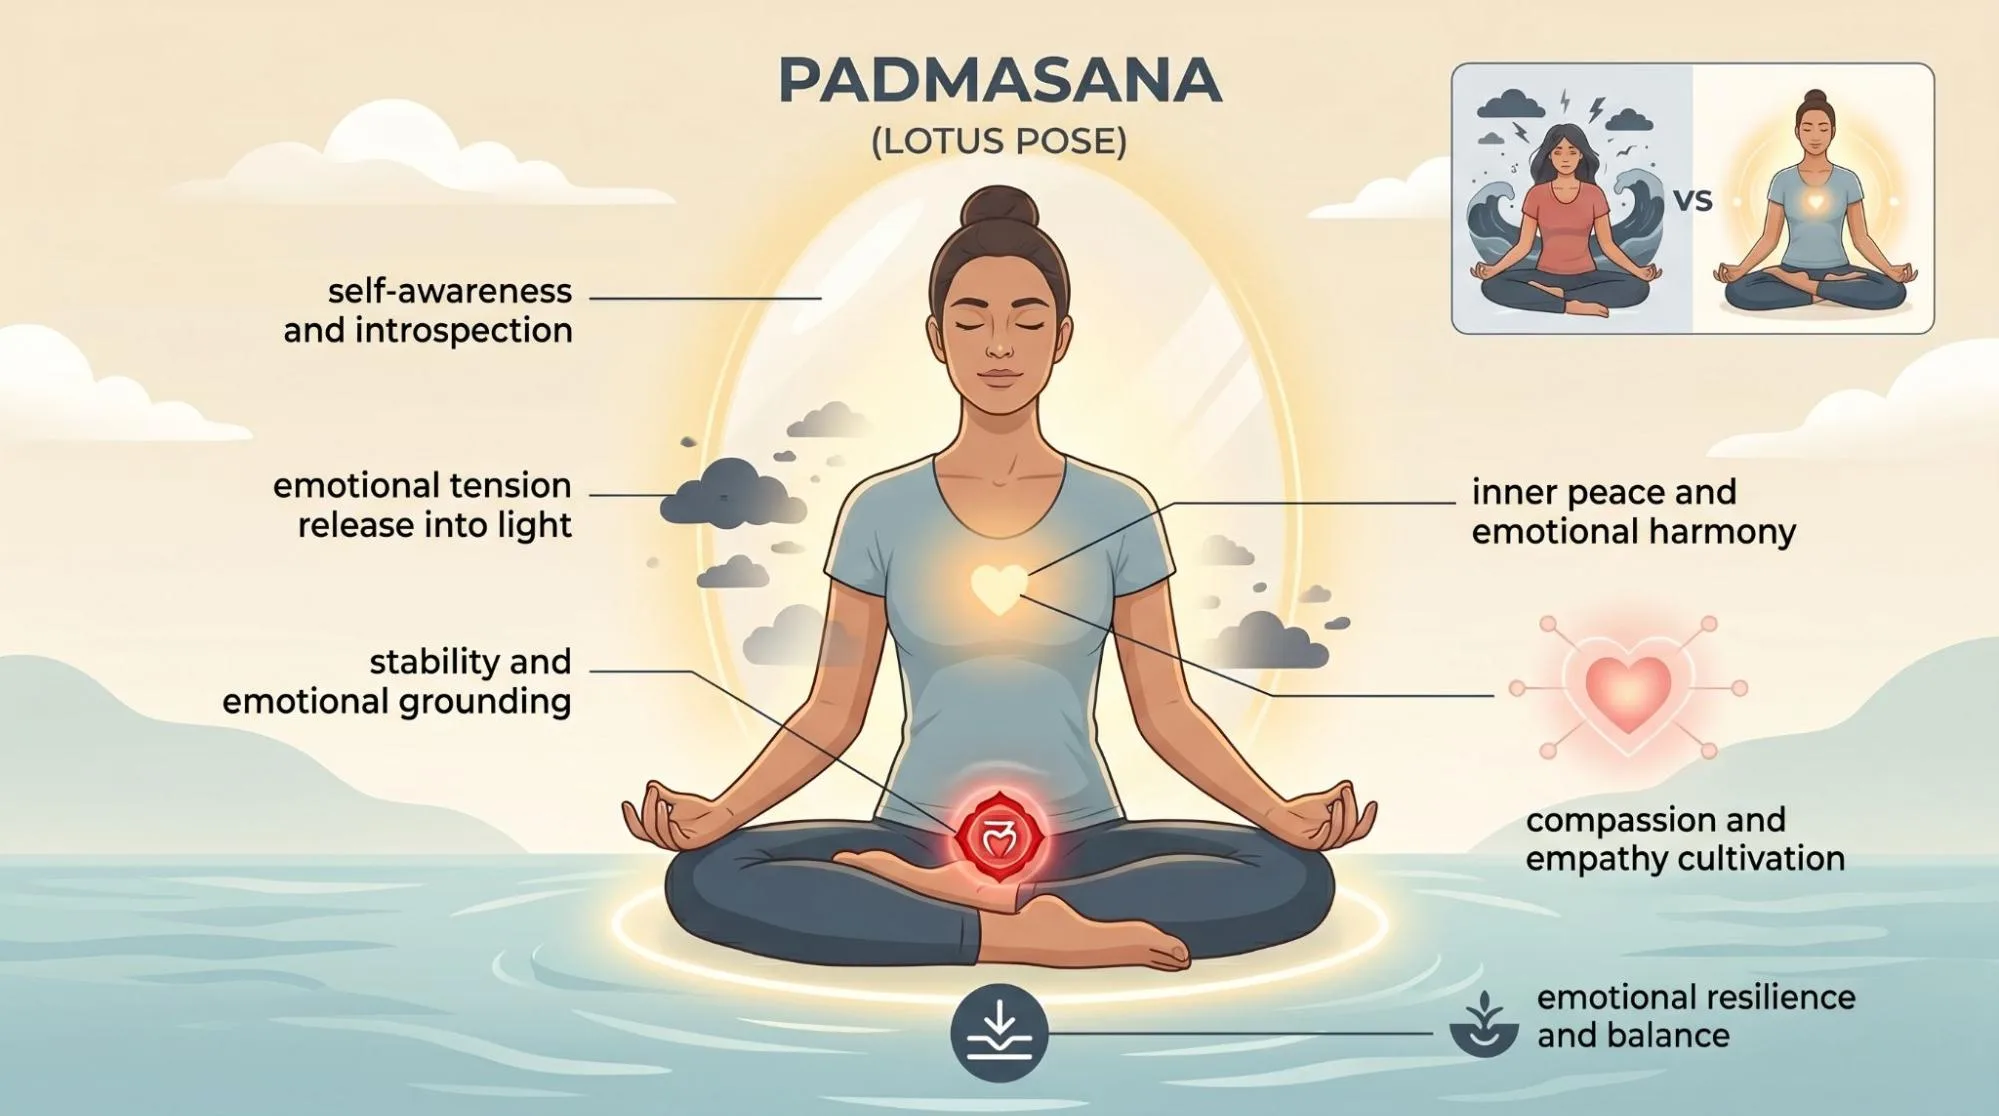
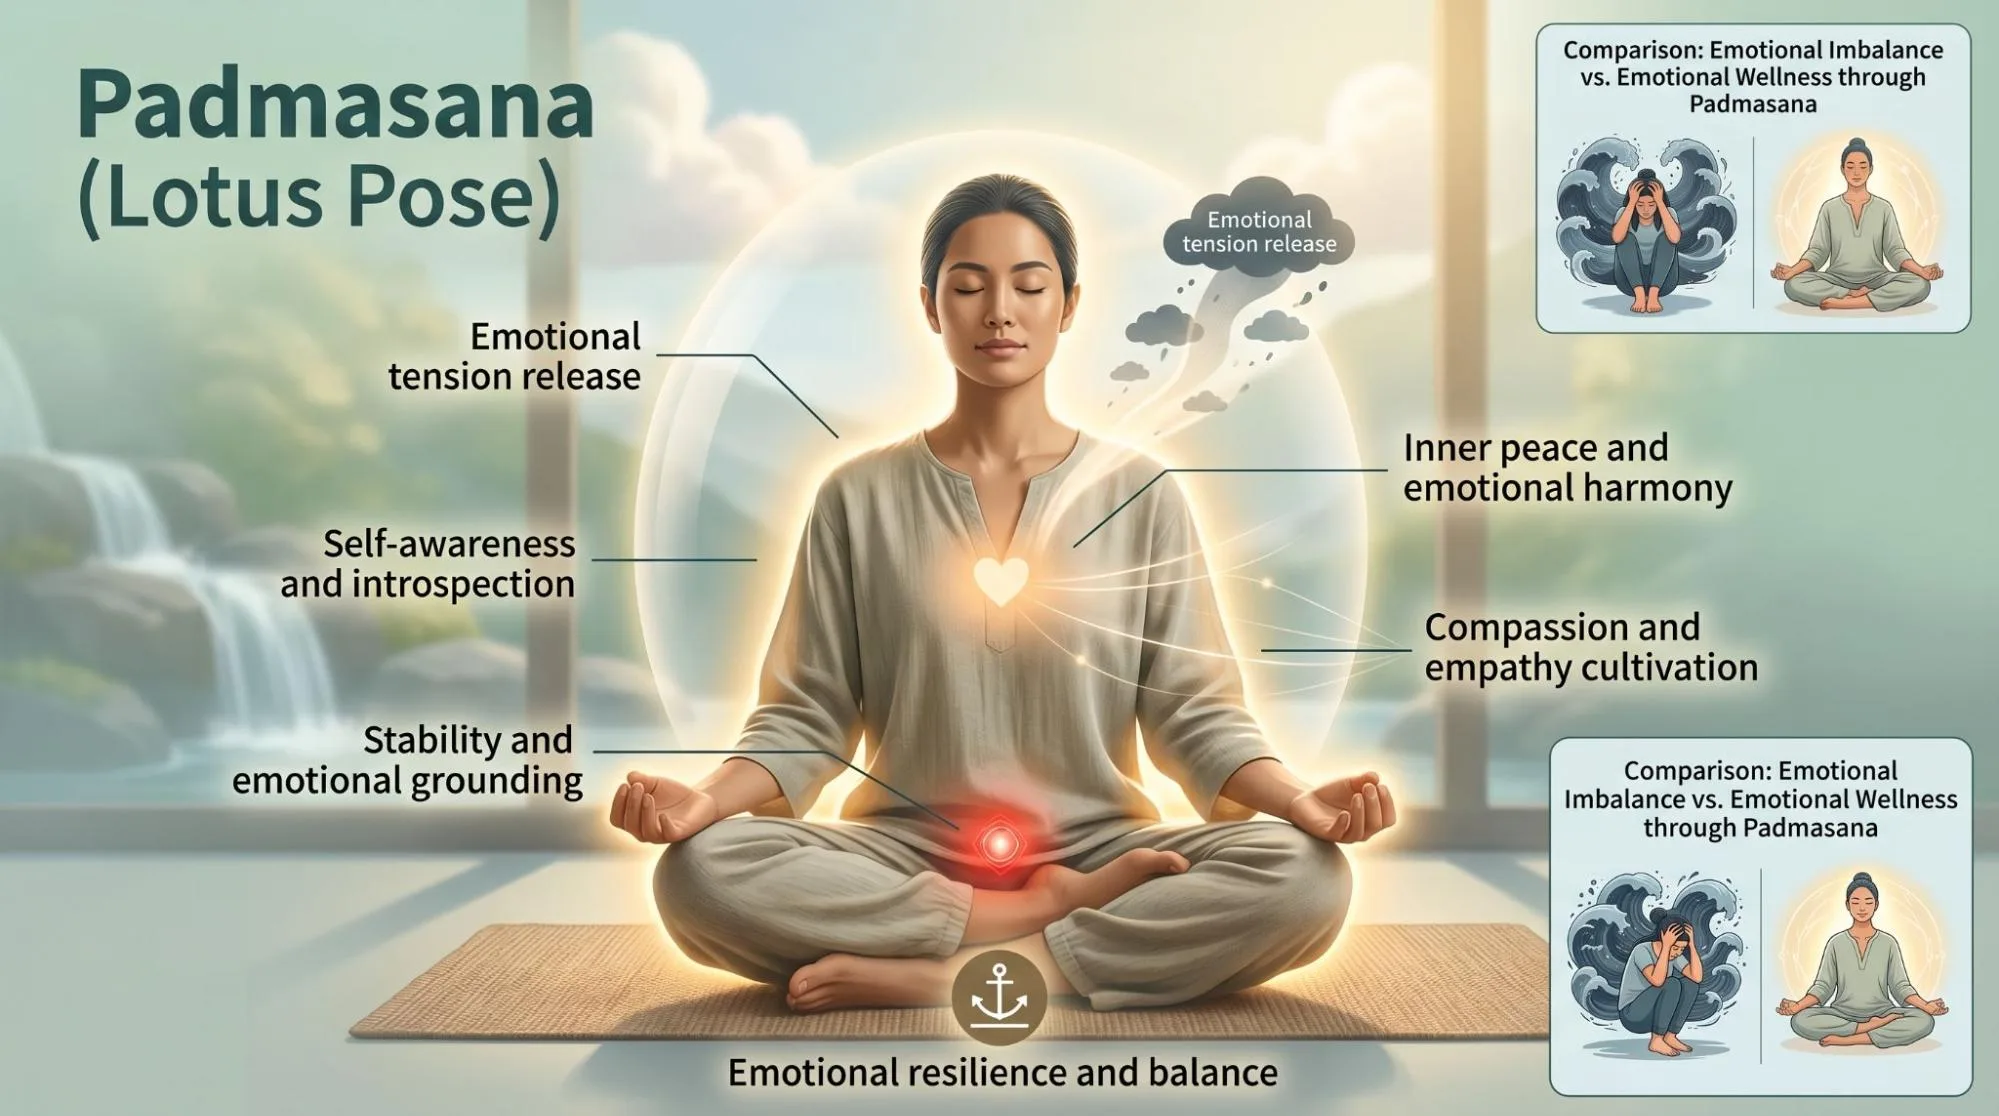
Enhances Self-Awareness
Quiet seated practice creates space to observe emotions and thoughts without distraction.
Relieves Emotional Tension
Slow breathing and mindful stillness may help release stored tension in the body.
Promotes Inner Peace
Even a few minutes of calm seated breathing can create a noticeable sense of mental quietness.
Balances the Root Chakra
Some yoga traditions believe lotus pose supports grounding energy connected with stability and emotional security.
Cultivates Compassion
Meditation practices in padmasana often include gratitude, compassion, or loving-kindness exercises.
Supports Emotional Resilience
Consistent mindfulness practice may improve emotional steadiness during stressful situations.
Aids Digestion and Improves Breathing
Stimulates the Digestive System
An upright seated posture can gently support healthy digestion and abdominal comfort.
Relieves Constipation
Mindful breathing and abdominal relaxation may support natural digestive movement.
Improves Lung Function
Sitting tall creates more space for the lungs to expand fully.
Enhances Diaphragmatic Breathing
Deep belly breathing becomes easier when the spine is aligned properly.
Promotes Relaxation in the Abdomen
Tension often builds unconsciously in the stomach area. Relaxed breathing helps soften that tension.
Supports Respiratory Health
Regular breath-focused yoga practice may improve overall breathing awareness and efficiency.
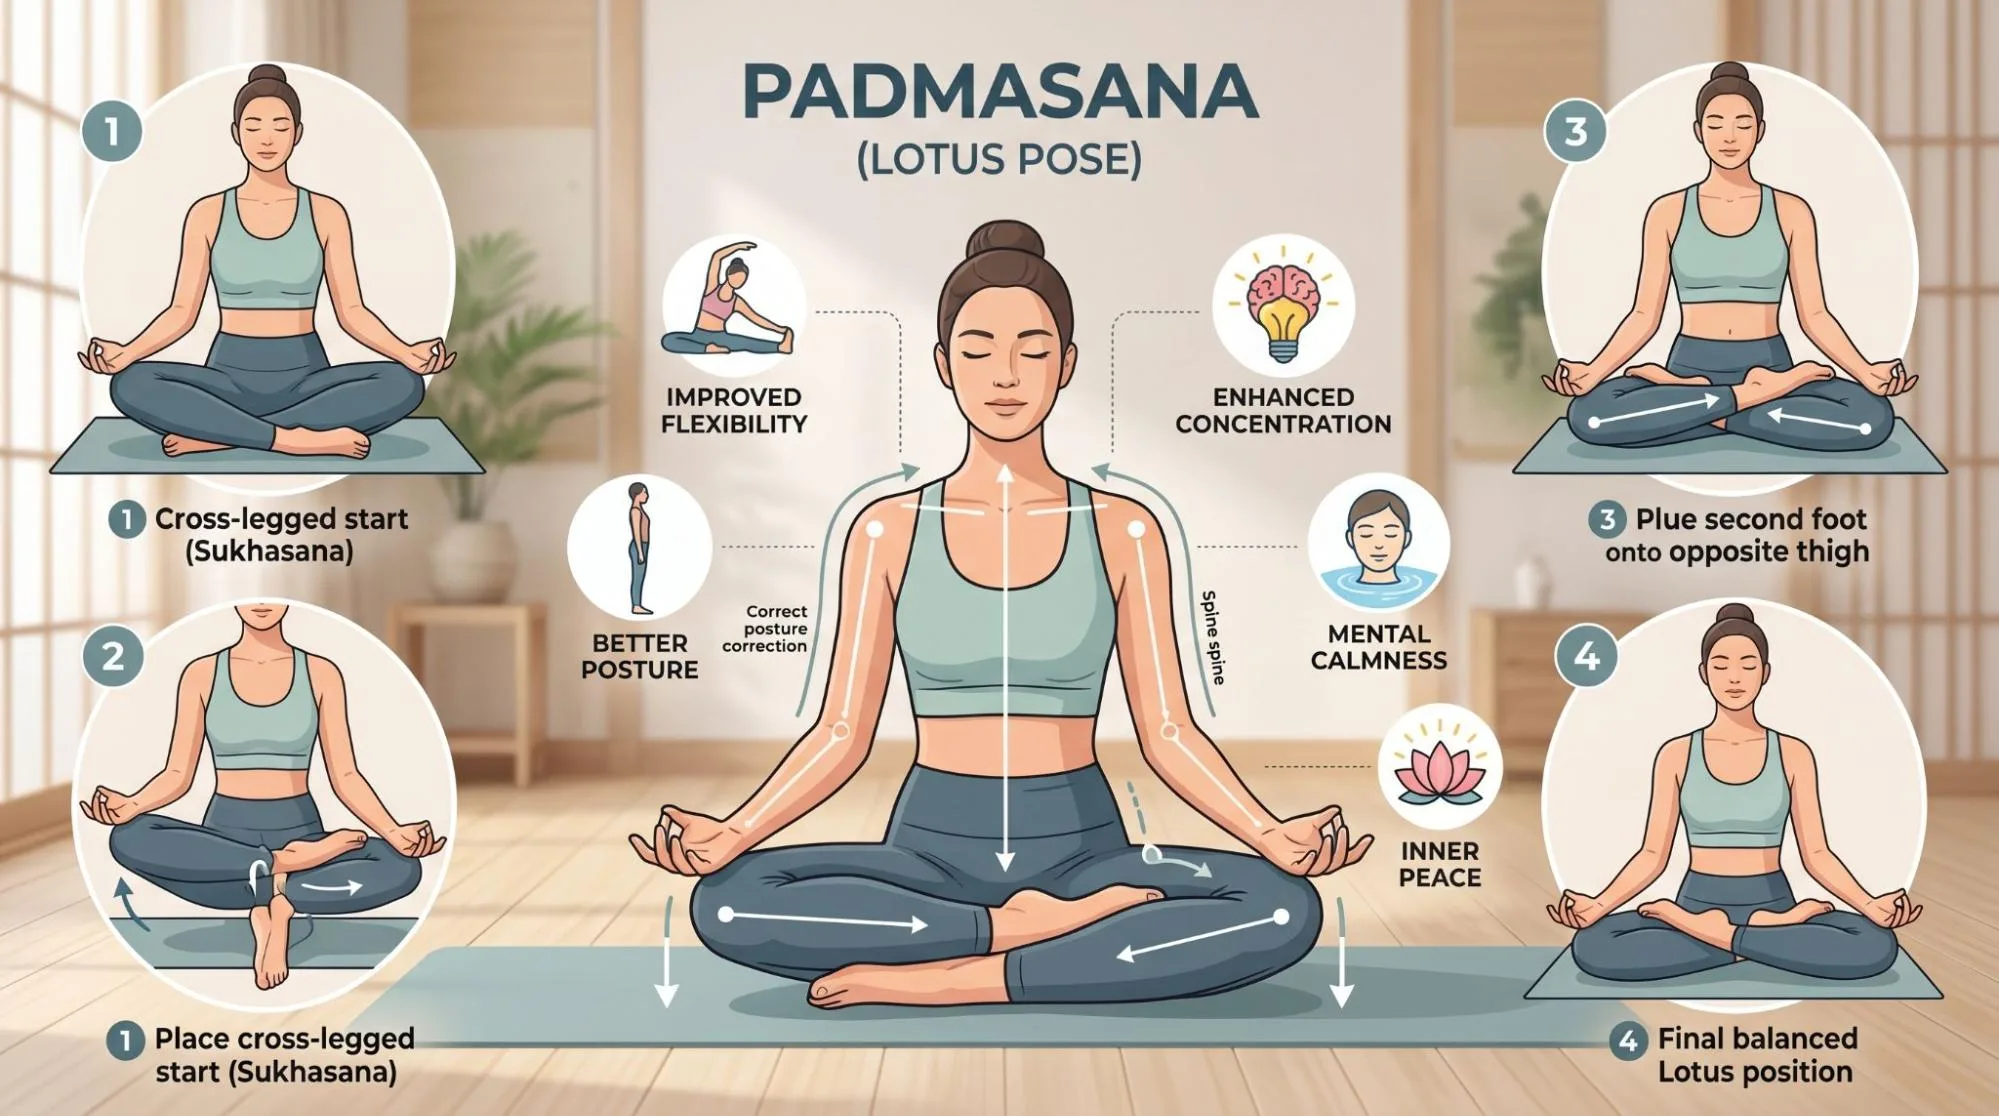
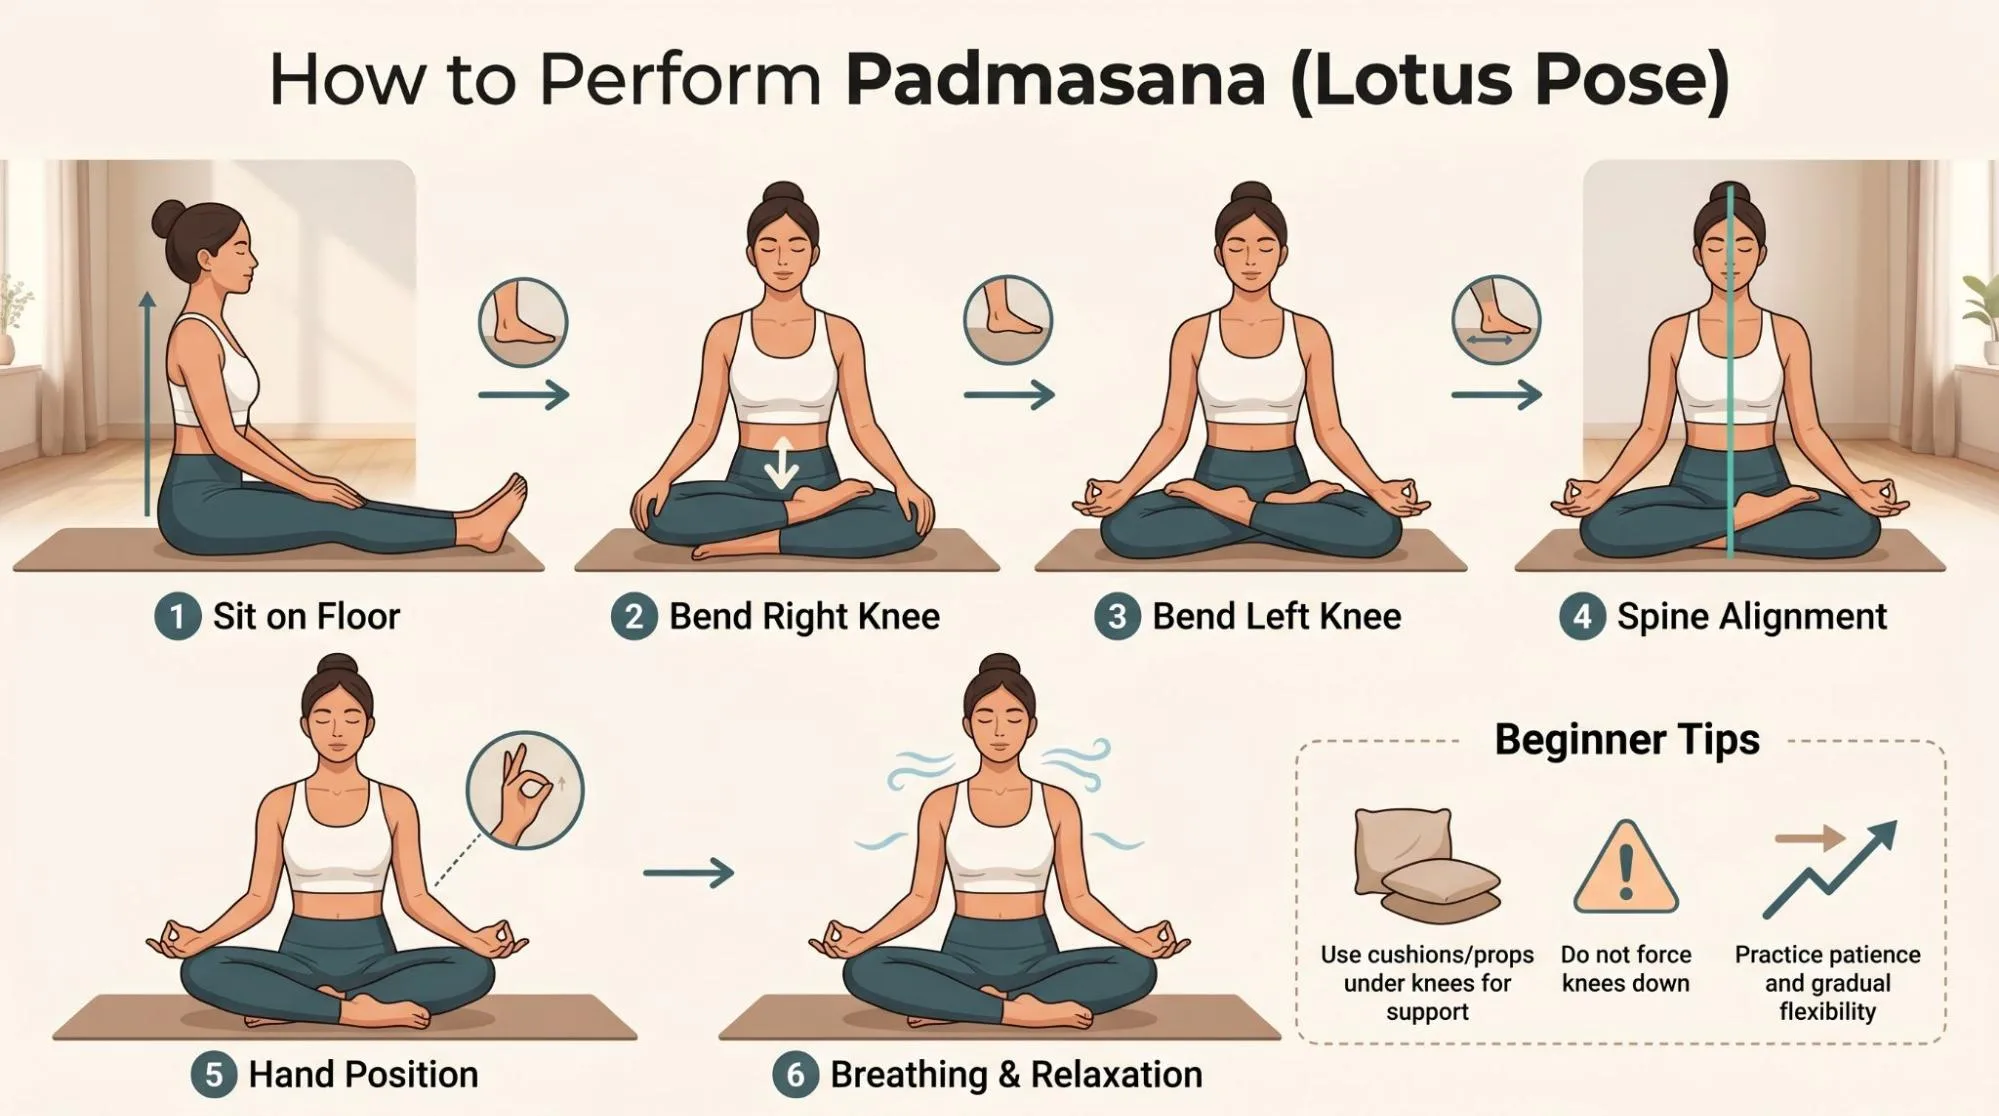
Sit on the Floor
Start by sitting on the floor with your legs stretched forward. Keep your spine tall and shoulders relaxed.
Bend One Knee
Bend your right knee and bring the right foot toward the left hip crease. Move slowly and avoid forcing the knee joint.
Bend the Other Knee
Now bend your left knee and place the left foot over the opposite thigh. If full lotus feels difficult, stay in ardha padmasana instead.
When practicing half lotus:
- One foot stays on the opposite thigh
- The other leg rests underneath comfortably
Never push aggressively while opening your hip area.
Align Your Spine
Lengthen through the spine and relax the shoulders. Keep the chest open without stiffening the body.
Rest Your Hands
Place your hands on your knees in a relaxed position. Many people use a meditation mudra or simply rest the palms downward.
Breathe and Relax
Close your eyes and take slow breaths. Stay relaxed rather than rigid.
Important Tips for Beginners
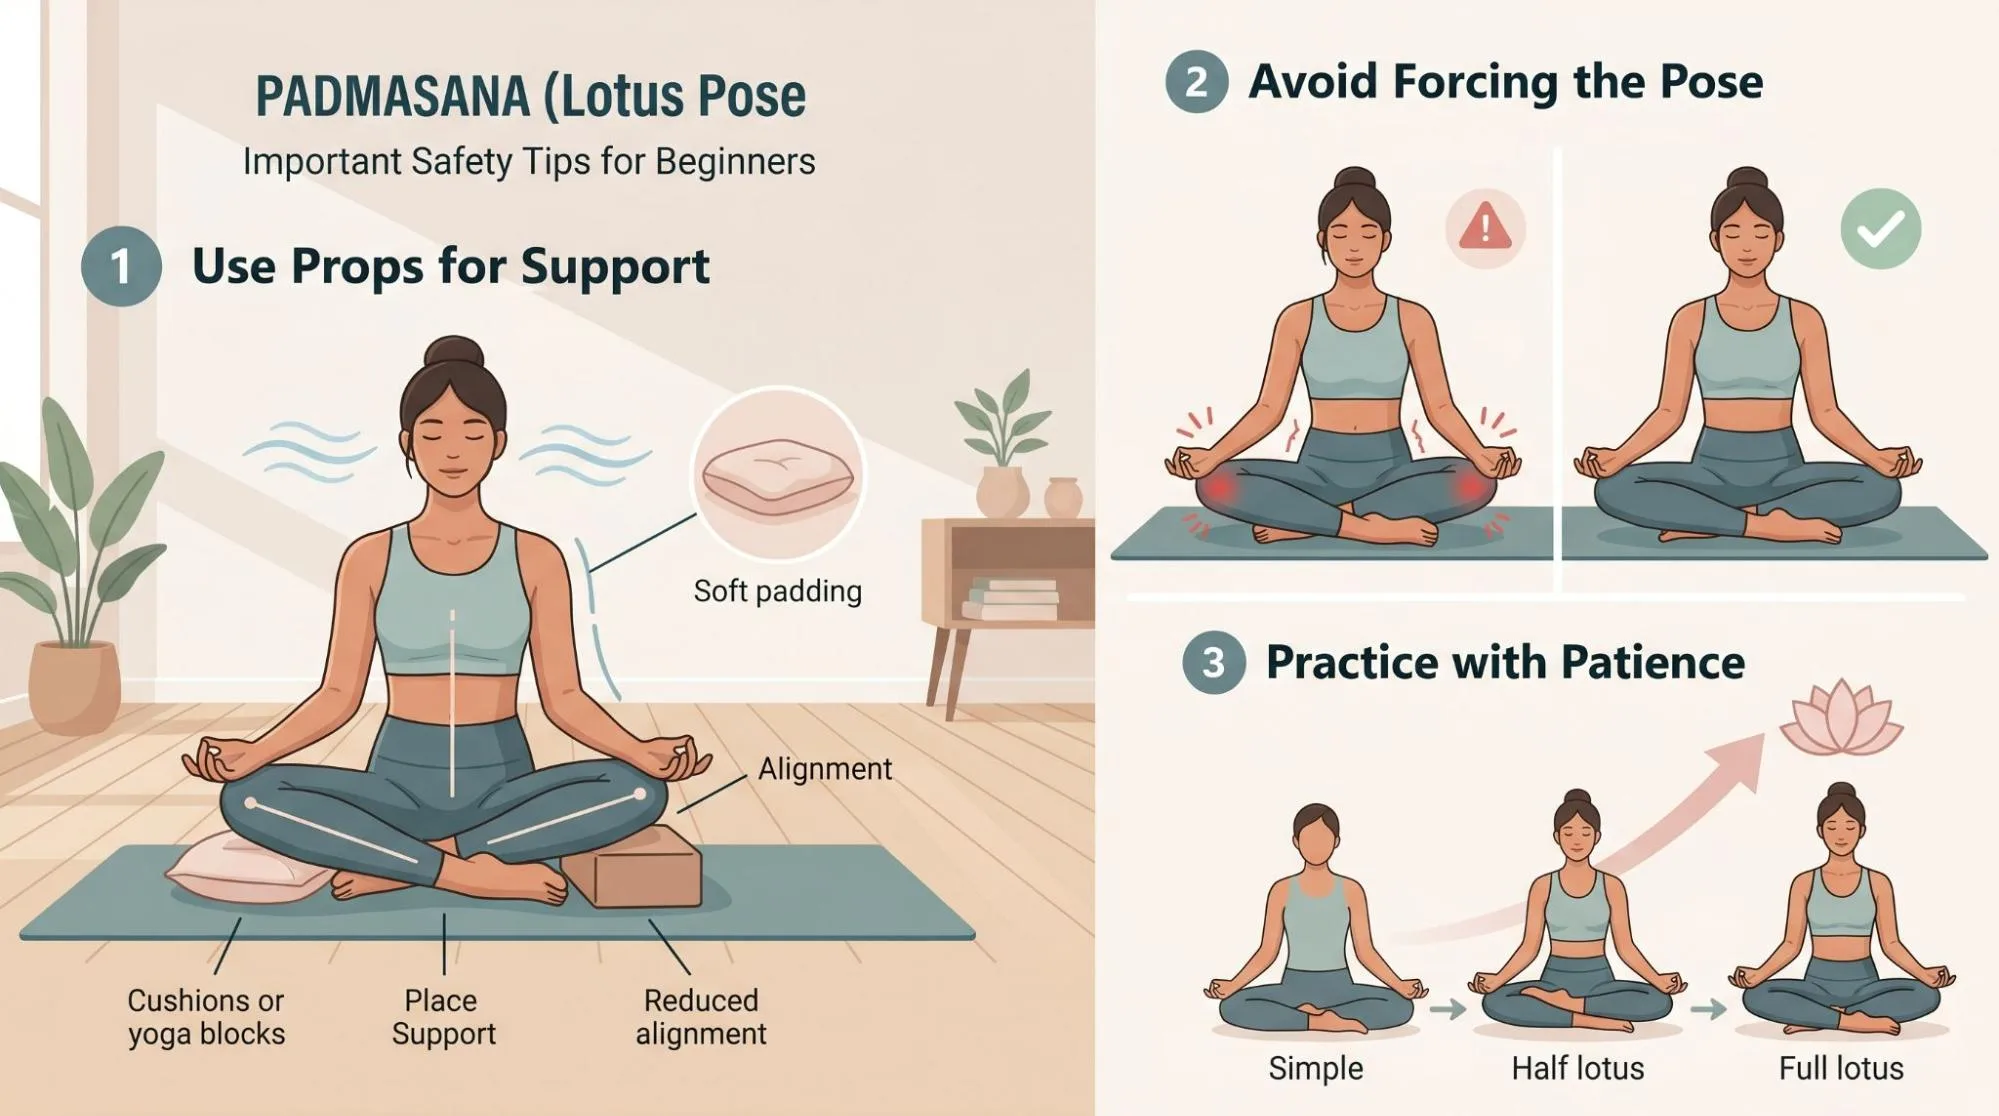
Use Props
Sitting on a folded blanket or cushion can make the pose more comfortable and reduce strain on the hips and knees.
Avoid Forcing the Pose
- This is one of the most important safety tips. Never force your legs into full lotus.
- If you feel pain in the knee joint, stop immediately. The stretch should mainly be felt around the hips, not the knees.
Practice with Patience
- Full lotus develops gradually. Some bodies need more time than others due to natural hip structure and flexibility.
- Consistent gentle practice works better than forcing progress.
Common Mistakes in Padmasana
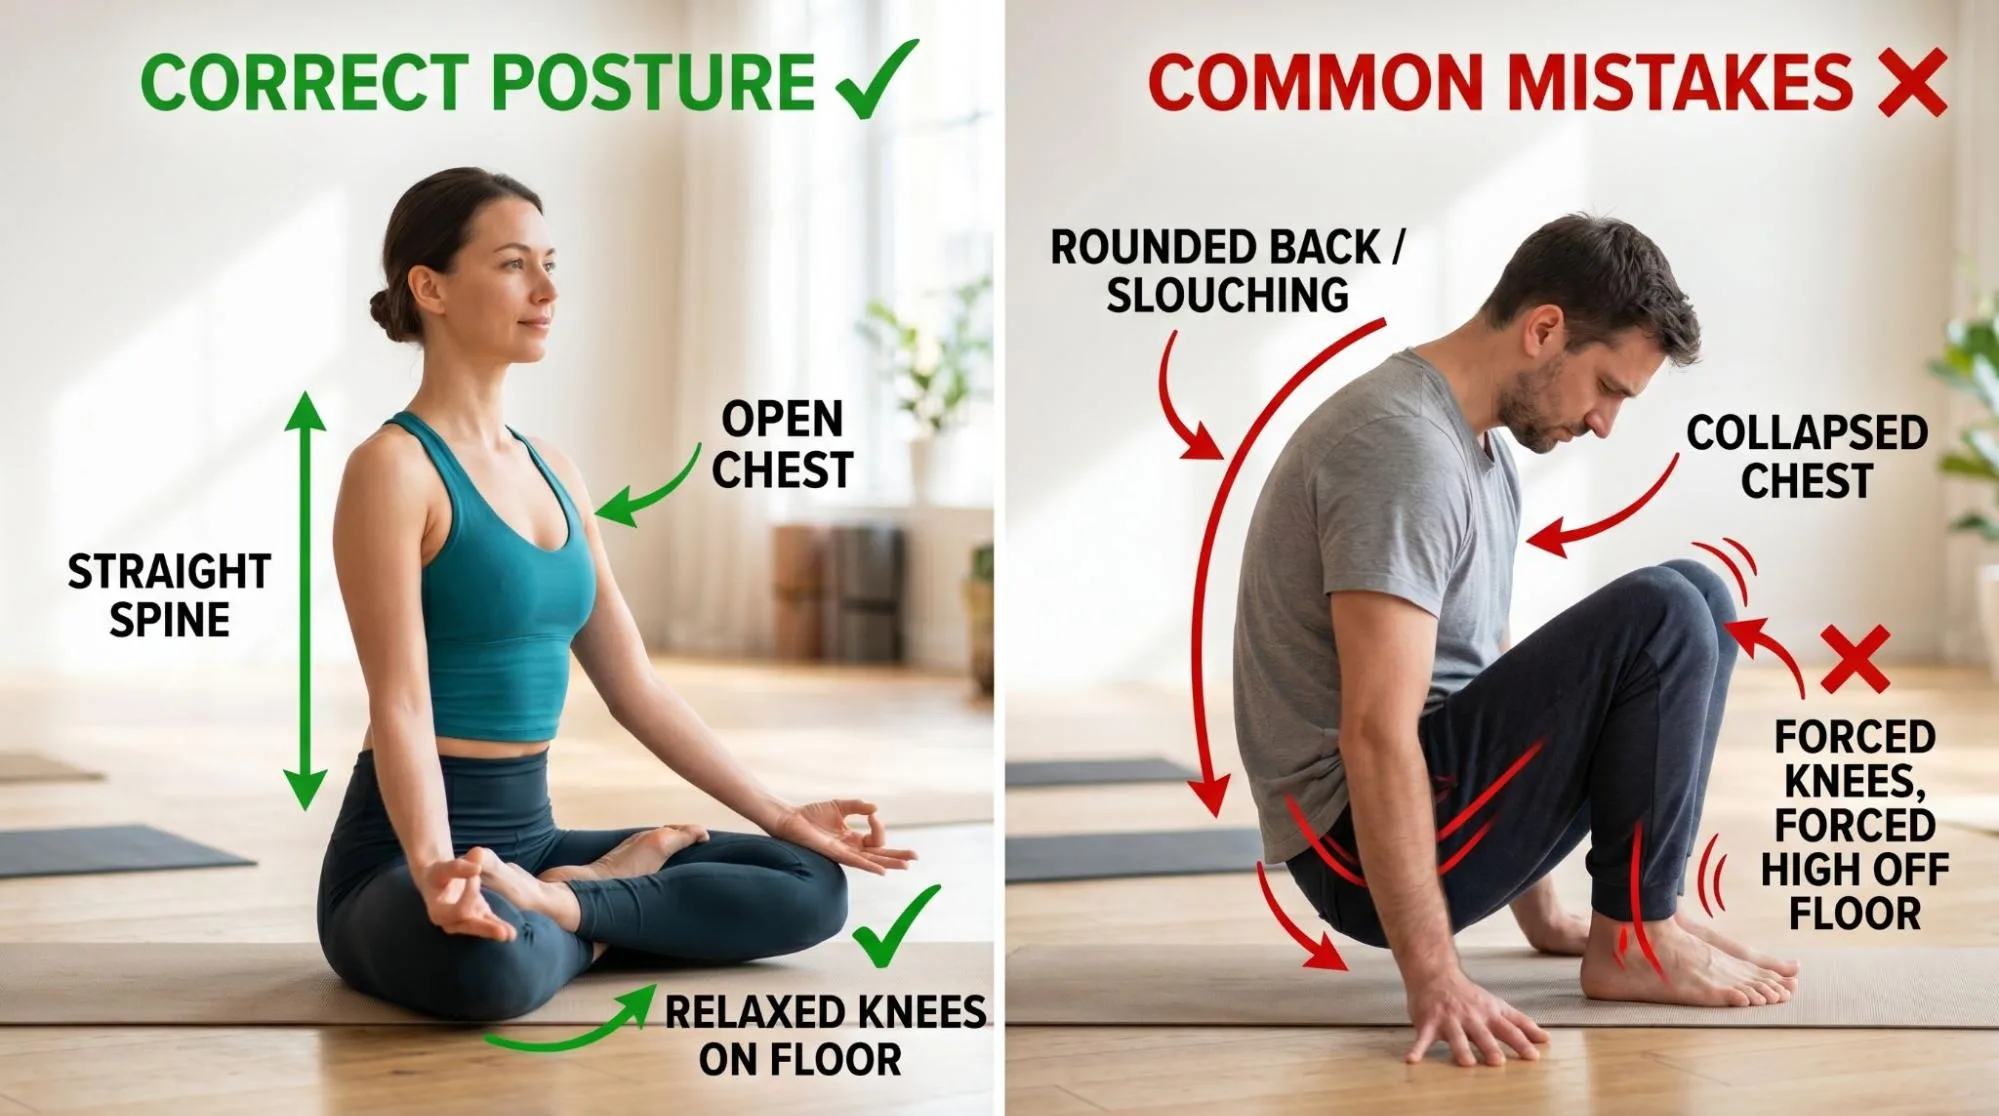
Forcing the Knees Down
The knees should lower naturally as hip mobility improves. Pressing them downward can strain the joints.
Slouching or Round Back
Many beginners collapse through the chest while sitting on the floor. Try lifting gently through the crown of the head.
Uncomfortable Foot Placement
- The feet should rest comfortably on the thighs without sharp pressure or twisting.
- If this feels unstable, return to ardha padmasana or an easier seated yoga pose.
Preparation Poses for Padmasana
Butterfly Pose (Baddha Konasana)
When padmasana is difficult because of tight hips or knees, it is a good idea to do preparatory poses, which open the hips and help to augment the flexibility. These are some of the poses that build up slowly to the complete expression of lotus pose.
Butterfly Pose (Baddha Konasana)
This is a seated position that stretches the inner thighs and hips making them ready to Padmasana. Sitting with the soles of the feet touching one another will help in getting the knees towards the ground, pushing them downwards, to stretch the hips.
Butterfly Pose (Baddha Konasana) is a seated yoga pose that is very effective in readying the body to Padmasana (Lotus Pose) particularly in terms of stretching inner thighs, hips and groin muscles. It is a common preparatory pose before getting down to practicing seated forms of meditation such as Padmasana.
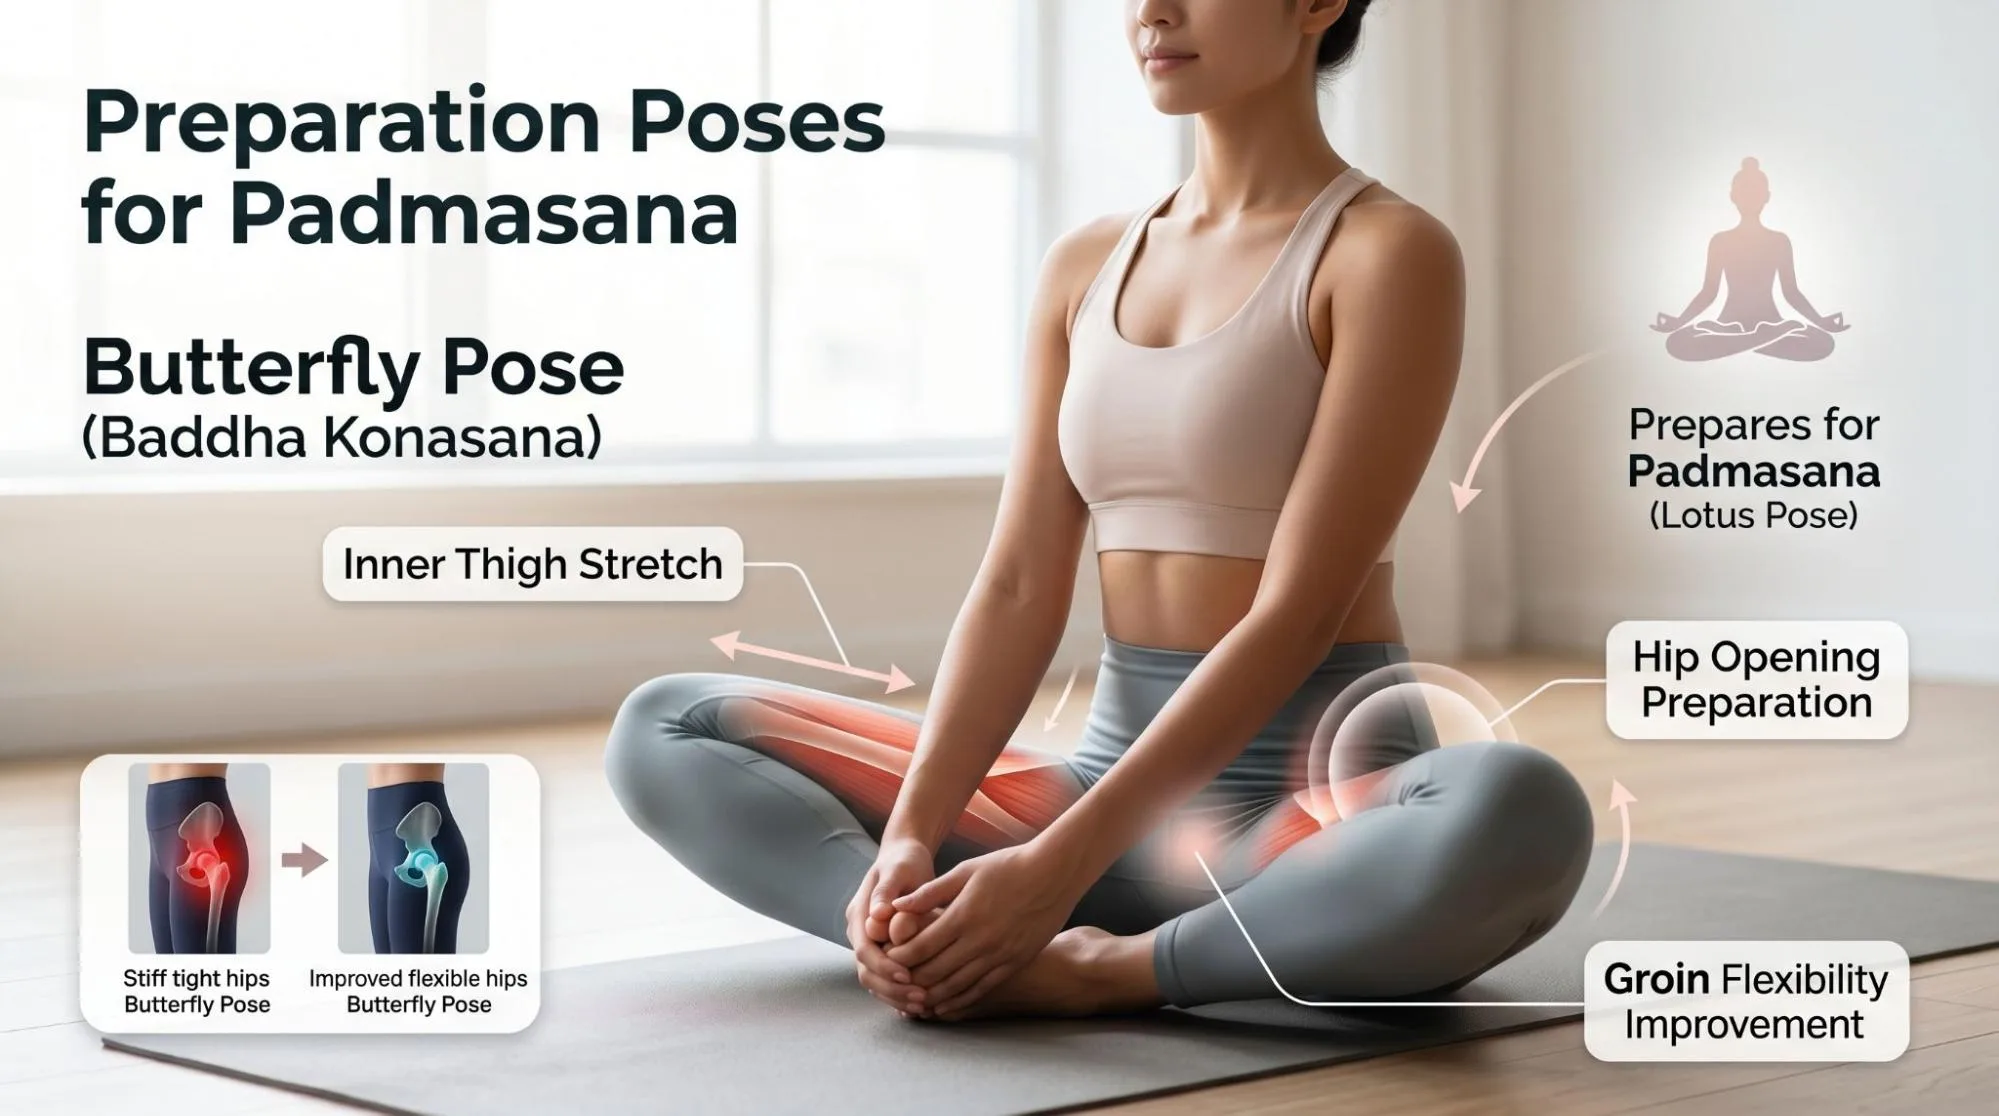
Butterfly pose gently opens the hips and inner thighs, making it a useful preparation for lotus pose.
Tips for Deepening the Stretch
- Sit tall instead of rounding forward
- Relax the knees rather than pushing them down
- Breathe slowly and stay patient
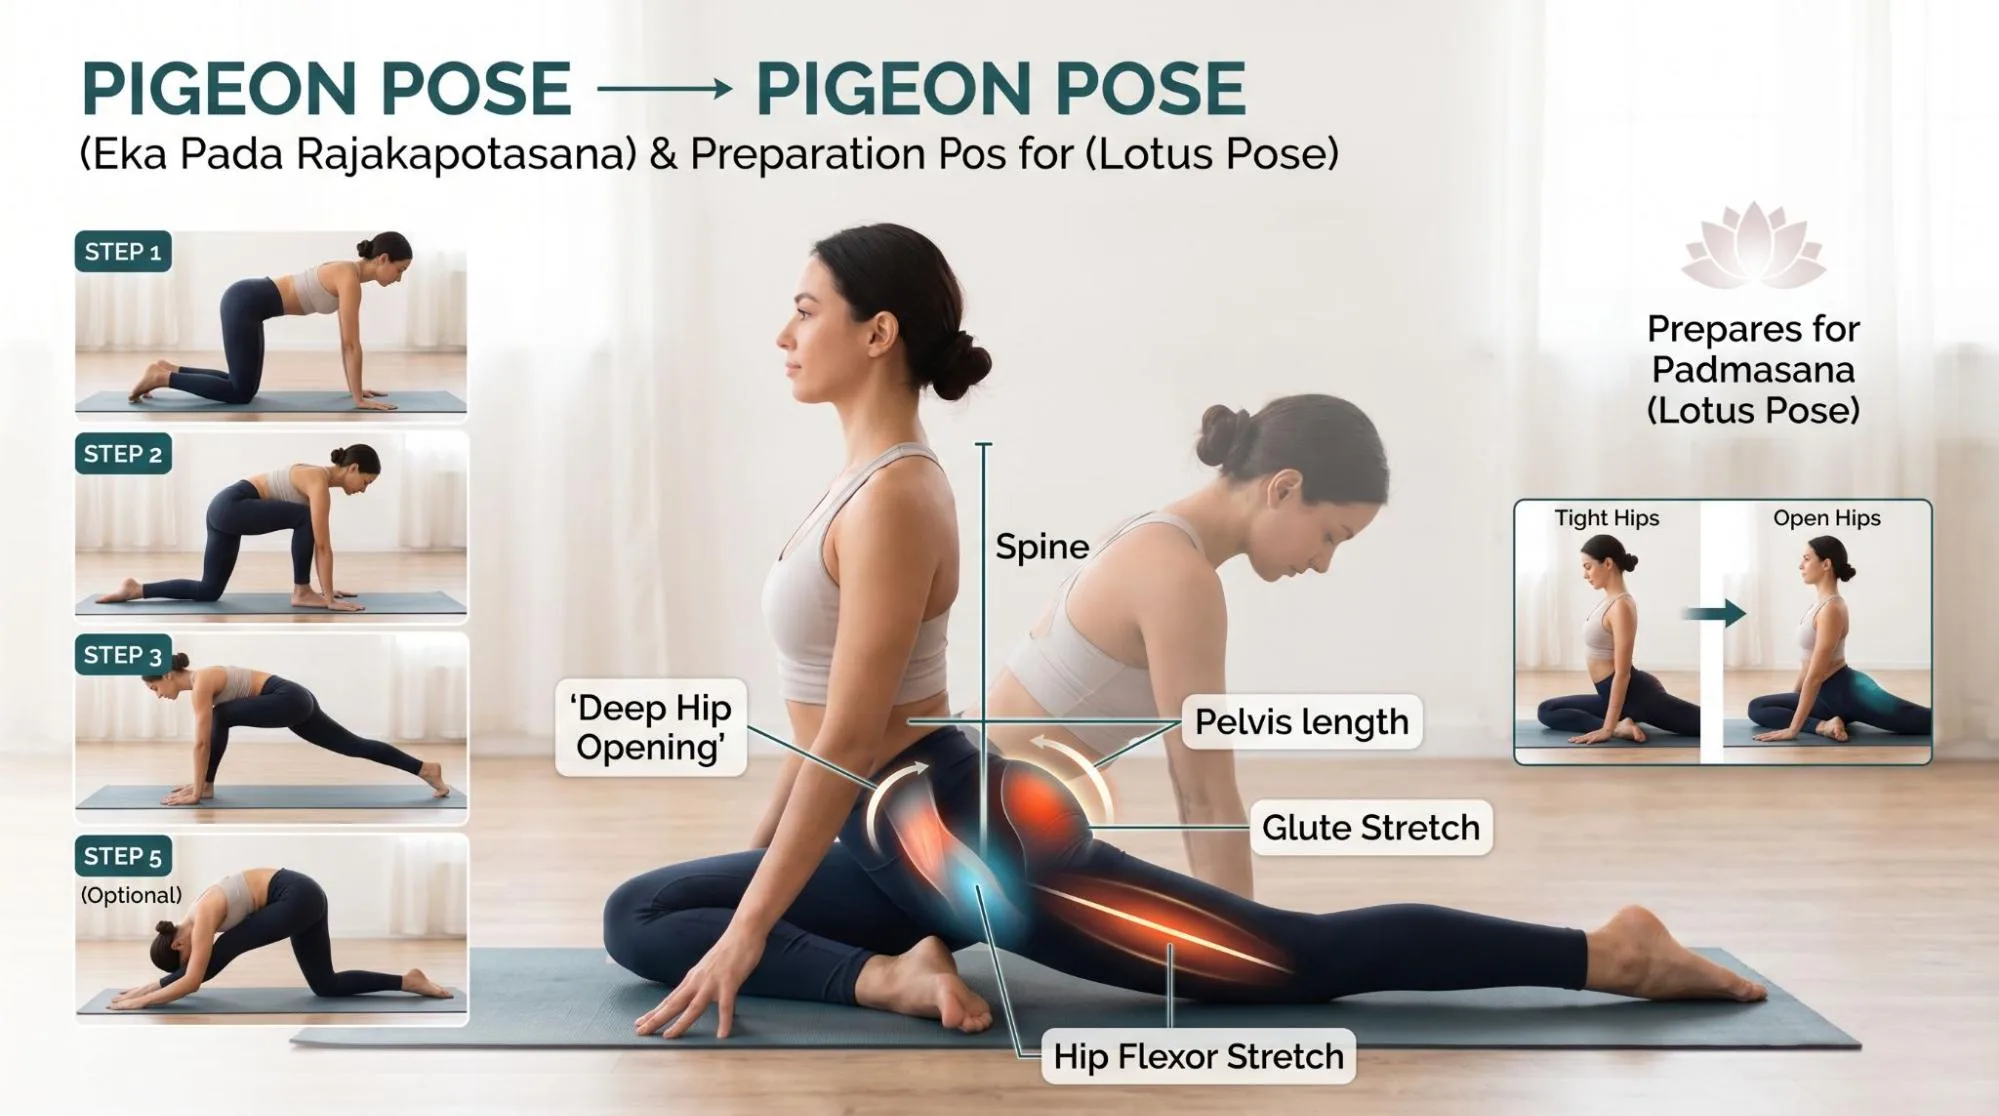
Pigeon Pose (Eka Pada Rajakapotasana)
Pigeon pose deeply stretches the hips and glutes.
How to Practice Pigeon Pose
- Bring one leg forward with the knee bent
- Extend the opposite leg behind you
- Keep the hips as level as possible
- Breathe deeply without forcing the stretch
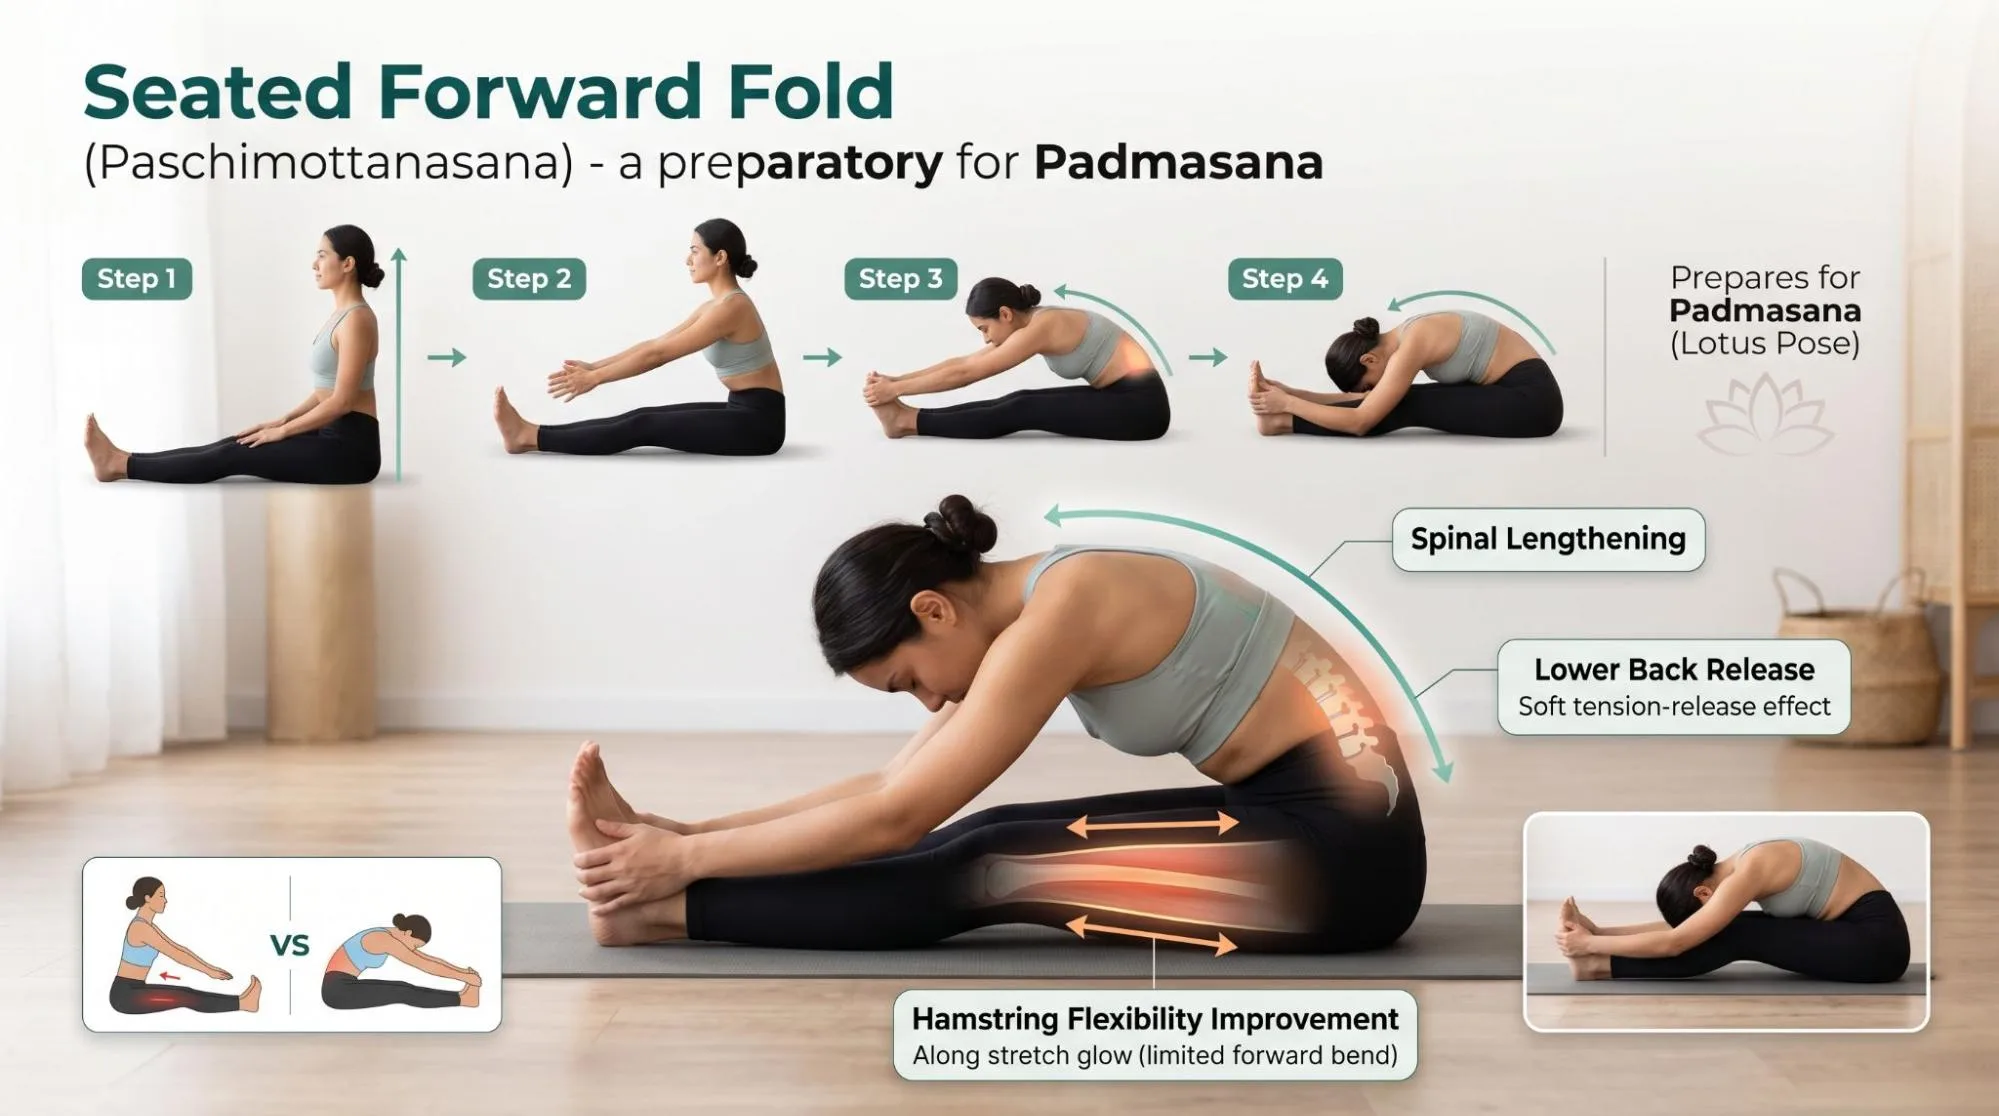
Seated Forward Fold (Paschimottanasana)
This pose stretches the back body, hamstrings, and lower spine while encouraging calm breathing.
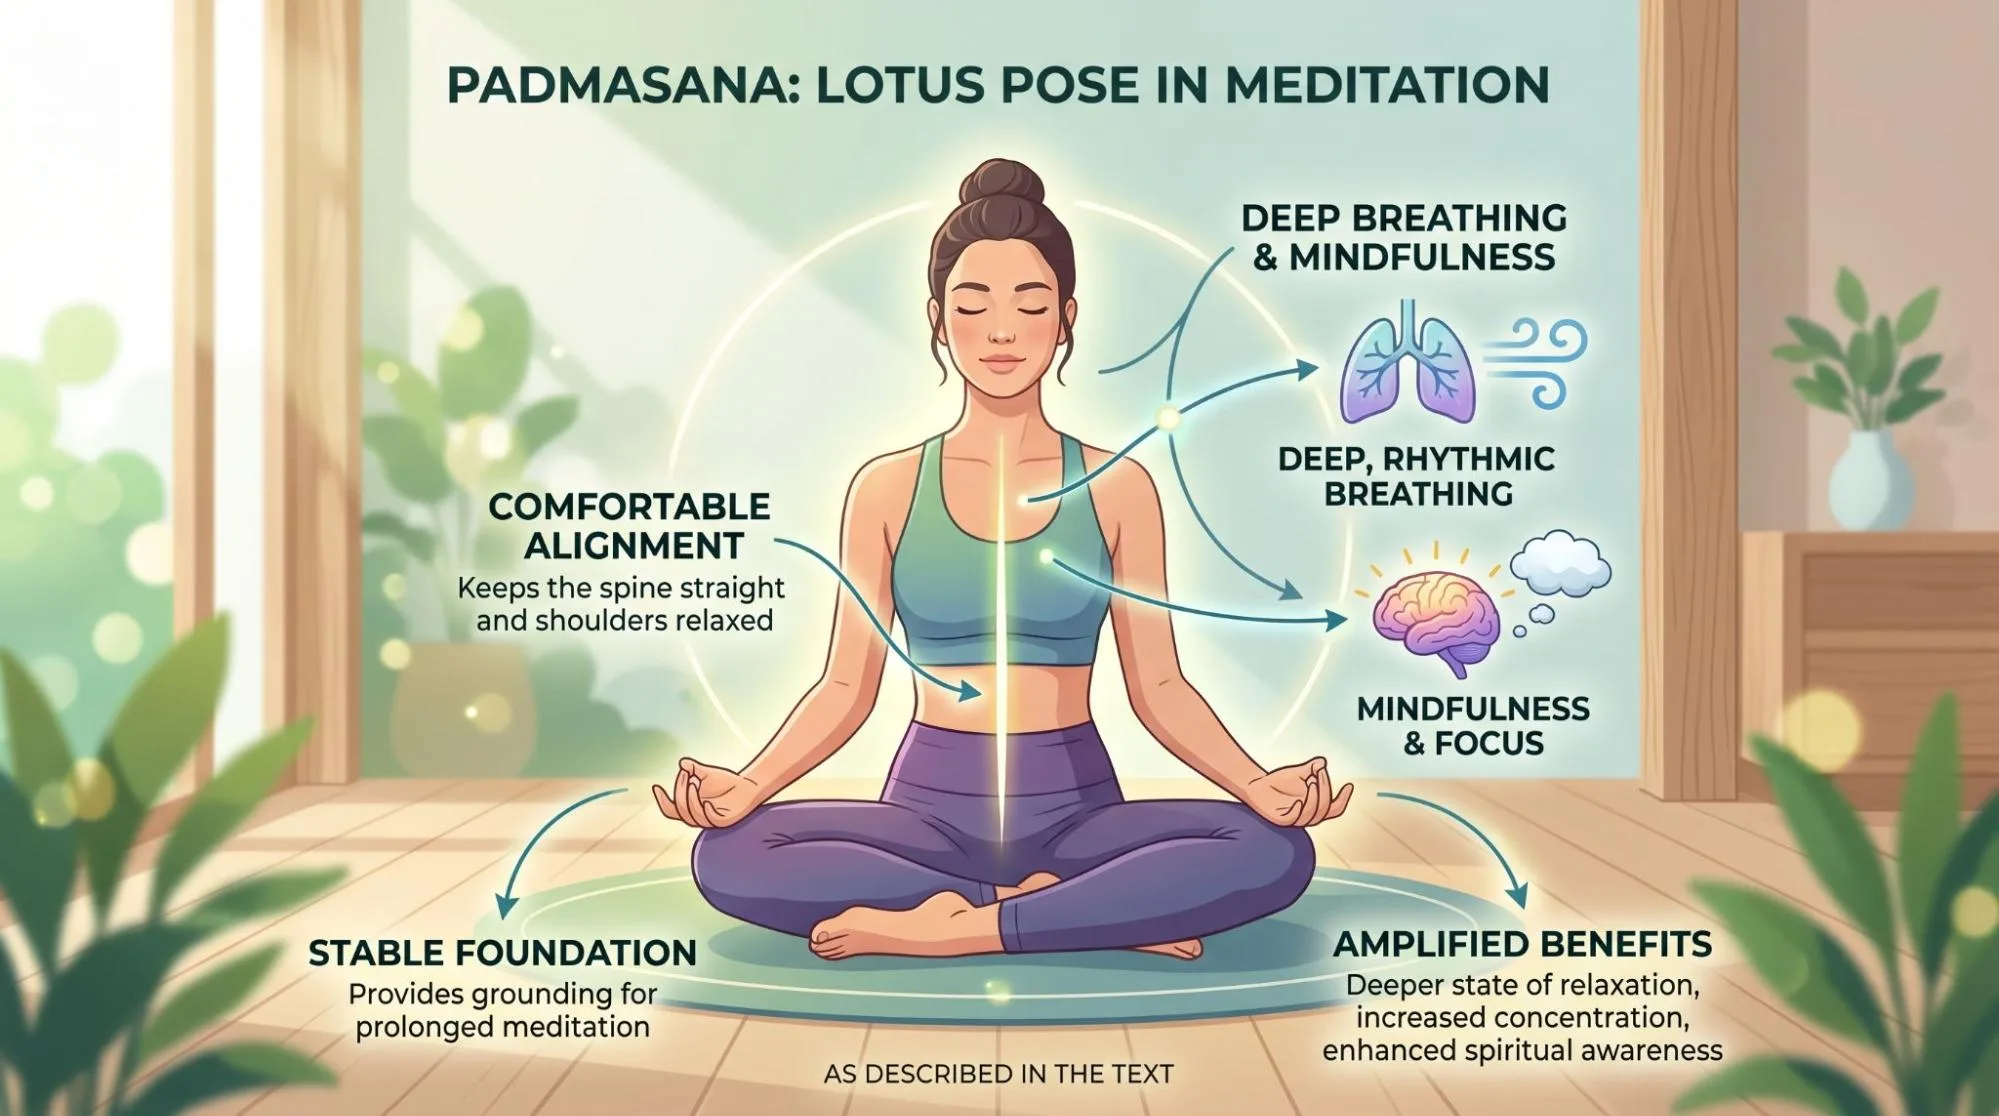
Lotus Pose in Meditation
Padmasana lotus is widely used during meditation because the posture supports stillness and mental focus.
Breath Awareness
One of the simplest meditation methods is paying attention to the breath.
Notice:
- The inhale entering the nose
- The rise of the chest
- The slow exhale
- The natural rhythm of breathing
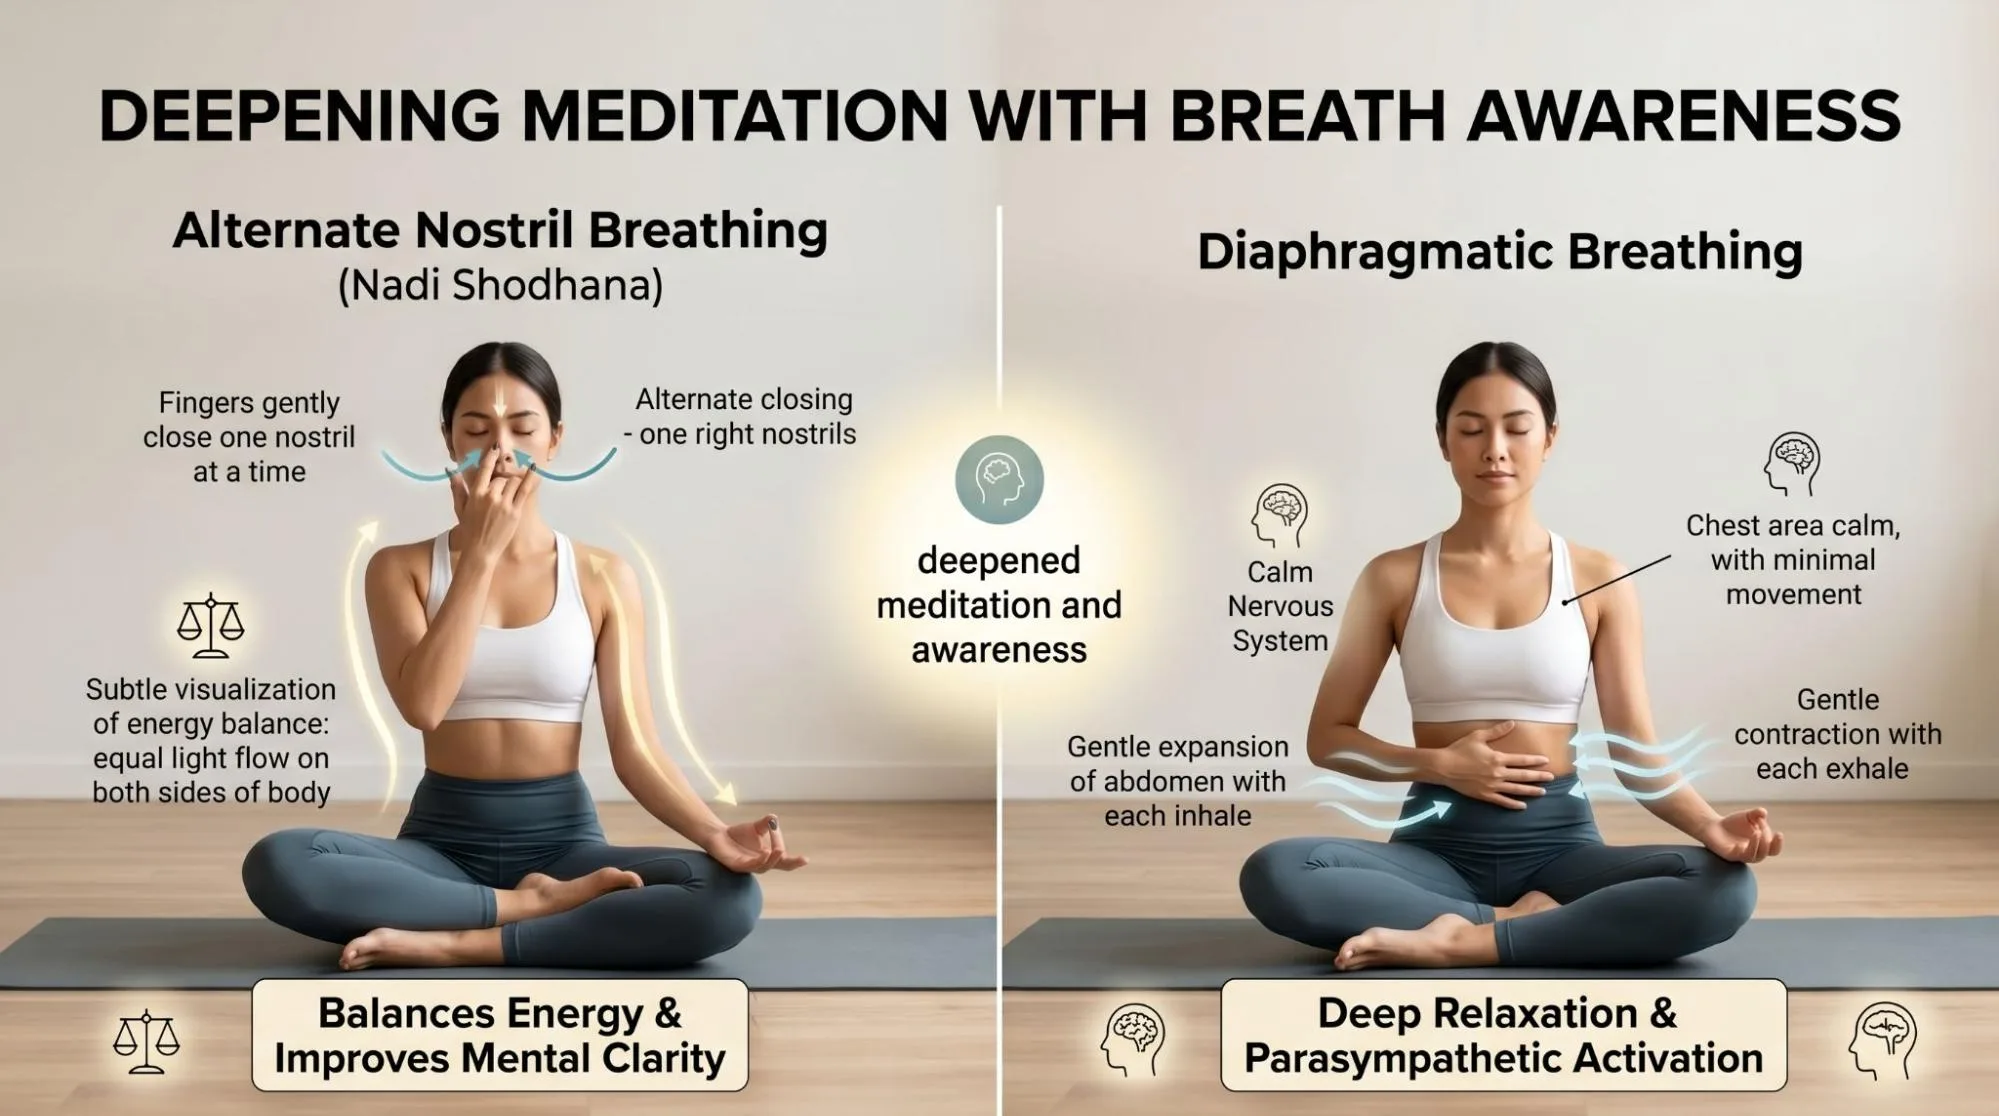
Deepening Your Meditation with Breath Awareness
Instead of controlling the breath too much, simply observe it calmly.
Alternate Nostril Breathing
Alternate nostril breathing is a traditional hatha yoga breathing exercise believed to calm the nervous system and improve focus.
Diaphragmatic Breathing
Deep belly breathing encourages relaxation and reduces shallow chest breathing patterns.
Visualization
Some practitioners combine lotus pose with visualization exercises. This may involve imagining calming light, peaceful scenery, or grounding energy while meditating.
Learn More : Body Scan Meditation Benefits: A Simple Guide to Relaxing the Mind and Body
Conclusion: Embrace the Power of Padmasana
Padmasana lotus is a simple yet deeply rewarding yoga pose. It supports flexibility, posture, breathing, focus, and emotional calmness while creating a strong foundation for meditation practice.
You do not need to master full lotus immediately to benefit from the posture. Even gentle variations like ardha padmasana can help improve body awareness and inner stillness over time.
The key is patience. Respect your body, move slowly, and allow flexibility to develop naturally. With regular yoga practice, lotus pose can become a comfortable place for stillness, breathing, and quiet reflection.
