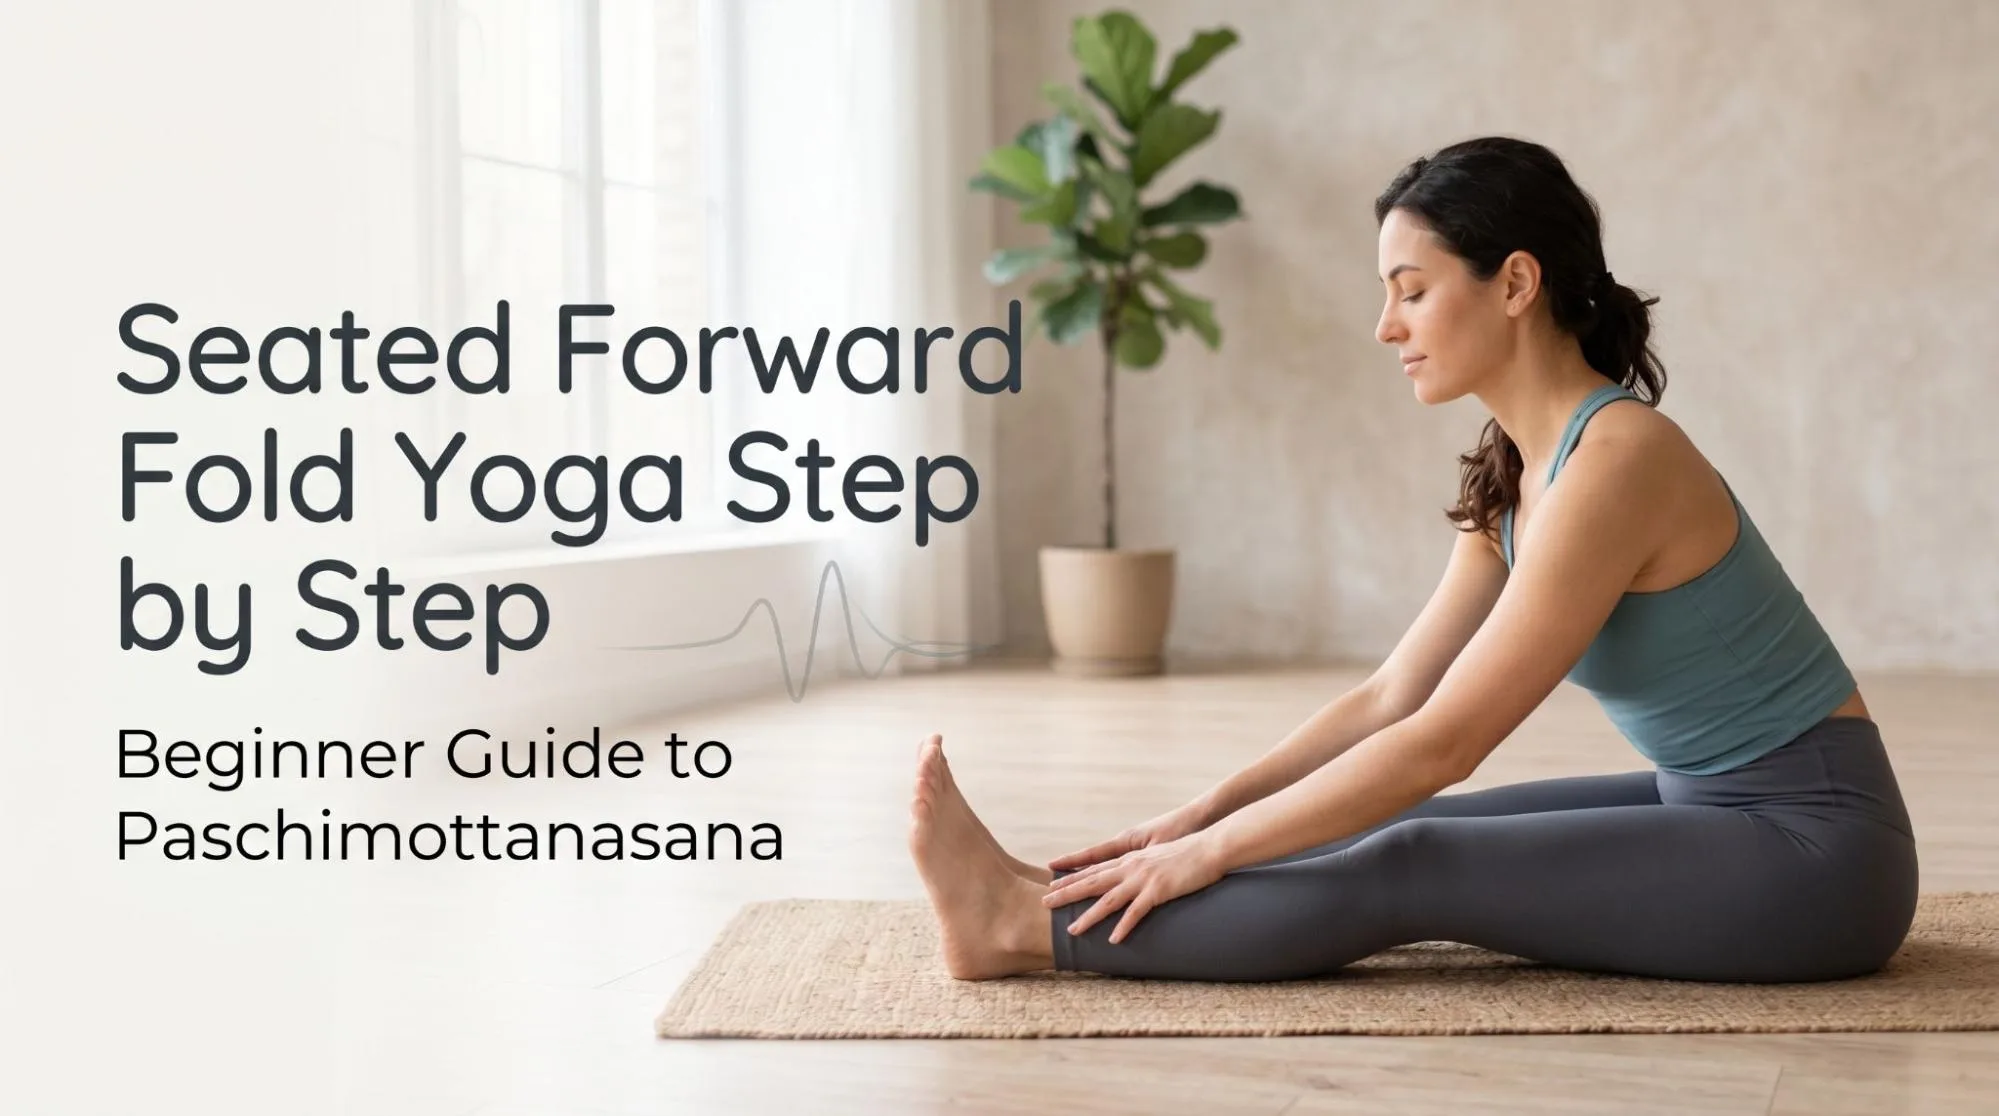
A good Seated Forward Fold does not begin with touching your toes. It begins with learning how to sit well, breathe calmly, and fold without forcing your back or legs. Many beginners think Paschimottanasana is about going as low as possible, but the real value of this pose comes from patience, body awareness, and safe movement.
Seated Forward Fold, also called Paschimottanasana, is one of the most common yoga poses for stretching the back side of the body. It targets the hamstrings, lower back, calves, hips, and spine. When practiced correctly, it can also help calm the mind and release physical tension.
This guide explains seated forward fold yoga step by step in a simple way, especially for beginners who may have tight hamstrings, stiff hips, or lower back discomfort. This seated forward fold yoga step by step guide will help you practice the pose safely, especially if you are new to yoga.
 alt=”Seated forward fold with long spine” title=”Seated forward fold with long spine”
Quick answer: Seated Forward Fold is a seated hamstring-focused fold. Sit on a folded blanket if your pelvis rolls backward, keep a soft bend in the knees, and lengthen forward rather than pulling yourself down.
Practical note: A strap around the feet can help the hands reach without rounding the spine. The useful version is the one you can hold with steady breathing, not the deepest-looking version.
What Is Seated Forward Fold?
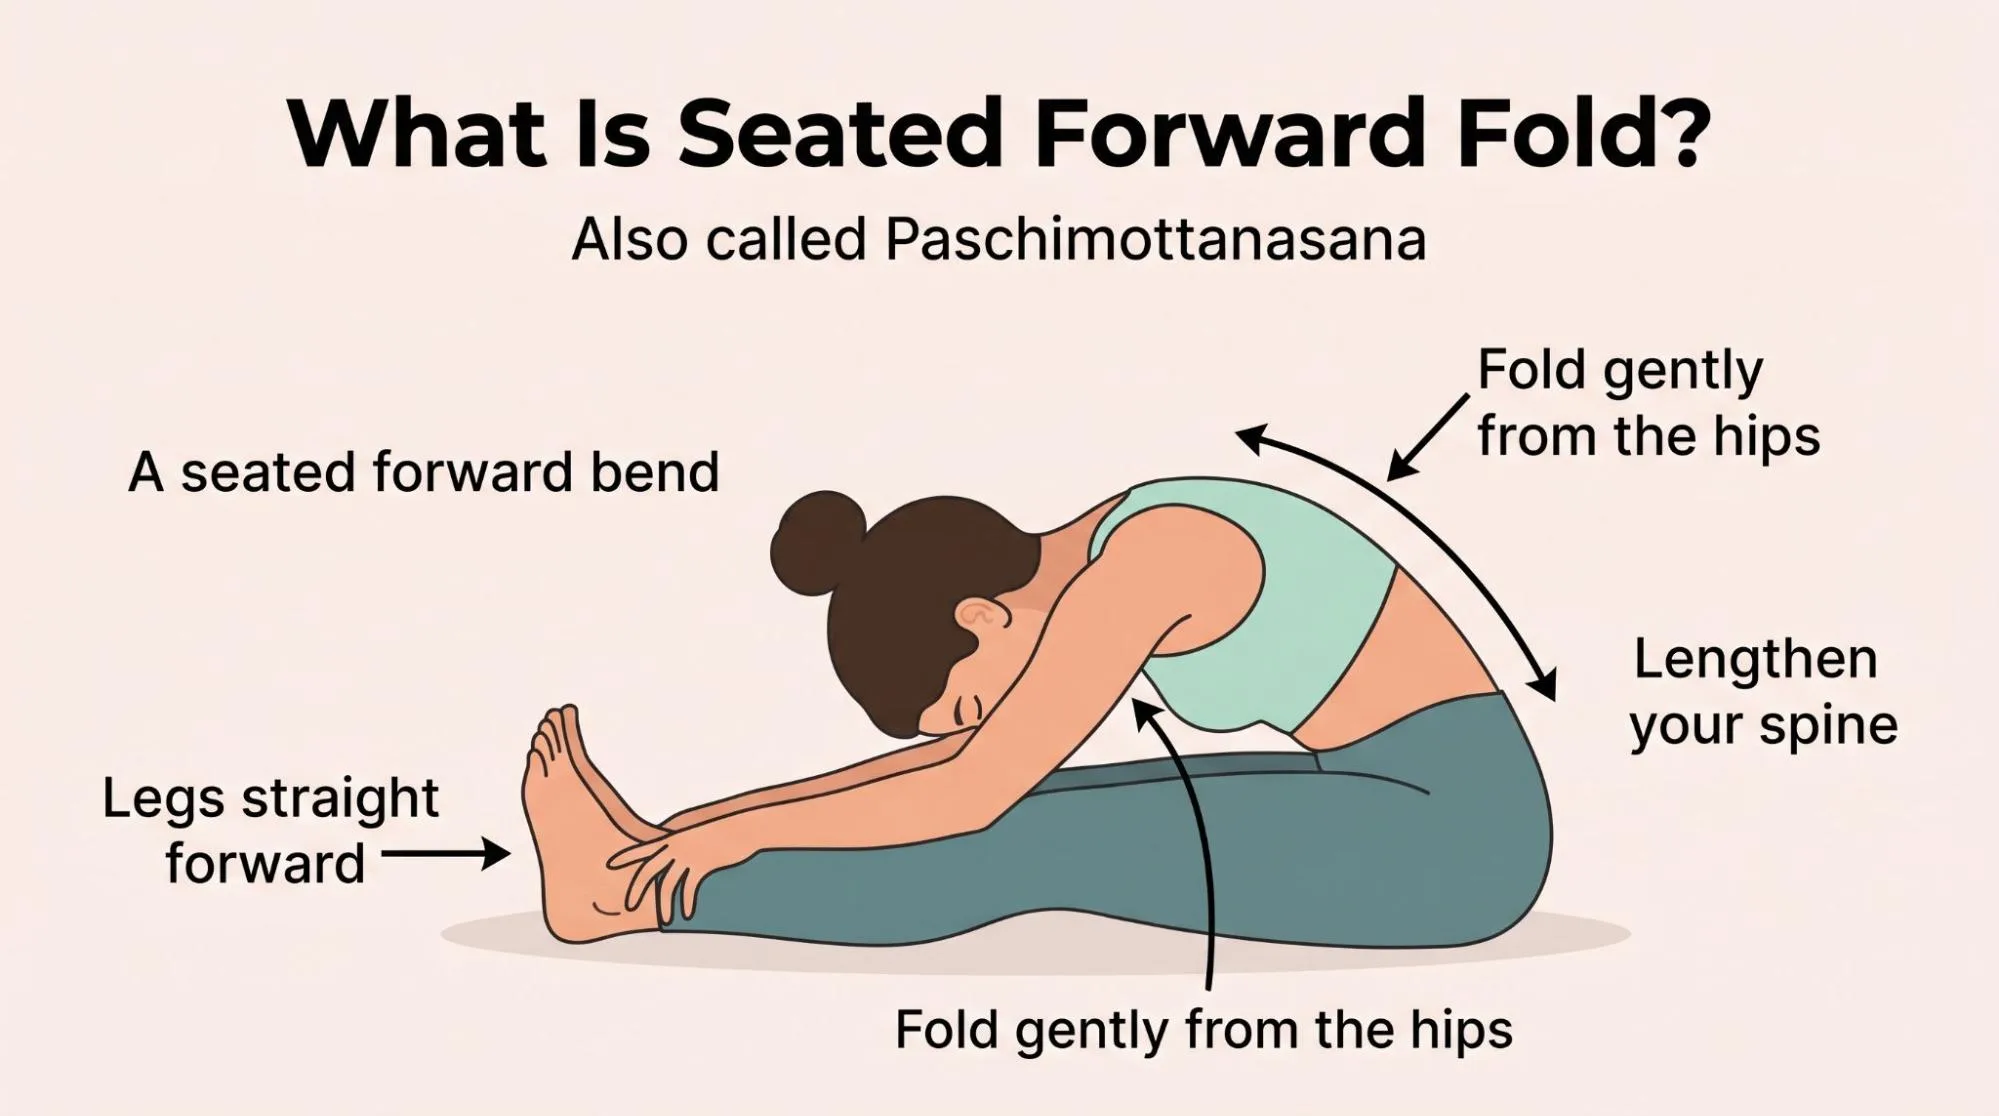
Seated Forward Fold is a seated yoga posture where both legs are extended forward and the upper body folds gently toward the legs. In yoga, it is known as Paschimottanasana. It is also commonly called a seated forward bend.
From the outside, the pose looks simple. You sit, stretch your legs, and fold forward. But inside the body, there is a lot happening. The hamstrings lengthen, the hips work, the lower back releases, and the breath becomes slower.
For beginners, the goal is not to grab the feet or push the head to the knees. The better goal is to lengthen your spine, fold from the hips, and stay relaxed while breathing. For beginners, seated fold yoga step by step is the safest way to understand the pose without forcing the body.
 alt=”Paschimottanasana setup on a yoga mat” title=”Paschimottanasana setup on a yoga mat”
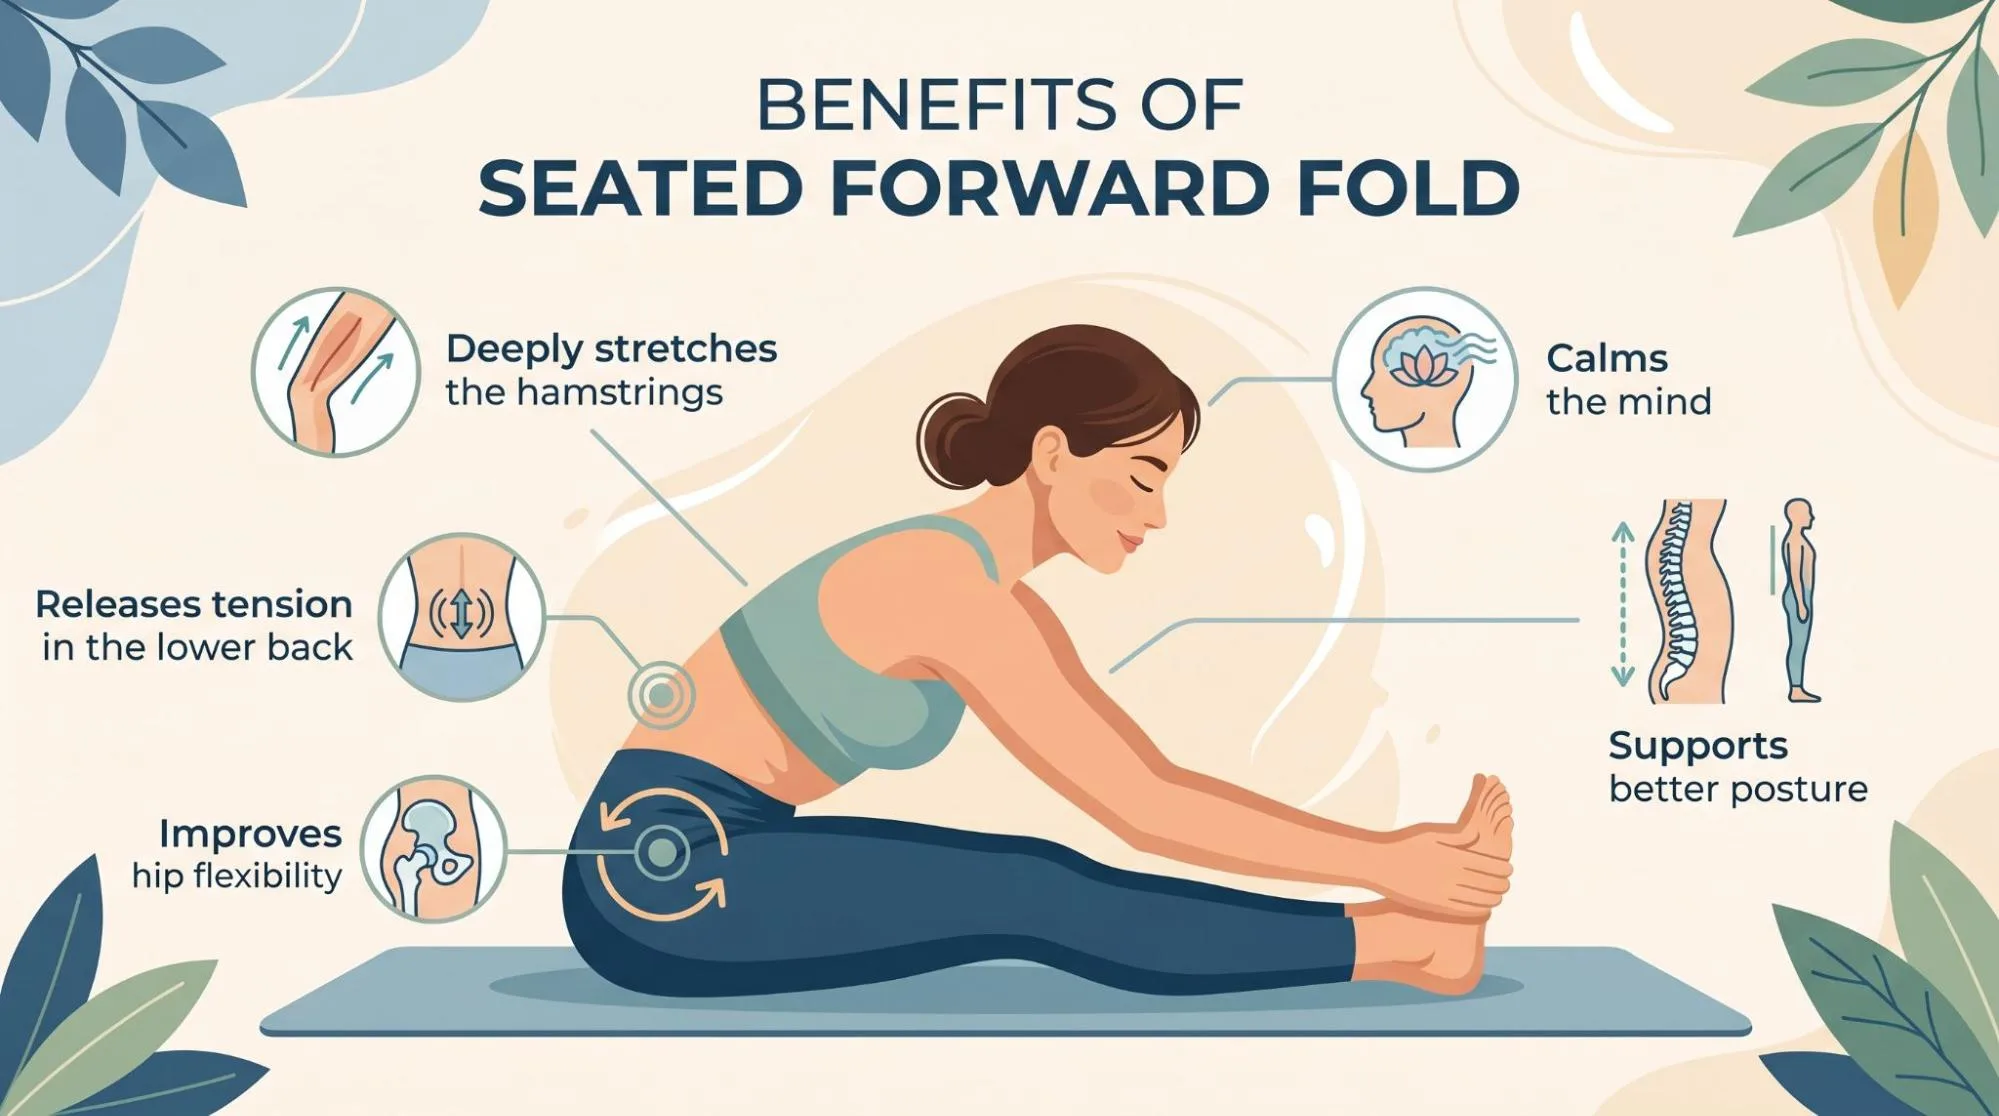
Benefits of seated fold
When you learn seated fold yoga step by step, you understand how this pose helps the legs, hips, lower back, and mind.
Deeply Stretches the Hamstrings
seated fold gives a strong stretch to the hamstrings, which are the muscles at the back of your thighs. If you sit for long hours or do not stretch regularly, these muscles can feel tight.
People with tight hamstrings should be careful not to force the pose. A small bend in the knees is perfectly fine. Over time, regular practice can help the legs feel more open and flexible.
Releases Tension in the Lower Back
When done gently, this pose can help reduce tension in the lower back. The key is not to collapse into the spine.
If you round your back too much and pull hard, the pose can feel uncomfortable. But when you sit tall, fold slowly, and breathe, the lower back may begin to soften naturally.
Improves Hip Flexibility
The forward fold should start from the hips, not the waist. This makes it useful for improving hip flexibility and control.
If the hips are stiff, the body often tries to compensate by rounding the back. That is why props and knee bends are helpful for beginners.
Calms the Mind
Forward folds often feel quiet and grounding. Once you settle into the pose, your breathing slows down and the body begins to relax.
You do not need an intense stretch to feel this benefit. Even a small forward fold can calm the nervous system when the breath is steady.
Supports Better Posture
seated fold teaches you how to sit tall and move from the hips. This awareness can support better posture in daily life, especially if you spend long hours sitting at a desk.
 alt=”Seated fold with knees gently bent” title=”Seated fold with knees gently bent”
Learn More : Half Moon Pose Yoga: Benefits, Steps, Alignment Tips, and Beginner Guide
seated fold Yoga Step by Step for Beginners
Follow this step by step method slowly. Do not rush into the deepest version of the pose.
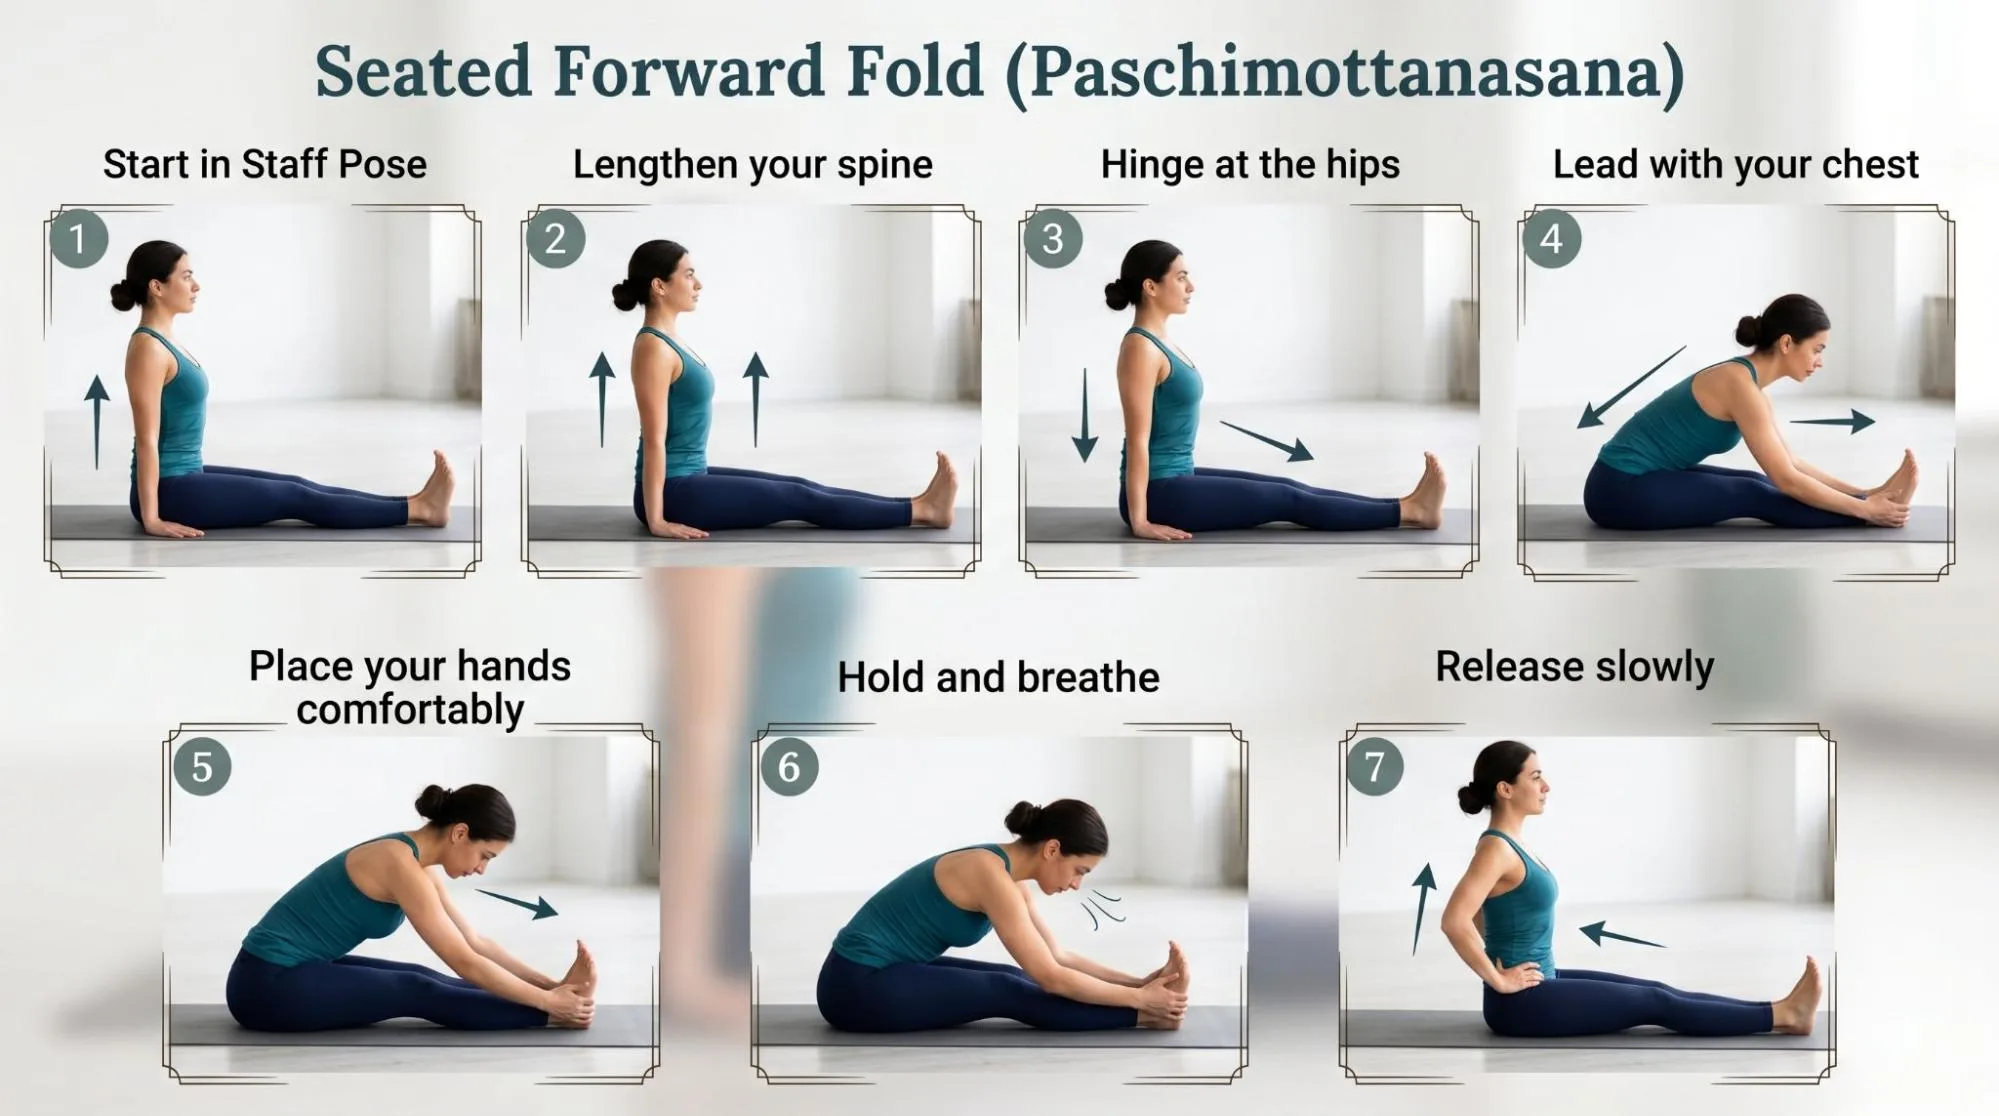
1. Start in Staff Pose
Sit on your mat with both legs straight in front of you. This position is called Staff Pose. This is the first position in seated fold yoga step by step practice.
Flex your feet gently so your toes point upward. Sit evenly on both sitting bones. If your lower back rounds, place a folded blanket under your hips.
2. Lengthen Your Spine
Take a slow inhale and sit tall. Lift through the crown of your head and open your chest slightly.
This is an important part of seated fold because it helps protect the lower back. Before you fold, create space in the spine. This part of seated fold yoga step by step is important because it prepares your back before the forward bend.
3. Hinge at the Hips
As you exhale, begin to fold forward from the hips. Think of your belly moving toward your thighs before your head moves down.
Do not simply bend from the waist. A hip hinge keeps the movement safer and more controlled.
4. Lead with Your Chest
Keep your chest reaching forward as you fold. This helps you avoid collapsing heavily into your back.
You may only fold a little, and that is fine. A small fold with good alignment is better than a deep fold with strain.
5. Place Your Hands Comfortably
Your hands can rest wherever they reach naturally. You may place them on your thighs, shins, ankles, or feet.
If feet holding feels easy, you can hold the outer edges of the feet. But if reaching the feet makes your back round or your shoulders tense, use a yoga strap instead.
6. Hold and Breathe
Stay in the pose for 3 to 8 slow breaths.
With each inhale, gently lengthen your spine. With each exhale, soften your shoulders and relax your face. Let the stretch happen gradually instead of forcing yourself deeper into the pose. In seated fold yoga step by step practice, breathing helps you stay relaxed instead of pushing too hard.
7. Release Slowly
To come out, inhale and lift your chest first. Use your hands for support if needed.
After the pose, you can take a gentle counter pose by placing your hands behind you, lifting your chest, and softly opening the front body.
 alt=”Using a folded blanket in seated forward fold” title=”Using a folded blanket in seated forward fold”
Beginner Modifications for seated fold
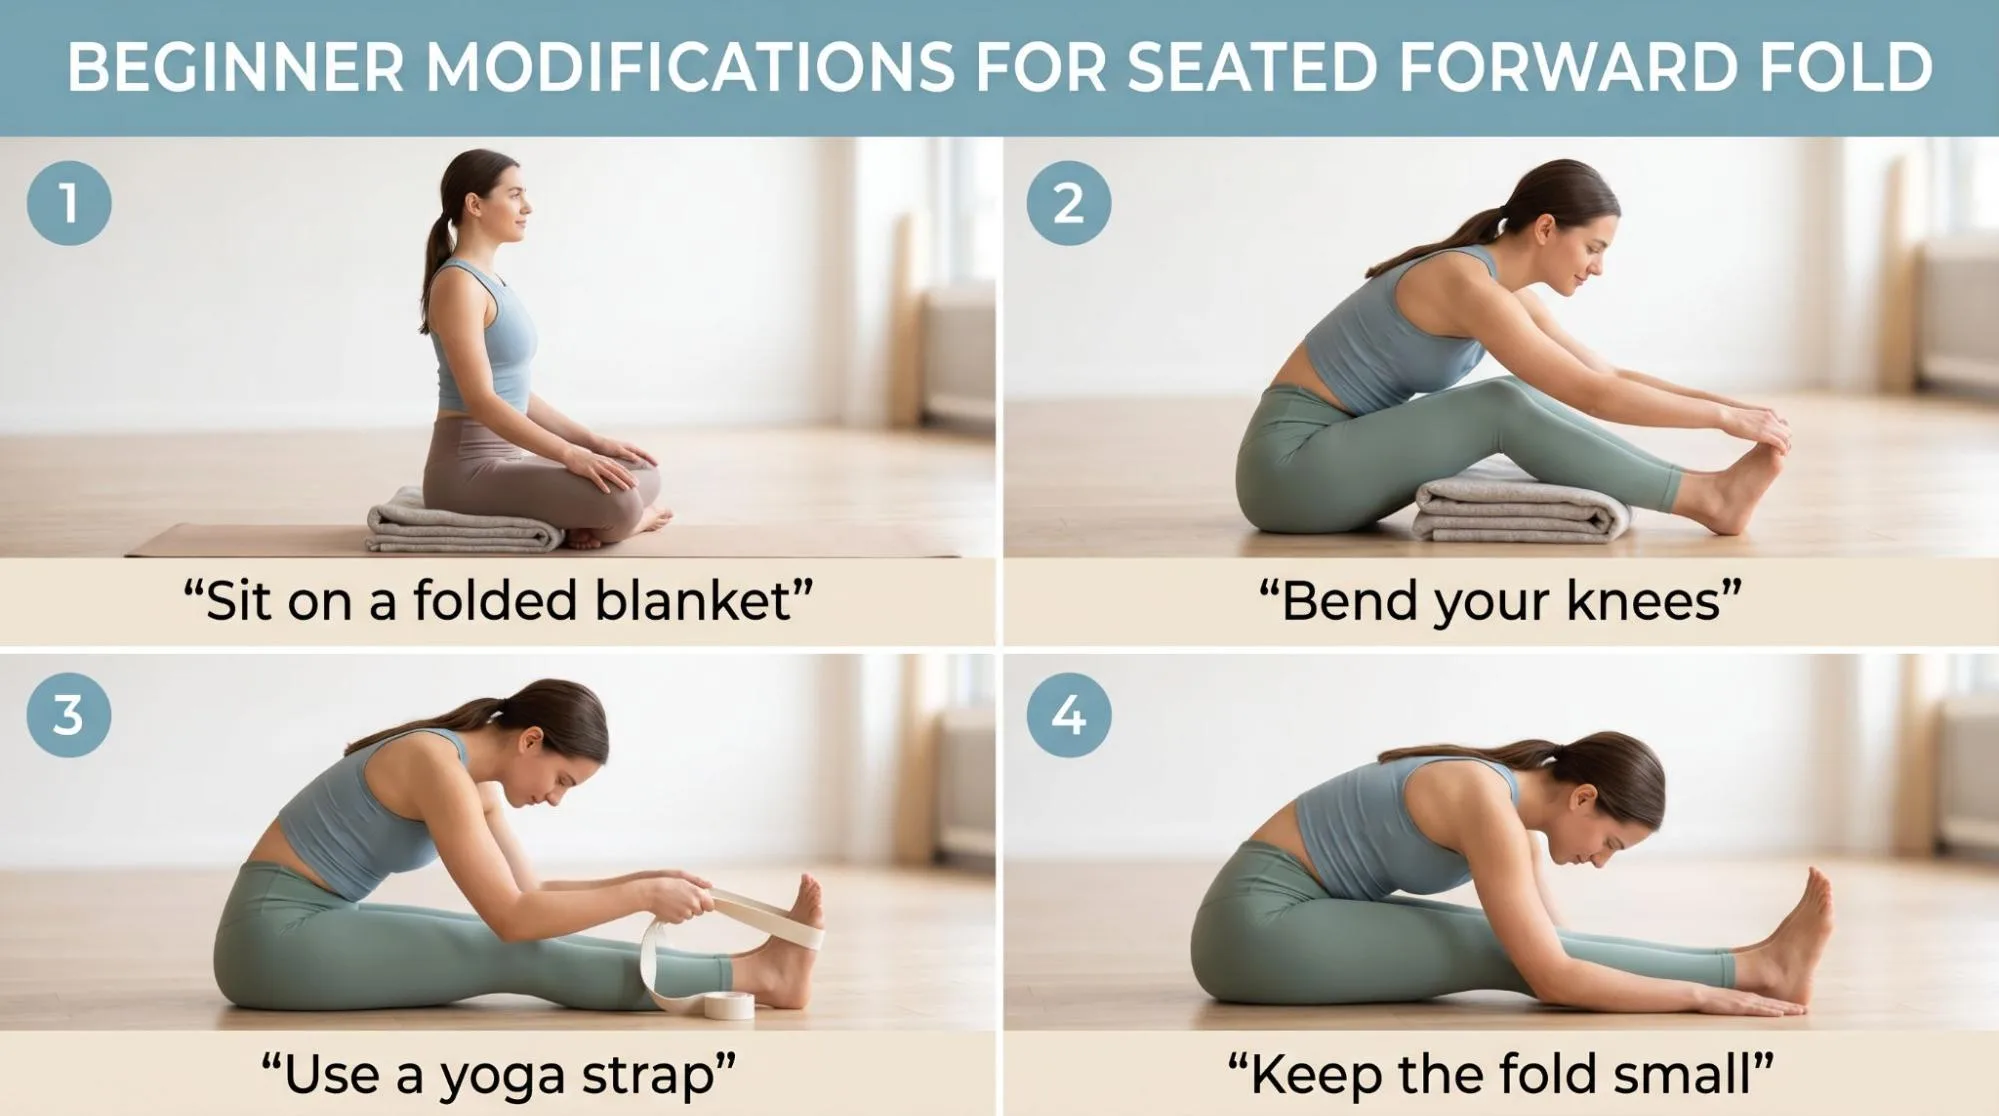
These seated fold yoga step by step modifications are helpful if your hamstrings, hips, or lower back feel tight.
Sit on a Folded Blanket
If your hips feel tight or your lower back rounds, sit on a folded blanket or cushion. This lifts the hips and makes it easier to fold from the pelvis.
Bend Your Knees
Bending the knees is one of the best beginner tips for seated fold. It reduces pressure on the hamstrings and lower back.
You can also place a rolled blanket under your knees for extra support.
Use a Yoga Strap
Loop a yoga strap, towel, or belt around the balls of your feet. Hold the strap with both hands and keep your elbows soft.
This helps you maintain length without pulling too hard.
Keep the Fold Small
You do not need to fold deeply to benefit from the pose. Some beginners only move a few inches forward. That is still a valid and useful practice.
 alt=”Seated fold with a yoga strap” title=”Seated fold with a yoga strap”
Common Mistakes to Avoid
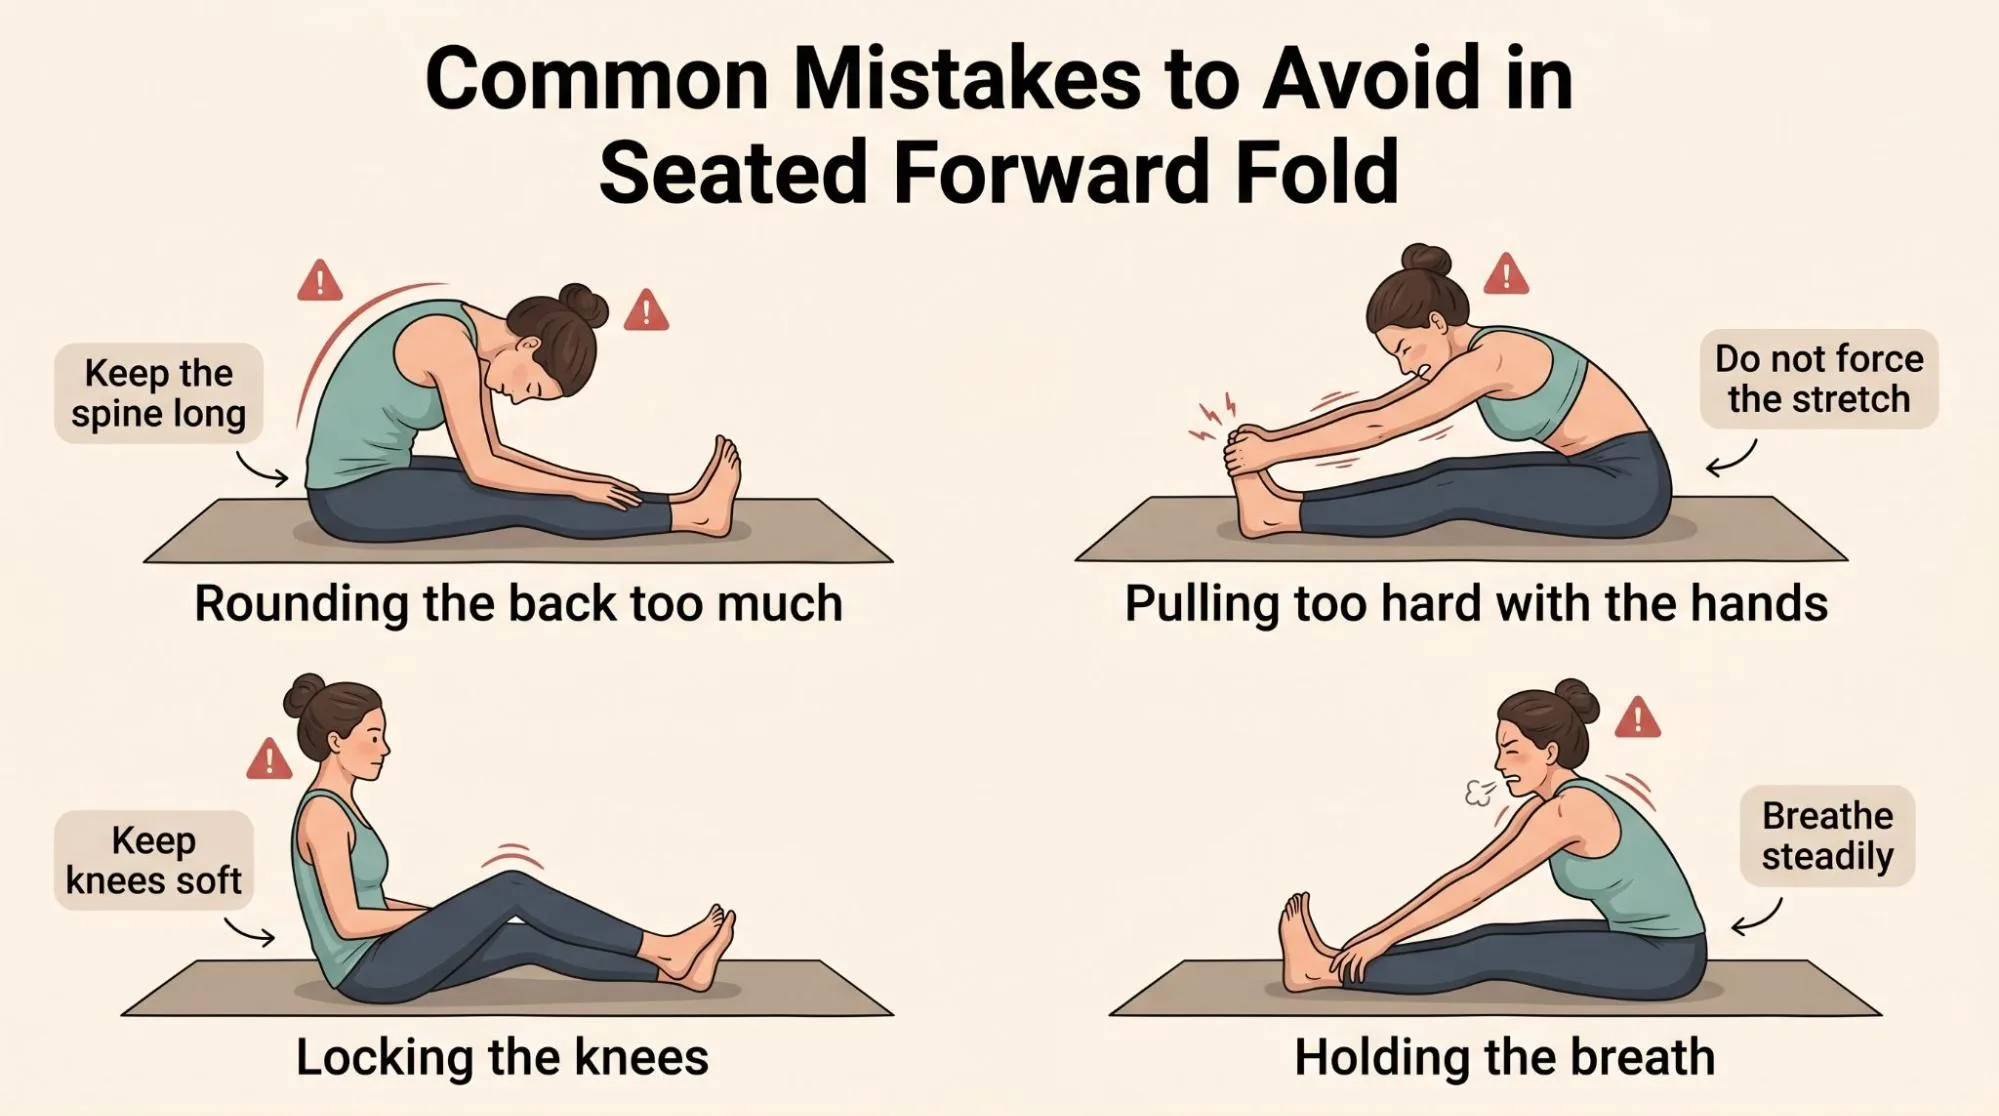
When learning seated fold yoga step by step, avoiding common mistakes is just as important as following the correct steps.
Rounding the Back Too Much
A little rounding is natural, but collapsing completely can strain the lower back. Try to sit tall first, then fold from the hips.
Pulling Too Hard with the Hands
Do not use your hands to drag yourself forward. This can overstretch the hamstrings and create tension in the back.
Locking the Knees
Keep the knees soft, even when the legs are straight. Locking the knees can make the pose feel harsh and uncomfortable.
Holding the Breath
If your breath becomes tight, you are probably pushing too far. Ease out slightly and return to a version where you can breathe calmly.
 alt=”Side view of safe seated fold alignment” title=”Side view of safe seated fold alignment”
Learn More : Wide Legged Forward Fold Benefits
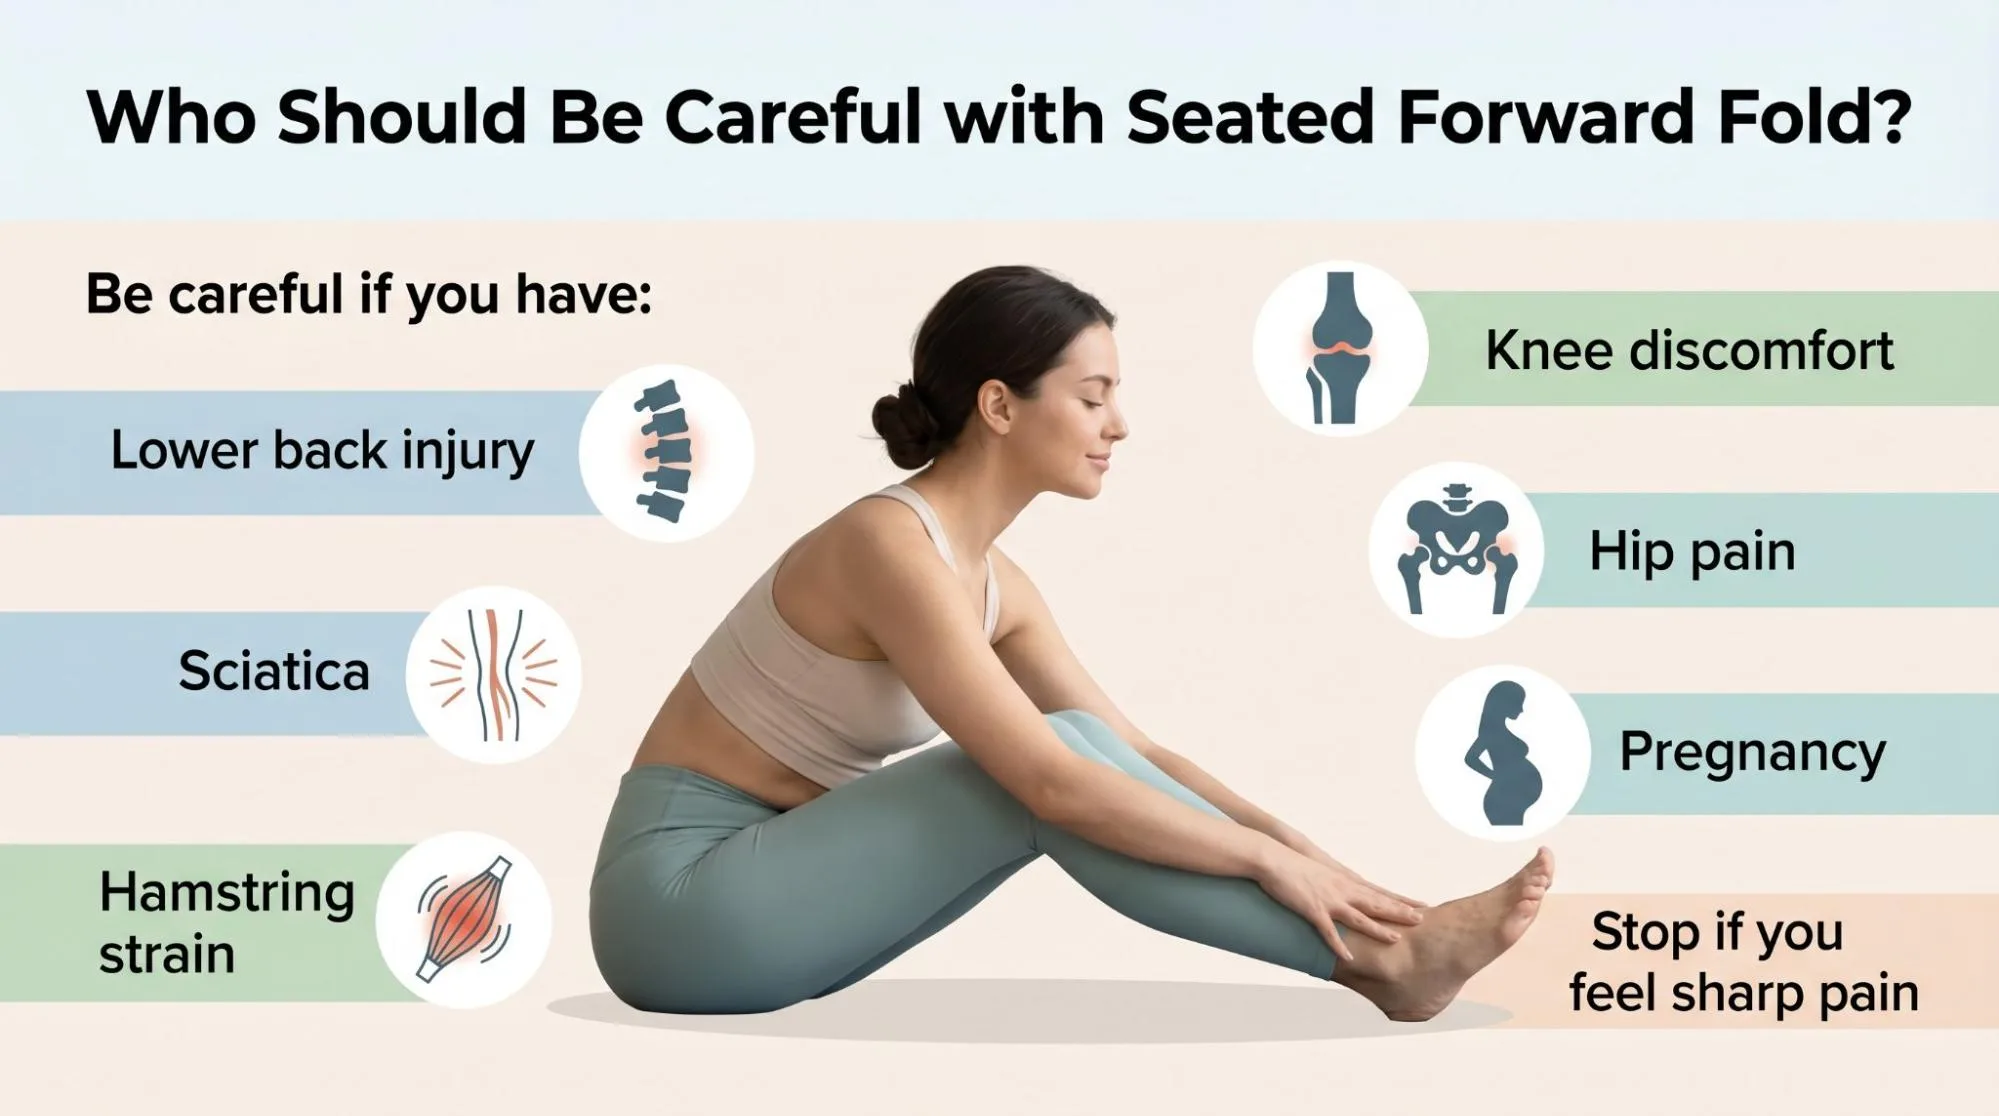
Who Should Be Careful with seated fold?
seated fold is gentle for many people, but it may not be suitable for everyone in the same way.
Be careful if you have:
- Lower back injury
- Sciatica
- Herniated disc issues
- Hamstring strain
- Severe hip stiffness
- Knee pain
- Pregnancy, especially later stages
If you feel sharp pain, numbness, tingling, or pulling behind the knee, come out of the pose. A mild stretch is fine. Pain is not.
 alt=”Relaxed breathing in a seated stretch” title=”Relaxed breathing in a seated stretch”
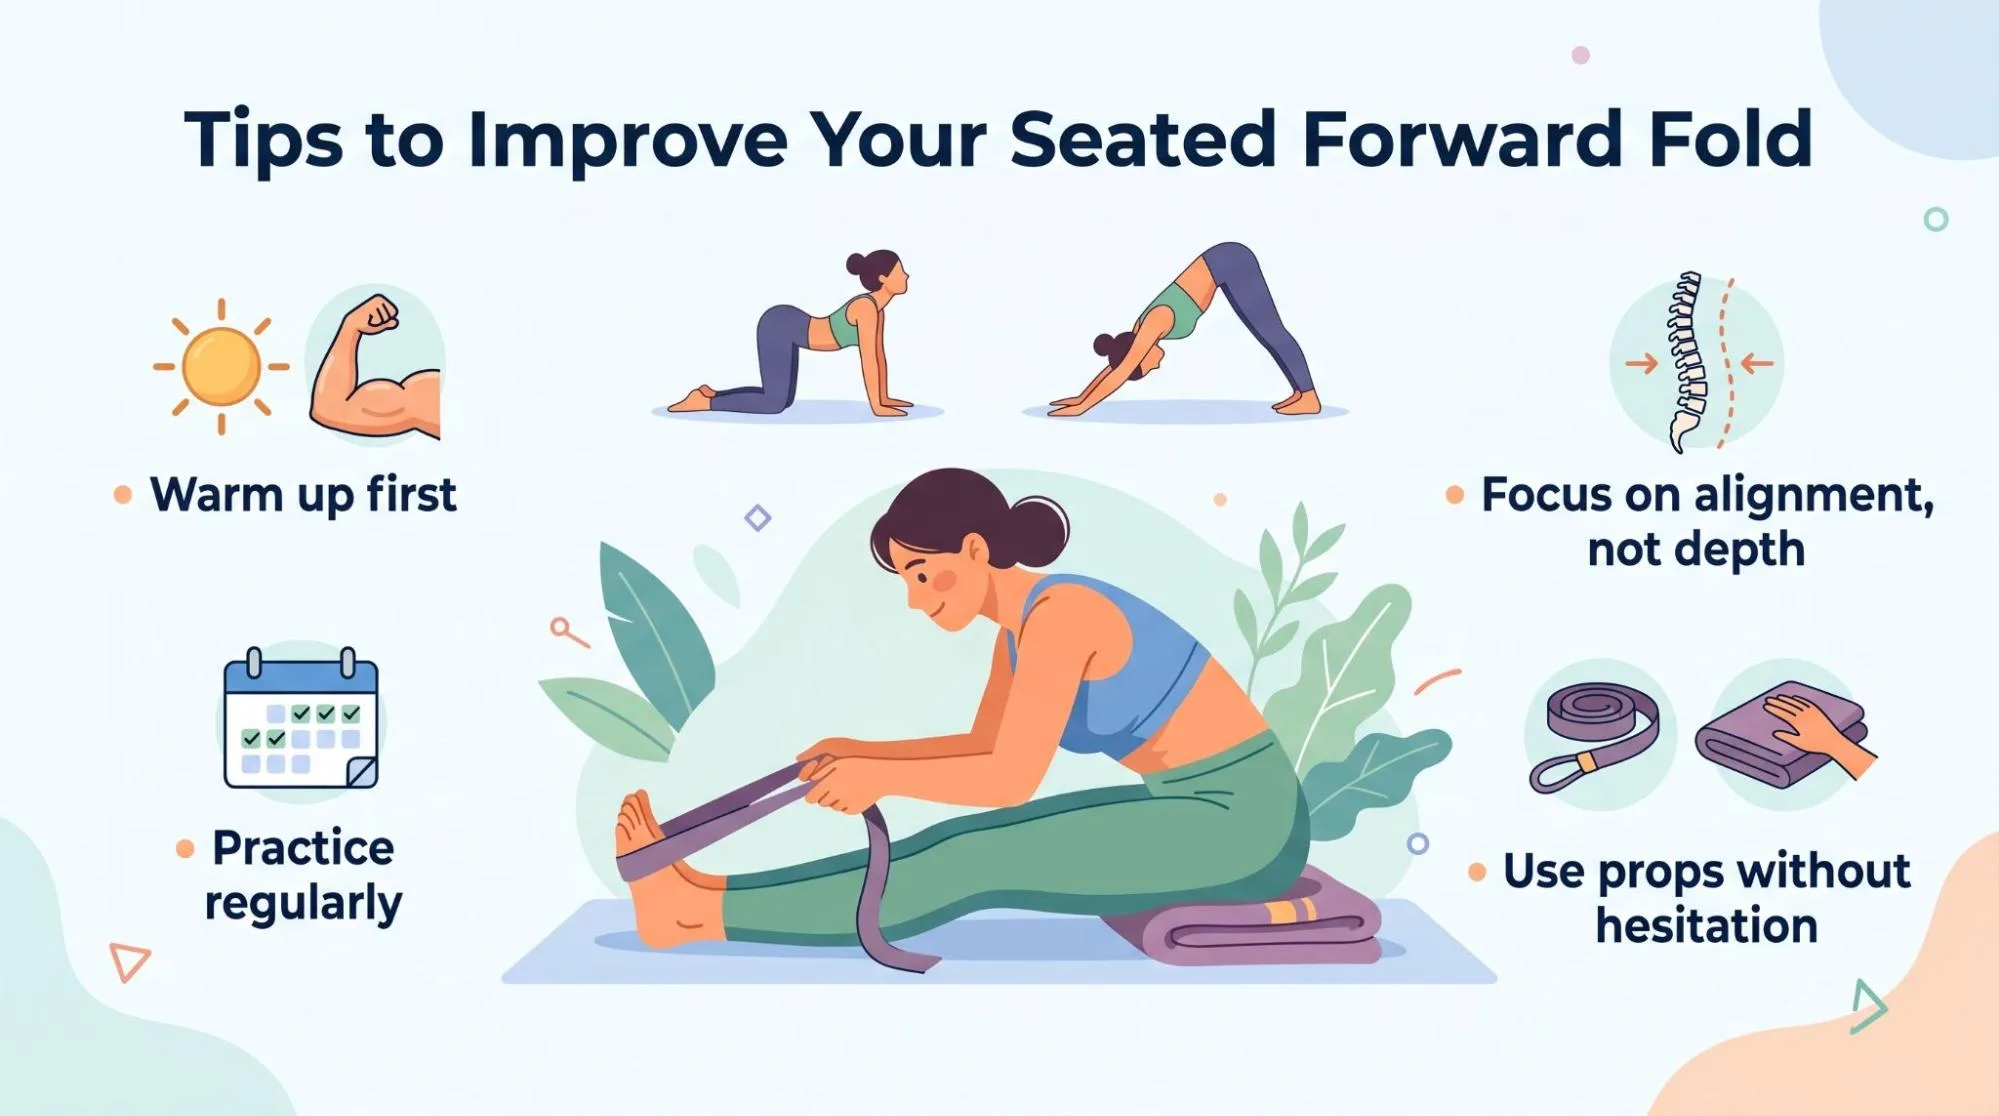
Tips to Improve Your seated fold
These seated fold yoga step by step tips can help you improve slowly and safely over time.
Warm Up First
Do not force this pose with cold muscles. Warm up with gentle movements such as Cat-Cow, Downward Dog, Low Lunge, or Standing Forward Fold.
Practice Regularly
A few minutes of regular practice is better than one long forced session. Flexibility improves slowly when the body feels safe.
Focus on Alignment, Not Depth
Touching your toes is not the main goal. Focus on sitting evenly, keeping the spine long, folding from the hips, and breathing smoothly.
Use Props Without Hesitation
Props are not a sign of weakness. A blanket, strap, or block can make the pose safer and more useful.
 alt=”Beginner modification for seated forward fold” title=”Beginner modification for seated forward fold”
FAQs About seated fold
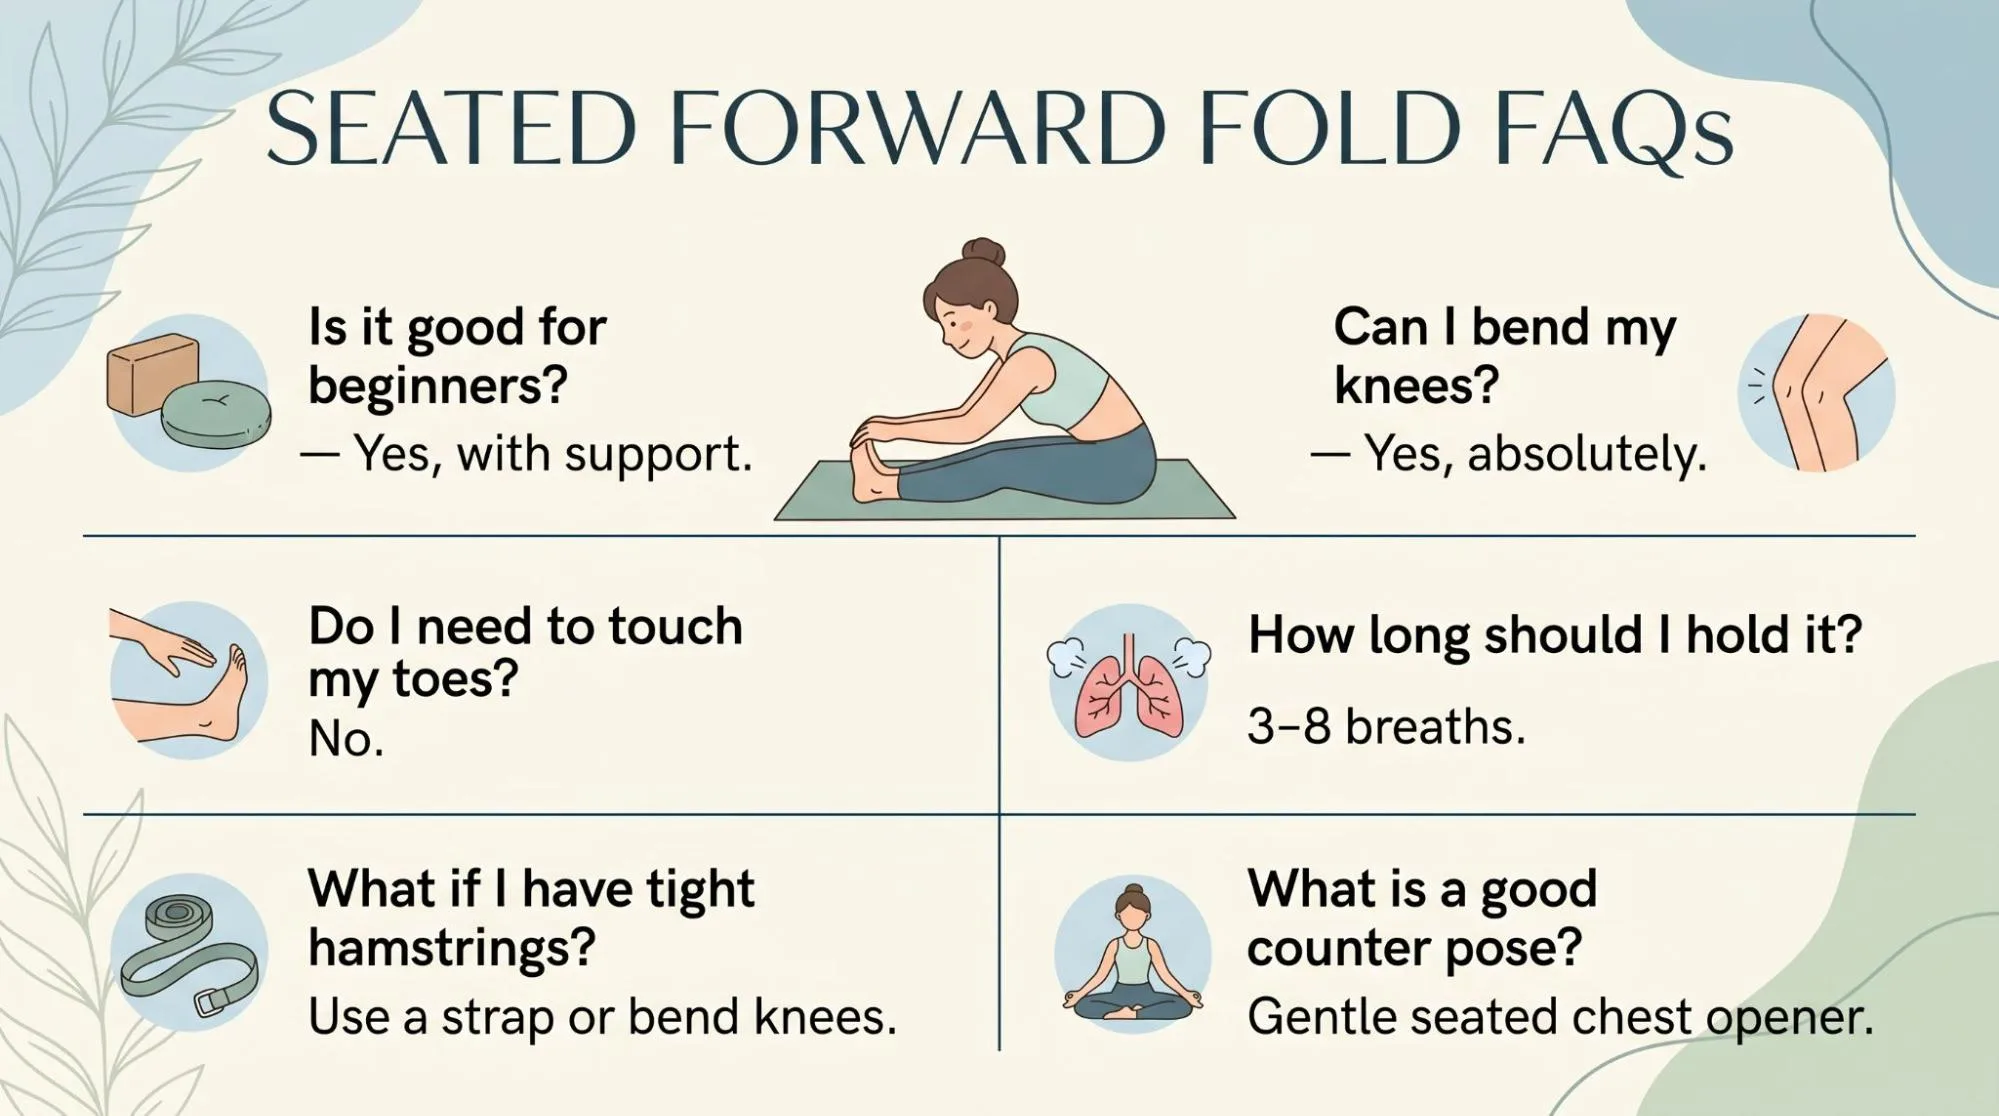
Is the seated fold good for beginners?
Yes, the seated fold can be good for beginners when practiced gently. Beginners should bend the knees, sit on a blanket, or use a strap if needed.
Why can’t I touch my toes in the seated fold?
You may have tight hamstrings, stiff hips, or limited lower back mobility. This is normal. You do not need to touch your toes to get benefits from the pose.
Should my back be straight in the seated fold?
Your spine should stay long as you begin the pose. Some natural rounding may happen, but avoid collapsing heavily into the lower back.
How long should I hold the seated fold?
Beginners can hold it for 3 to 8 slow breaths. As your body becomes more comfortable, you may stay a little longer.
What is the best counter pose after seated fold?
A gentle seated chest opener works well. Place your hands behind you, lift your chest, and breathe for a few seconds to balance the forward fold.
Is the seated fold safe for lower back pain?
It depends on the cause of the pain. Some people feel relief, while others may feel discomfort. Keep the knees bent, use support, and avoid deep folding. If pain increases, stop.
What is the easiest way to learn seated fold yoga step by step?
The easiest way is to sit on a folded blanket, bend your knees slightly, lengthen your spine, and fold only as far as your body allows. Focus on breathing and alignment instead of touching your toes.
 alt=”Hamstring stretch with supported posture” title=”Hamstring stretch with supported posture”
Learn More : Inversion Variations in Yoga: Benefits, Types, Safety, and Beginner Guide
Final Thoughts
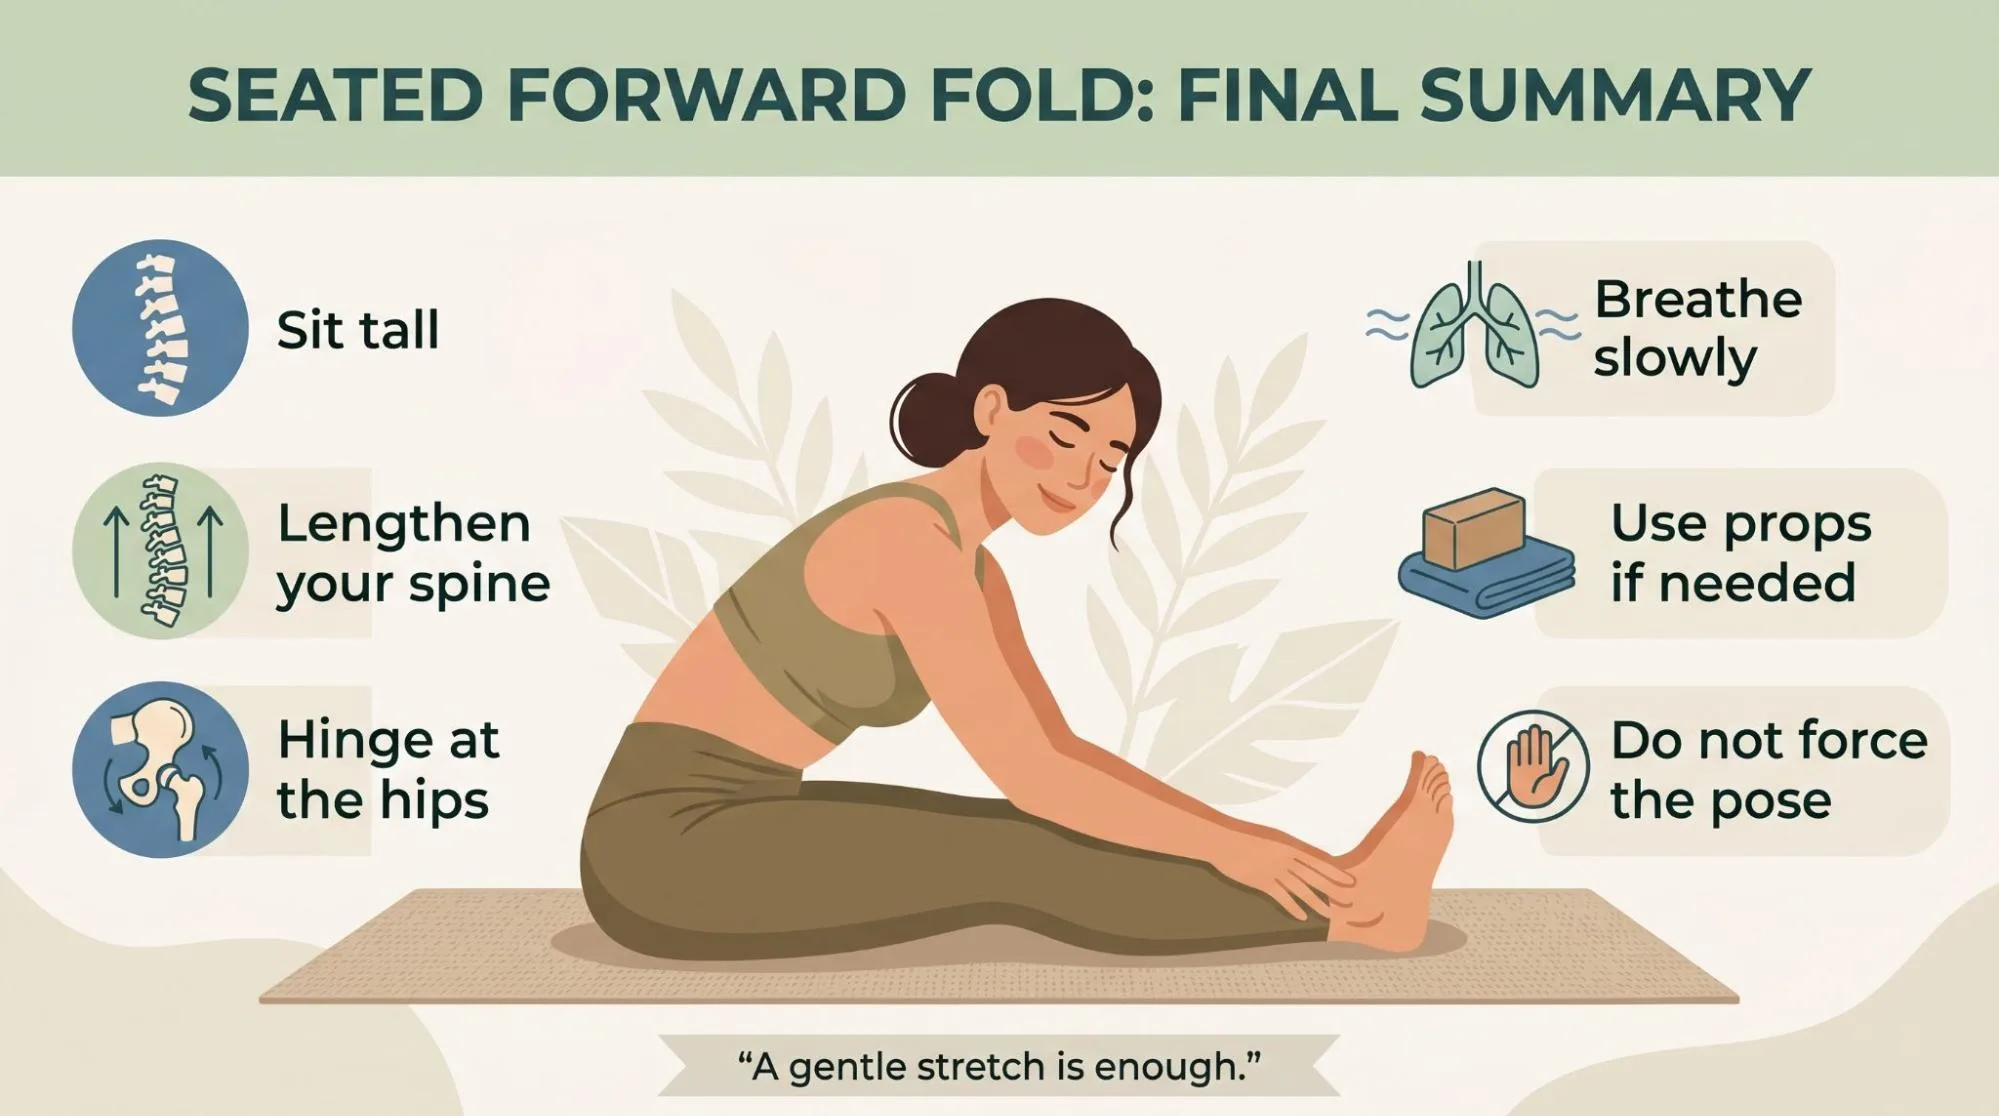
The seated fold is a simple pose, but it teaches a lot. It helps you stretch the hamstrings, release the lower back, improve hip flexibility, and calm the mind.
The safest way to practice is to follow seated fold yoga step by step: sit tall, lengthen your spine, hinge from the hips, breathe slowly, and use props when needed.
Do not chase depth. A gentle, steady fold done with awareness is far more useful than forcing your body into a shape it is not ready for.
 alt=”Seated fold preparation with straight legs” title=”Seated fold preparation with straight legs”
Further reading: For general yoga safety information, see NCCIH: Yoga—What You Need To Know.
